
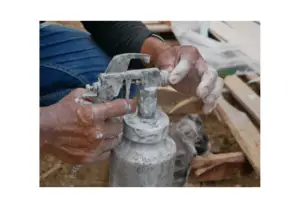
The paint sprayer, a favorite tool among both DIY enthusiasts and professional painters, offers a seamless blend of speed and finesse. When utilized correctly, it can make the arduous process of painting vast surfaces or intricate details exponentially more efficient. However, achieving that perfect finish isn’t solely about the sprayer itself. The consistency of the paint being used is equally vital. Too thick, and you risk clogging your equipment. Too thin, and the paint might run, leaving behind an unprofessional finish.
Diving into the keyword topic, “How Much to Thin Paint for Sprayer,” this article aims to provide a definitive guide on achieving the right consistency for your paint. It’s not just about adding a random amount of thinner; it’s about understanding the type of paint you’re using, the specifications of your sprayer, and the desired finish. By the end of this guide, readers, whether novice or experienced, will have a clearer idea of the precise measurements and techniques to thin paint effectively for sprayers, ensuring optimal results every time.
Table of Contents
Key Takeaway:
- Properly thinning paint is important for achieving desired consistency and sprayability when using sprayers.
- Using a sprayer for painting projects offers benefits such as faster and more efficient coverage compared to traditional methods.
- Thinning ratios and techniques vary depending on the type of paint (latex, acrylic, oil-based) and the type of sprayer (HVLP, airless).
Importance of properly thinning paint for sprayers
Properly thinning paint for sprayers is crucial to achieve optimal results in painting projects. When using a sprayer, it is important to ensure that the paint is thinned to the right consistency for smooth and even application. Thinning the paint allows it to flow more easily through the sprayer, reducing clogging and providing better coverage on surfaces.
Thinning paint for sprayers offers several benefits. It enables the paint to be evenly distributed over a larger surface area, resulting in a more uniform and professional finish. Additionally, properly thinned paint ensures that there are no visible brush strokes or roller marks on the painted surface.
There are different types of paints and sprayers that require specific thinning techniques. For example, water-based latex paints can be thinned by adding water gradually until the desired consistency is achieved. It is important to follow step-by-step instructions provided by manufacturers when thinning latex paint.
On the other hand, acrylic paints have different thinning ratios compared to latex paints. Over-thinning acrylic paint may result in reduced color intensity and coverage, so it is crucial not to exceed the recommended amount of thinner.
Oil-based paints also require thinning before being used with sprayers. It is essential to read and follow the manufacturer’s instructions for thinning ratios and use recommended thinners specifically formulated for oil-based paints.
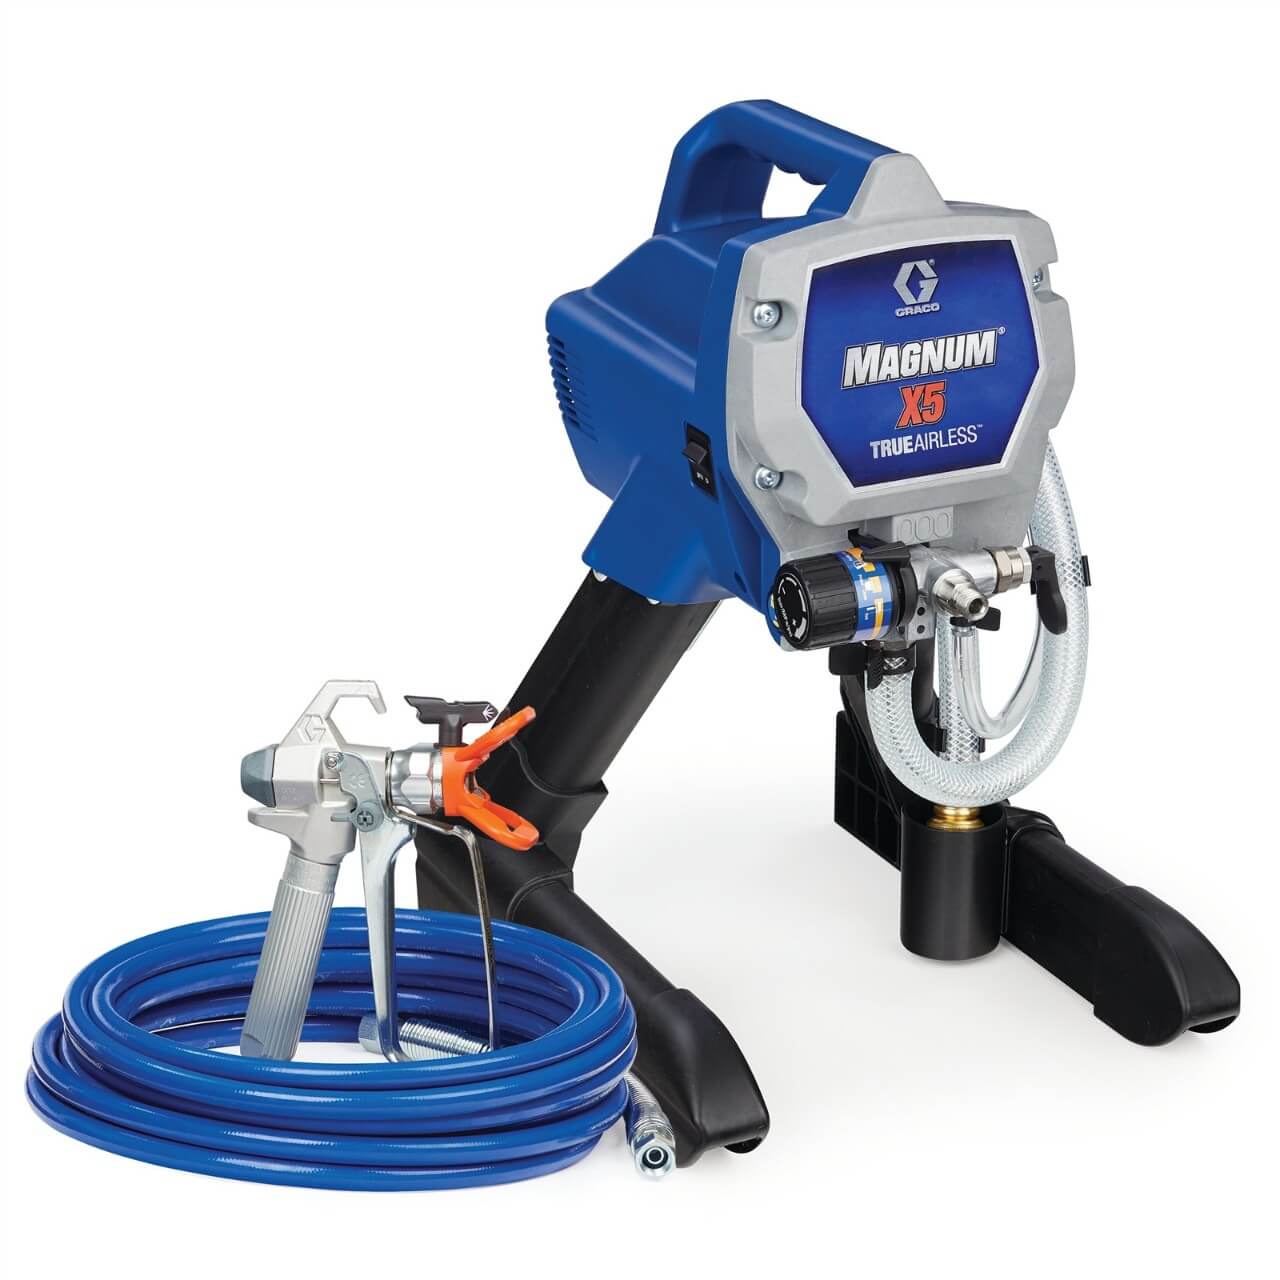
Different types of sprayers, such as HVLP (high-volume low-pressure) and airless sprayers, also have specific requirements for thinning paint. HVLP sprayers often require starting with a specific water ratio and adjusting as necessary based on the desired spray pattern and thickness. Airless sprayers generally do not require thinning latex or oil-based paints but may need automotive lacquer thinner if working with air-driven systems.
When using sprayers, safety precautions should always be followed. This includes wearing appropriate safety gear such as respirator masks to protect against fumes or overspray. It is also important to take measures to avoid paint droplets from landing on surrounding objects by properly covering or shielding them.
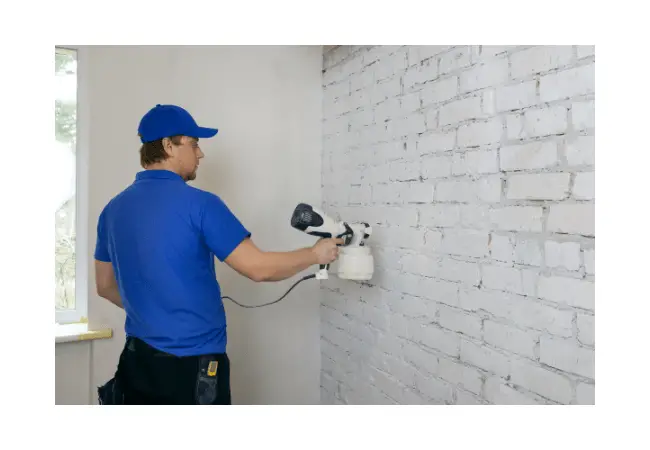
Benefits of using a sprayer for painting projects
Using a sprayer for painting projects offers several benefits that make it a preferred choice among professionals and DIY enthusiasts.
- Sprayers allow for faster and more efficient coverage compared to traditional methods like brushes or rollers.
- They can evenly coat large surfaces in a fraction of the time, increasing productivity and reducing labor costs.
- Sprayers produce smooth, professional-looking finishes, eliminating brushstrokes or roller marks. This is especially beneficial when working on surfaces that require a high level of detail and precision.
- Sprayers are versatile tools that can be used for a wide range of painting projects, including interior and exterior applications. They can handle different types of paints, such as latex, acrylic, and oil-based paints.
- Sprayers ensure an even distribution of paint, which reduces the risk of streaks or uneven patches. This results in a seamless and consistent finish throughout the painted surface.
- With sprayers, large-scale projects can be completed in significantly less time compared to manual methods. This allows professionals to take on more jobs and complete them within tight deadlines.
- In addition to these benefits, sprayers also offer convenience by saving effort and minimizing fatigue during extended painting sessions.
Whether it’s for commercial or residential purposes, using a sprayer for painting projects enhances overall efficiency while delivering high-quality results.
Types of Paint and Sprayers
Types of Paint and Sprayers: Discover the differences between oil-based and water-based paint, as well as the benefits of airless sprayers versus HVLP sprayers. Uncover the unique characteristics and applications of each paint type, and learn about the effectiveness and efficiency of different sprayer options. Get ready to gain insights into the world of paint and sprayers to make informed choices for your upcoming projects.
Oil-based paint and water-based paint
- Oil-based paint is made with a base of oil, typically linseed oil or alkyd resin, mixed with pigments and solvents. It provides a durable and glossy finish, making it suitable for surfaces that require high durability and moisture resistance, such as woodwork and metal surfaces.
- Water-based paint, on the other hand, is primarily made with water as its base, along with binders, pigments, and additives. It dries quickly and has a low odor compared to oil-based paint. Water-based paint is commonly used for interior walls, ceilings, and trim.
- Oil-based paint typically takes longer to dry compared to water-based paint. It also has a stronger odor due to the solvents used in its formulation.
- Water-based paint is easier to clean up since it can be washed off with soap and water. Oil-based paint usually requires mineral spirits or other harsh solvents for cleanup.
- When it comes to application techniques, oil-based paint often requires more skill and experience due to its slower drying time and higher viscosity. Water-based paint is generally easier to apply because of its fast drying time and lower viscosity.
The differences between oil-based and water-based paints include their composition, drying time, cleanup process, odor level, and application technique. This understanding is essential for choosing the right type of paint for specific surfaces in order to achieve the desired results in painting projects without any issues or complications.
Airless sprayers and HVLP sprayers
To provide a clear comparison between airless sprayers and HVLP sprayers, a table can be created to showcase the key differences. The table will have columns highlighting the characteristics of each type, such as paint suitability, application method, and recommended thinning ratios.
The reference data provides information on how to thin different types of paint for both airless sprayers and HVLP sprayers. It explains that latex and oil-based paints may require thinning for airless sprayers, but not necessarily for HVLP sprayers. The use of automotive lacquer thinner is mentioned as an option for thinning oil-based paint when using air-driven sprayers.
By emphasizing these unique details, it is possible to provide additional insights into the specific thinning requirements for each type of sprayer. This adds value to the overall understanding of why proper thinning techniques are important when using airless and HVLP sprayers.
Overall, understanding the differences between airless sprayers and HVLP sprayers helps painters choose the most appropriate tool for their specific project while also ensuring they achieve the desired results.
Thinning paint for sprayers: the key to a smooth finish that’ll leave your walls saying ‘thank you’ and your neighbors saying ‘What fresh hell have you unleashed?
Thinning Paint for Sprayers
Thinning paint for sprayers is crucial for achieving optimal results. In this section, we will explore the process of thinning paint for different types of sprayers, including latex, acrylic, and oil-based paint. Discover the key considerations and techniques for achieving the right viscosity in your paint, ensuring smooth application and professional-quality finishes. So, let’s dive in and uncover the art of thinning paint for sprayers!
Thinning latex paint
- Start by pouring a small amount of paint into a container.
- Gradually add water to the paint, stirring continuously.
- Continue adding water in small increments until the desired consistency is achieved.
- To test the thickness of the paint, use a funnel and observe how quickly it flows through. If it flows too slowly or drips inconsistently, it may need further thinning.
- Adjusting the water ratio may be necessary depending on factors such as temperature and humidity. Add more water if needed, but avoid over-thinning the paint.
- Once thinned to the desired consistency, mix the paint thoroughly to ensure an even distribution of pigment and other additives.
When thinning latex paint for sprayers, it is important to note that acrylic-latex paints require different water ratios compared to traditional latex paints. Acrylic-latex paints typically have a higher solids content and therefore may require less water for thinning.
By following these guidelines, you can ensure that your latex paint is properly thinned for optimal performance with a sprayer in your painting projects.
Step-by-step instructions for adding water to achieve desired consistency
To properly thin latex paint for use in sprayers, follow these three simple steps:
- Assess the paint’s thickness: Begin by checking the viscosity of the latex paint. This can be done by using a funnel and observing how quickly the paint flows through it. If the paint is too thick and does not flow freely, it will need to be thinned.
- Gradually add water: Start by adding small amounts of water to the paint, stirring thoroughly after each addition. The general rule of thumb is to add no more than 10% water by volume at a time. Continue this process until the desired consistency is achieved. It is important to add water slowly and gradually to avoid over-thinning the paint.
- Test the consistency: Once you have added water and stirred well, test the thinned paint by spraying it onto a similar surface before applying it to your intended project. This will allow you to make any necessary adjustments before beginning your painting project.
These step-by-step instructions provide a practical approach to thinning latex paint for sprayers, ensuring that you achieve the desired consistency for smooth and even application on various surfaces without clogging or spattering issues.
It is worth noting that these instructions are specific to thinning latex paint only and may not be applicable to other types of paints or sprayers discussed in this article.
Checking the paint’s thickness using a funnel
A funnel can be a useful tool for checking the thickness of paint before using it in a sprayer. By observing the paint’s behavior as it flows through the funnel, you can determine whether or not it needs to be thinned.
- Place the funnel securely in a container and pour the paint into it. Make sure the funnel is clean and free of any residue to ensure accurate results.
- Observe how the paint flows through the funnel. If the paint is too thick, it may flow slowly or even become stuck in the funnel. This indicates that the paint needs to be thinned before using it in a sprayer.
- On the other hand, if the paint flows smoothly and quickly through the funnel without any signs of clogging, it is likely at an appropriate thickness for spraying.
By using a funnel to check the paint’s thickness, you can ensure that it is suitable for use in a sprayer and avoid potential issues such as clogging or uneven application. It is important to note that different types of paints may have different ideal consistencies, so refer to manufacturer guidelines for specific recommendations regarding thinning ratios and techniques.
Thinning acrylic paint
Acrylic paint is a popular choice among artists and DIY enthusiasts due to its versatility and vibrant colors. Thinning acrylic paint is an essential step in achieving the desired consistency for smooth application using a sprayer. By diluting the paint with water or an acrylic medium, it becomes more fluid and easier to spray, resulting in even coverage and a professional finish.
To thin acrylic paint for sprayers, follow these six simple steps:
- Start by pouring a small amount of acrylic paint into a mixing container.
- Gradually add water or an acrylic medium to the paint, stirring continuously.
- Mix until you achieve the desired consistency, which should be similar to that of milk or cream.
- Test the thinned paint by spraying it onto a test surface. If it flows evenly without clogging the sprayer nozzle, it is ready for use.
- If the thinned paint is too thick and does not flow smoothly through the sprayer, add more water or medium in small increments until the desired consistency is reached.
- When you are satisfied with the thinned acrylic paint, transfer it into your spray gun and begin your painting project.
It is important to note that over-thinning acrylic paint can lead to poor coverage and color intensity. Therefore, it is recommended to add water or medium gradually while constantly testing and adjusting until you achieve the desired viscosity.
Thinning acrylic paint for sprayers offers several advantages, including improved control during application, reduced clogging of spray nozzles, and increased efficiency when covering large areas. By following these steps and taking precautions such as wearing safety gear and protecting surrounding objects from overspray, you can achieve great results with your acrylic painting projects using a sprayer.
Differences in water ratio compared to latex paint
Acrylic paint and latex paint have different water ratios when thinning for use in sprayers. The reference data does not provide specific information on the exact differences between the two ratios, but it emphasizes that over-thinning the paint should be avoided regardless of the type. This means that when thinning acrylic paint, there are specific considerations to keep in mind that may differ from those for thinning latex paint.
To illustrate the differences in water ratios between acrylic and latex paints, a table can be created. The table would have columns for “Type of Paint,” “Water Ratio,” and “Considerations,” and rows for acrylic and latex paints. This table would provide a clear visual representation of how the water ratios vary between these two types of paints.
In addition to avoiding over-thinning, it is crucial to follow the manufacturer’s instructions for each specific type of paint. These instructions will provide guidance on appropriate thinning ratios and recommended thinners to achieve optimal results. By carefully reading and adhering to these instructions, painters can ensure they are using the correct ratios for their chosen type of paint.
Overall, while the reference data does not explicitly provide the exact differences in water ratio compared to latex paint, it emphasizes the importance of being mindful when thinning acrylic paint for sprayer use. By following manufacturer instructions and avoiding over-thinning, individuals can achieve the desired consistency and optimal spraying results.
Importance of not over-thinning the paint
The proper thinning of paint is crucial when using a sprayer for painting projects. However, it is equally important to not over-thin the paint. Over-thinning can lead to negative outcomes and compromise the quality of the paint job.
When paint is over-thinned, it becomes too runny and loses its ability to adhere properly to the surface being painted. This can result in streaks, drips, and an uneven finish. Additionally, over-thinned paint may also have reduced coverage and require multiple coats for adequate opacity.
To avoid over-thinning the paint, it is essential to follow the recommended thinning ratios provided by the paint manufacturer. These ratios indicate the appropriate amount of thinner that should be added to achieve the desired consistency without compromising the integrity of the paint.
It is important to note that different types of paints have different thinning requirements. For example, latex paint typically requires less thinning compared to acrylic or oil-based paints. Therefore, it is crucial to read and follow the manufacturer’s instructions specific to each type of paint.
In addition to following thinning ratios, it is also advisable to regularly check the thickness of the paint using a funnel or similar method. This helps ensure that the desired consistency is maintained throughout the painting process and allows for adjustments if necessary.
By avoiding over-thinning, painters can achieve better results with their sprayers. The even application of properly thinned paint promotes a smooth finish and reduces wasted time and effort associated with excessive touch-ups or additional coats.
Overall, understanding and adhering to proper thinning techniques are essential for achieving satisfactory painting results with a sprayer. By not over-thinning the paint, painters can optimize their efficiency and productivity while ensuring a high-quality finish on their painting projects.
Thinning oil-based paint
To successfully thin oil-based paint for sprayers, it is crucial to follow the proper techniques and guidelines outlined by manufacturers. Thinning oil-based paint allows for better atomization and spray patterns, resulting in a smoother finish and improved coverage on various surfaces.
Here is a step-by-step guide on how to thin oil-based paint:
- Begin by reading the manufacturer’s instructions: Different oil-based paints may require different ratios of thinners to achieve the desired consistency. It is essential to consult the product label or technical data sheet for specific recommendations.
- Gather necessary supplies: Prepare all the required materials, including a measuring container, stir stick, and appropriate thinning solvent recommended by the manufacturer.
- Pour a small amount of paint into a clean container: Start with a small quantity of oil-based paint in a separate container. This allows for easier control when adding thinner and ensures an even mixture.
- Slowly add the recommended thinner: Gradually introduce the recommended thinner into the paint while stirring continuously with a stir stick. Add small amounts at a time until achieving the desired consistency.
- Mix thoroughly: Maintain consistency by stirring the mixture thoroughly, ensuring that no lumps or clumps are left behind. This process also helps in evenly distributing the thinner throughout the paint.
- Test viscosity and adjust if necessary: To determine if you have achieved the correct viscosity for sprayer application, dip your stir stick or brush into the thinned paint and observe its flow off of them. If it appears too thick or flows unevenly, add more thinner following the manufacturer’s recommendations; if it is too thin or drips excessively, add more paint instead.
By adhering to these steps, individuals can ensure they properly thin their oil-based paint for sprayers, thus maximizing efficiency and achieving optimal results in their painting projects.
When working with oil-based paint, it is essential not to overlook certain important details. The use of the appropriate thinning ratios and recommended thinners as specified by the manufacturer can ensure the paint retains its intended durability and quality. Additionally, it is crucial to note that over-thinning oil-based paint can lead to diminished color density and coverage, resulting in a less desirable finished product. Therefore, it is imperative to follow precise measurements and mixing techniques when thinning oil-based paint for sprayers.
Reading the instructions might be the only way to thin paint without ending up with abstract art.
Reading manufacturer’s instructions for thinning ratios and recommended thinners
Thinning paint for sprayers requires careful attention to the manufacturer’s instructions regarding thinning ratios and recommended thinners. These instructions provide valuable information on how to achieve the desired consistency for optimal spray application. By reading and following these instructions, painters can ensure that they are using the correct amount of thinner to achieve the best results.
One important aspect of reading the manufacturer’s instructions is understanding the specific thinning ratios for the paint being used. Different paints have different requirements when it comes to thinning, and these ratios can vary depending on the brand and type of paint. The manufacturer’s instructions will outline the appropriate ratio of paint to thinner, ensuring that painters achieve the right balance for optimal performance.
In addition to thinning ratios, manufacturers also provide recommendations for which thinners should be used with their specific paint products. Different thinners have different properties and can affect the performance and durability of the paint. By following the recommended thinners suggested by the manufacturer, painters can ensure compatibility between the paint and thinner, resulting in a high-quality finish.
It is essential to pay attention to any unique details provided in the manufacturer’s instructions that have not been covered already. These details may include specific recommendations for mixing techniques or any precautions that should be taken when working with certain types of sprayers. By following all of these instructions, painters can confidently prepare their paint for spraying, ensuring an efficient and successful painting project.
Thinning Paint for Different Sprayer Types
Thinning paint is crucial for achieving optimal results when using different sprayer types. In this section, we will explore the art of thinning paint for HVLP sprayers and airless sprayers. Discover the right techniques and ratios to achieve smooth, even coats and avoid clogging or overspray. Mastering the art of thinning paint for various sprayer types will greatly enhance your painting projects, ensuring professional-quality finishes every time.
Thinning paint for HVLP sprayers
Thinning paint for HVLP sprayers involves starting with a specific water ratio and adjusting as necessary to achieve the desired consistency. HVLP sprayers are a popular choice for painting projects due to their high volume and low-pressure capabilities. To achieve optimal results with these sprayers, it is important to properly thin the paint before application. This helps in ensuring that the paint flows smoothly through the sprayer and provides an even coat on the surface.
It is recommended to test the spray on a similar surface before applying it to the actual project. This allows for adjustments in thinning ratios or spray technique if needed, resulting in better results. Thinning paint for HVLP sprayers requires precision and attention to detail. By following the proper techniques, painters can achieve professional-looking finishes with these efficient spraying tools.
Finding the perfect water ratio is like Goldilocks trying to find the right porridge temperature but with paint. Thinning paint for HVLP sprayers involves starting with a specific water ratio and adjusting as necessary. Testing the spray on a similar surface before application allows for adjustments in thinning ratios or spray technique if needed. Precision and attention to detail are key to achieving professional-looking finishes with these efficient spraying tools.
Starting with a specific water ratio and adjusting as necessary
When thinning paint for sprayers, it is important to start by measuring the appropriate amount of water needed according to the water ratio suggested for the type of paint being used. This ratio may vary depending on the brand and specific paint formula.
To achieve the desired consistency, add the measured water gradually to the paint while stirring continuously. It is crucial to add water slowly to avoid over-thinning, which can negatively impact the coverage and adherence of the paint.
After adding some water, it is recommended to test the consistency of the thinned paint by dipping a funnel into it and observing how it flows through. The paint should flow smoothly without any clumps or excessive thickness.
If necessary, make further adjustments to the consistency by adding small amounts of water incrementally. Continuously mix and test until reaching an ideal thinning level that allows for easy spray application without clogging or spattering.
It is important to note that different paints may require different levels of thinning, so it is crucial to refer to individual product instructions and guidelines when determining the appropriate water ratio.
Thinning paint correctly ensures optimal performance when using a sprayer, improving overall efficiency, and achieving professional-looking results with ease.
Pro Tip: Always use distilled water instead of tap water when thinning paint for sprayers, as tap water can contain impurities that may affect its performance or lead to clogging within the sprayer system.
Before unleashing your artistic skills on the actual surface, it’s always wise to give your paint spray a test drive on a similar sacrificial canvas.
Testing paint spray on a similar surface before application
Paint spray should be tested on a similar surface before its actual application to ensure the desired outcome. This step is essential in achieving satisfactory results and avoiding any potential issues that may arise during the painting process. By testing the paint spray beforehand, you can ensure that it adheres properly to the surface and achieves the desired coverage and finish.
Testing paint spray on a similar surface before application:
- Prepare a similar surface: Select a test surface that closely resembles the one you intend to paint. Make sure it is clean and free from any dust or debris that could affect the paint’s adhesion.
- Mix and thin the paint: Prepare the paint by following the recommended thinning instructions provided by the manufacturer. Ensure that it is properly mixed and has achieved the desired consistency for spraying.
- Set up your sprayer: Adjust your spray gun according to the manufacturer’s recommendations for pressure, nozzle size, and spray pattern. This will ensure consistent application during testing.
- Apply a test coat: Spray a small amount of paint onto the test surface using smooth, even strokes. Pay attention to coverage, texture, and any potential issues such as drips or streaks.
- Evaluate the results: Allow the test coat to dry completely and evaluate its appearance. Check for proper coverage, adhesion, texture, and overall finish quality. If necessary, make adjustments to your spraying technique or thinning ratio based on these results.
By following this step-by-step guide, you can assess how well the paint adheres to a similar surface before applying it to your intended project. This allows you to identify any areas for improvement or make necessary adjustments in your technique or thinning ratio for optimal results.
It is important not to overlook this crucial step as it can save time, effort, and resources by preventing potential issues during actual application. Testing paint spray on a similar surface beforehand helps minimize any surprises or setbacks that may arise during the painting process, ensuring a smooth and successful outcome. Embrace this practice to maximize your chances of achieving the desired finish and avoid any possible frustration or dissatisfaction with your painting project.
Thinning paint for airless sprayers
- Begin by selecting the appropriate type of paint for your project, whether it is latex or oil-based. It is important to note that latex and oil-based paints do not typically require thinning when using an airless sprayer.
- If you are working with automotive lacquer paint or another type of specialty coating that requires thinning, consider using an appropriate thinner recommended by the manufacturer. It is crucial to carefully follow the manufacturer’s instructions regarding thinning ratios and recommendations.
- Prior to starting your project, perform a test spray on a similar surface to determine if you have achieved the desired consistency and coverage. Make any necessary adjustments to your thinning ratio based on this test spray.
- When using an airless sprayer, avoid over-thinning the paint as this can affect its ability to adhere properly to surfaces. Over-thinning can result in poor coverage and diminished durability of the finish.
In addition, make sure to wear appropriate safety gear such as respirator masks when operating sprayers. Take measures to protect surrounding objects from overspray, such as covering them or using masking tape.
By following these steps and precautions, you can ensure proper thinning of paint for airless sprayers and achieve professional results in your painting projects.
Don’t miss out on achieving high-quality finishes with your airless sprayer! Follow these guidelines for properly thinning your paint and enjoy the benefits of faster and more efficient painting projects while producing impressive results.
Sprayers and paint thinning go together like a thin layer of paint on a thick canvas.
Not necessary to thin latex or oil-based paint for airless sprayers
Airless sprayers provide a convenient and efficient way to apply paint, without the need for thinning latex or oil-based paint. These sprayers are designed to handle thicker paints without sacrificing quality or performance. The use of airless technology allows for a high-pressure application, which atomizes the paint particles and delivers a smooth and even finish on various surfaces.
When using an airless sprayer, there is no need to thin latex or oil-based paint, as the sprayer is specifically designed to handle these types of paints without dilution. Thinning paint can sometimes be a tedious and time-consuming process, but with airless sprayers, you can skip this step altogether.
Latex paint is often preferred for its ease of use and quick drying time. With an airless sprayer, you can achieve excellent results with latex paint straight from the can. The high-pressure application ensures that the paint is evenly distributed and dries quickly for optimal adhesion and durability.
Oil-based paints have their own set of advantages, such as superior durability and resistance to wear and tear. Fortunately, airless sprayers are capable of handling these thicker paints without the need for thinning. This saves both time and effort during your painting projects.
To ensure optimal performance when using an airless sprayer with latex or oil-based paint, it is recommended to follow proper maintenance and cleaning procedures as outlined by the manufacturer. This will help maintain the longevity of your sprayer and ensure consistent performance throughout your painting projects.
Spray away your painting woes with a touch of automotive lacquer thinner, if your air-driven sprayer needs a little extra thinning TLC.
Use of automotive lacquer thinner for air-driven sprayers if needed
The use of automotive lacquer thinner for air-driven sprayers is an option to consider if necessary. When using air-driven sprayers, it may be required to thin the paint in order to achieve the desired consistency for optimal spray application. In such cases, utilizing automotive lacquer thinner can be beneficial.
Here is a 6-step guide on how to use automotive lacquer thinner for air-driven sprayers:
- Read the manufacturer’s instructions: Before starting the thinning process, it is essential to consult the specific instructions provided by the paint manufacturer. These instructions will typically include recommended thinning ratios and suitable thinners.
- Gather the necessary material: Prepare all the required materials, including automotive lacquer thinner and a clean container for mixing.
- Measure and pour: Using a measuring cup, carefully measure out the appropriate amount of automotive lacquer thinner as specified in the manufacturer’s instructions. Slowly pour it into the container.
- Mix thoroughly: Stir the paint and thinner mixture thoroughly using a stirring stick or paddle until they are well combined. This ensures an even consistency throughout.
- Test spray on a similar surface: Before proceeding with applying the thinned paint onto your actual project, perform a test spray on a similar surface or spare piece of material. This allows you to assess whether further thinning adjustments are needed or if the desired coverage and finish are achieved.
- Make adjustments as necessary: If needed, make additional adjustments by adding more automotive lacquer thinner gradually while continuously stirring until achieving the desired consistency.
It is important to note that every paint brand and type may have different requirements for thinning with automotive lacquer thinner, so always refer to and follow the manufacturer’s instructions provided with your specific paint product.
One notable fact to remember is that automotive lacquer thinner should only be used as recommended by the manufacturer and in well-ventilated areas due to its volatile nature (Reference Data).
Sprayers make painting fun and dangerous at the same time, just like juggling chainsaws at a clown convention.
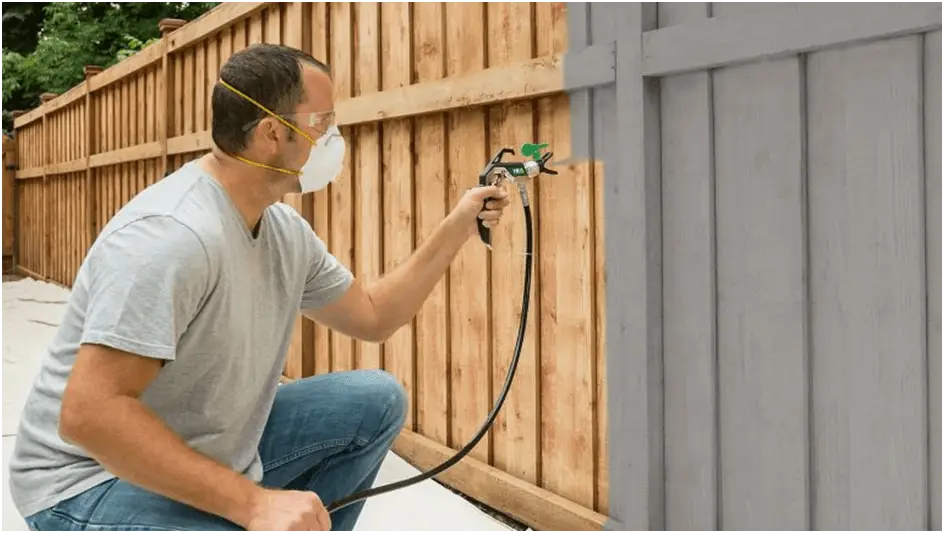
Safety Precautions and Tips
When it comes to using a sprayer for painting, safety precautions are paramount. In this section, we will explore essential tips to ensure a safe and successful painting experience. From wearing the appropriate safety gear, like respirator masks, to employing protective measures for surrounding objects, we’ll cover everything you need to know. Additionally, we’ll discuss the importance of using the right spray gun tips for achieving optimal results. Stay tuned for valuable insights into maintaining safety while obtaining professional-quality finishes.
Wearing safety gear, such as respirator masks, when using sprayers
Here is a list of safety gear recommended when using sprayers:
- Respirator masks: These masks are designed to filter out harmful particles and fumes from the air, ensuring that the person using the sprayer does not breathe them in.
- Eye protection: Goggles or safety glasses should also be worn to protect the eyes from any splashes or overspray.
- Gloves: Wearing gloves helps prevent direct contact with paint, reducing the risk of skin irritation or allergic reactions.
- Coveralls or protective clothing: To avoid getting paint on one’s clothes or skin, it is recommended to wear coveralls or other protective clothing.
- Ventilation: It is essential to work in a well-ventilated area or use exhaust fans to minimize exposure to paint fumes.
In addition to these precautions, it is important to follow proper cleaning procedures for both the sprayer and the safety gear after each use. This will help maintain their effectiveness and ensure safe future use without any contamination.
It should be noted that wearing safety gear, such as respirator masks, when using sprayers, does not guarantee complete protection. It is still necessary to exercise caution and practice safe painting techniques while using sprayers.
A true fact related to this topic is that according to a study conducted by the National Institute for Occupational Safety and Health (NIOSH), exposure to paint fumes can lead to various health issues including respiratory problems and lung damage.
Protective measures for avoiding paint droplets on surrounding objects
To effectively avoid paint droplets on surrounding objects, it’s important to implement protective measures. Follow these 5 steps:
- Prepare the area: Before starting the painting project, remove any furniture or objects that may be at risk of getting paint on them. Cover the remaining surfaces with drop cloths or plastic sheets to provide a protective barrier.
- Masking tape: Use masking tape to cover any areas that you want to keep paint-free, such as trim, windows, and switches. Make sure to press down firmly to create a tight seal, preventing any paint from seeping underneath.
- Create a spray booth: If possible, set up a makeshift spray booth by hanging plastic sheets or using portable walls around the work area. This enclosed space will help contain the overspray and minimize the chances of it reaching other surfaces.
- Proper spraying technique: Hold the sprayer nozzle at an appropriate distance from the surface – typically 12-18 inches for most sprayers – and move it in smooth, even strokes. Avoid excessive pressure or over-spraying, as this can lead to more paint droplets being dispersed into the air.
- Use a shield or shield attachments: Some sprayers come with accessories like shields or extensions that can be attached to the nozzle for more precise control over where the paint is directed. These shields can help block stray paint particles from drifting onto surrounding objects.
In addition to these protective measures, it’s important to always use high-quality materials and equipment when painting with sprayers. This ensures that the sprayer functions properly and produces an even spray pattern, minimizing the risk of excessive overspray and droplet formation.
By following these guidelines and taking proper precautions, you can effectively avoid paint droplets on surrounding objects, resulting in a clean and professional paint job. Protect your surroundings and achieve the desired finish with confidence and ease.
Spray gun tips: the unsung heroes of painting, here to save your project from going down the drain.
Exchanging spray gun tips for better results
When it comes to achieving better results with a sprayer, one important aspect that shouldn’t be overlooked is the exchange of spray gun tips. These tips play a crucial role in the spraying process and can significantly impact the outcome of your painting project.
- Choose the right tip size: The size of the tip determines the width and coverage of the paint spray. It’s essential to select a tip size that matches your project requirements. A larger tip will result in a broader spray pattern, while a smaller tip will provide more precision and control.
- Consider the material being sprayed: Different materials require different types of tips. For example, latex paint may work best with a particular type of tip, while oil-based paint may require a different one. Understanding the compatibility between your chosen paint and the spray gun tip is crucial to ensure optimal results.
- Regularly clean and maintain tips: Over time, paint residue can build up on the tips, affecting their performance. It’s important to regularly clean and maintain your spray gun tips to prevent clogs or uneven spraying. A clean and well-maintained tip will ensure consistent coverage and better results.
- Experiment with different spray patterns: Some spray gun tips allow you to adjust the spray pattern, such as fan-shaped or circular patterns. By experimenting with different patterns, you can achieve various effects on your painted surface. This flexibility adds depth and creativity to your painting projects.
While these points cover key aspects regarding exchanging spray gun tips for better results, it’s worth mentioning that thorough understanding and proper usage of these tips are crucial factors in achieving optimal painting outcomes.
Properly exchanging spray gun tips is an essential aspect of achieving better results with a sprayer. By selecting the right tip size, considering material compatibility, cleaning and maintaining tips regularly, and experimenting with different spray patterns, you can enhance the quality and precision of your paint application. Take the time to understand how spray gun tips can improve your painting project and achieve the desired professional finish.
Conclusion
Concluding our exploration, we highlight the significance of adhering to proper thinning techniques for achieving desired paint results. Additionally, we unveil the advantages of utilizing sprayers for faster and more efficient painting projects. With these insights, you’ll be equipped to make informed decisions and optimize your painting endeavors.
Importance of following proper thinning techniques for achieving desired paint results
Proper thinning techniques are crucial for achieving desired paint results when using a sprayer. Thinning the paint to the appropriate consistency ensures that it can be evenly distributed and applied onto the surfaces being painted. Without proper thinning, the paint may become too thick and result in a bumpy or uneven finish, or it may be too thin and lead to drips and runs on the surface. Therefore, understanding the importance of following proper thinning techniques is essential for achieving professional-looking paint results with a sprayer.
To achieve desired paint results, follow these six steps for proper thinning techniques:
- Identify the type of paint being used, whether it is latex, acrylic, or oil-based. Different types of paint require different ratios of thinner.
- Consult the manufacturer’s instructions to determine the recommended ratio for thinning the particular type of paint.
- Use a funnel to check the thickness of the paint as you add thinner. This helps ensure that you are gradually achieving the desired consistency without over-thinning.
- For latex paint, add water to achieve the desired consistency gradually. Start by adding small amounts and continue until reaching the desired thickness.
- When working with acrylic paint, keep in mind that it requires a different water ratio compared to latex paints. Follow manufacturer guidelines regarding thinner ratios accordingly.
- Be cautious not to over-thin the paint as this can negatively impact its adhesion and coverage capabilities.
Some unique details about following proper thinning techniques include ensuring safety during painting projects by wearing appropriate protective gear such as respirator masks to avoid inhaling harmful fumes or particles from atomized paints. Additionally, taking measures to protect surrounding objects from overspray or droplets is equally important for achieving desirable results without causing unintended damage or messiness in your work area. Lastly, swapping out spray gun tips when necessary contributes significantly to better painting outcomes by optimizing spray patterns and controlling application precision without compromising on the paint’s consistency. By following these additional precautions and tips, you will be able to achieve the desired results by effectively thinning your paint and using sprayers efficiently.
Benefits of using sprayers for faster and more efficient painting projects
Sprayers offer several benefits for faster and more efficient painting projects. These benefits include providing a more even and consistent coat of paint compared to manual methods like brush painting. The fine mist produced by sprayers allows for better coverage and a smoother finish. Additionally, sprayers can significantly reduce painting time, especially on larger projects, by quickly and efficiently covering large surfaces. This saves valuable time that would otherwise be spent extensively brushing or rolling.
Sprayers are also highly effective at reaching difficult areas and crevices that may be challenging to access with brushes or rollers. The spray can penetrate corners, edges, and irregular surfaces more effectively, ensuring complete coverage without excessive touch-ups or rework.
Using sprayers can result in a reduction in paint consumption. The fine mist allows for better paint atomization and distribution, minimizing overspray and waste. This not only contributes to cost savings but also promotes an eco-friendly approach to painting projects.
Moreover, sprayers can lead to a more professional-looking paint job. The smooth finish achieved through spraying minimizes visible brush marks or roller texture, resulting in a visually appealing result.
Lastly, sprayers offer greater flexibility in the choice of paint. Unlike brushes or rollers that may have limitations, sprayers can accommodate various types of paints including oil-based and water-based paints. This adds to the versatility and convenience of using sprayers for painting projects.
Some Facts About How Much to Thin Paint for a Sprayer:
- ✅ Paints are divided into oil-based and water-based categories. (Source: Team Research)
- ✅ Oil-based paints can be sprayed without thinning because they are already thin and don’t dry quickly or clog the spray gun’s nozzle. (Source: Team Research)
- ✅ Modern latex paints made of synthetic resins can also be used in spray guns, but may still need to be thinned. (Source: Team Research)
- ✅ For latex paint, a common rule of thumb is to add ½ cup of water for every gallon of paint, but the amount may vary depending on the desired consistency. (Source: Team Research)
- ✅ Manufacturers provide thinning instructions and recommendations on the paint’s data sheets. (Source: Pittsburgh Spray Equipment Company)
FAQs about How Much To Thin Paint For Sprayer
FAQs on How Much to Thin Paint for Sprayer:
1. How much water should I add to thin latex paint for a sprayer?
Answer: To thin latex paint for a sprayer, start by adding ½ cup of water per gallon of paint. Mix thoroughly and check the consistency. If needed, add an additional ⅛ cup of water per gallon and mix again until the desired thinness is achieved.
2. Can I use an airless sprayer without thinning water-based paints?
Answer: Yes, airless sprayers are designed to handle thicker, water-based paints without the need for thinning. However, it’s always best to refer to the paint manufacturer’s recommendations to ensure optimal performance.
3. How much thinner should I add to oil-based paint for spraying?
Answer: The recommended amount of thinner for oil-based paint can be found on the paint’s label or datasheet. It’s important to follow the manufacturer’s instructions for the specific paint you are using to achieve the desired consistency.
4. Can I use an HVLP sprayer without thinning latex paint?
Answer: HVLP (high volume, low pressure) sprayers typically require thinning for most paints, especially latex paint. It’s best to consult the paint manufacturer’s recommendations and follow their instructions for thinning ratios when using an HVLP sprayer.
5. What is the ideal viscosity for paint when using an air spray gun?
Answer: The ideal viscosity for air spray guns can be determined by using a viscosity cup, such as a Zahn 2 cup. The paint should run for 20-30 seconds in the cup for optimal spraying. If it runs above 30 seconds, consider using an airless paint sprayer instead.
6. How can I test the consistency of thinned paint before spraying?
Answer: To test the consistency of thinned paint, conduct a test spray on a similar surface. If the paint finish appears chunky and there is minimum fluid pressure and high air pressure, additional thinning may be necessary. Gradually add a small amount of thinner until the desired result is achieved.
Leave a Reply