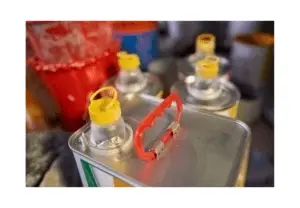
The art of painting, whether for DIY home projects or professional applications, requires a good understanding of the materials and tools at hand. One such crucial tool is the paint sprayer, a device that can make large painting jobs more efficient and the finish smoother. However, not every paint can be used directly in a paint sprayer. Oil-based paints, known for their durability and rich finish, often need to be thinned before they can be used in a sprayer. If not done properly, an unthinned or poorly thinned paint can lead to clogs, uneven application, and a compromised finish.
We will be addressing the topic, “How to Thin Oil Based Paint For a Sprayer”. The process of thinning oil-based paint for a sprayer can seem intimidating, but it is a straightforward task once you understand the basics. We will provide step-by-step instructions on how to properly thin your oil-based paint, explain why this process is necessary, and discuss the role that different thinners can play in this process. Whether you’re a seasoned painter or a beginner, this guide will equip you with the knowledge to ensure optimal performance from your paint sprayer when using oil-based paints.
Table of Contents
Key Takeaways:
- Thinning oil-based paint for spray guns is important to achieve better coverage and smoother finishes.
- There are several methods for thinning oil-based paint, including using lacquer thinner, turpentine, and mineral spirits.
- When working with oil-based paint and thinning agents, it is essential to follow safety precautions such as wearing protective clothing, ensuring proper ventilation, and following the manufacturer’s recommendations.
- The step-by-step process for thinning oil-based paint for a sprayer involves gathering necessary equipment, straining paint for impurities, mixing paint with the thinning agent, and checking the consistency of the thinned paint.
- To achieve the best results when thinning oil-based paint, it is recommended to test the thinned paint on a similar surface, adjust the ratio to achieve the desired spray pattern, and properly store and dispose of materials.
Introduction
Oil-based paints are commonly used for many different projects, but they can be difficult to apply with a sprayer due to their thick consistency. To ensure smooth and even coverage, it may be necessary to thin the paint before using a sprayer. Thinning oil-based paint allows for better flow through the sprayer nozzle, resulting in a more professional finish. By understanding the proper technique and using the right materials, you can successfully thin oil-based paint for your sprayer.
To thin oil-based paint for a sprayer, there are a few methods that can be used. One common approach is to add a small amount of paint thinner or mineral spirits to the paint. These solvents help to break down the paint and reduce its viscosity, making it easier to spray. It’s important to follow the manufacturer’s instructions when using these products, as they can vary in their effectiveness and compatibility with different paints.
Another method for thinning oil-based paint is to use a specific paint conditioner or additive. These products are designed to improve paint flow and reduce brush marks or streaks. Paint conditioners can be added directly to the paint and mixed thoroughly before spraying. Again, it’s essential to read and follow the instructions provided by the manufacturer to ensure the best results.
It’s important to note that the amount of thinner or conditioner needed to thin oil-based paint can vary depending on the specific product and the desired consistency. It’s recommended to start with a small amount and gradually add more as needed, mixing thoroughly between additions. This will help you achieve the desired thickness without making the paint too thin and compromising its quality.
Importance of thinning oil-based paint for spray guns
Thinning oil-based paint for spray guns is of utmost importance for achieving optimal results. The viscosity of oil-based paint is typically thicker than what is suitable for spraying, necessitating the use of a compatible thinning agent. Diluting the paint with a thinning agent allows it to become more fluid, resulting in smoother application and enhanced coverage.
Maintaining a consistent spray pattern and avoiding uneven coverage are key factors when using a spray gun. Thinning the oil-based paint helps accomplish this by minimizing the risk of clogging or droplet formation that can lead to undesirable streaks or blotches. Furthermore, it improves the atomization of the paint particles, ensuring a fine mist is sprayed onto the surface, resulting in a more even and professional finish.
Choosing the right thinning agent is crucial for effectively thinning oil-based paint. Common options include mineral spirits, paint thinner, or specific thinning agents recommended by the paint manufacturer. It is essential to adhere to the manufacturer’s instructions and guidelines to achieve the correct ratio of paint to thinning agent. This ensures that the paint retains its desired properties such as color, finish, and durability while also allowing it to flow smoothly through the spray gun.
Overall, the importance of thinning oil-based paint for spray guns cannot be overstated. It is a crucial step in achieving a smooth and uniform finish. Thinning the paint enhances the performance of the spray gun by improving spray pattern consistency and reducing the likelihood of clogs or uneven coverage. By selecting the appropriate thinning agent and following the manufacturer’s instructions, painters can ensure that their oil-based paint is properly prepared for spraying, ultimately resulting in professional-looking results.
Methods for thinning oil-based paint
Discover effective methods for thinning oil-based paint to achieve optimal results in your painting projects. Explore various techniques such as thinning with lacquer thinner, turpentine, and mineral spirits. Uncover the advantages and considerations of each method to ensure you choose the right approach for your specific painting needs. Upgrade your skills by understanding the proper ways to thin oil-based paint, enhancing your painting experience like never before.
Thinning with lacquer thinner
Lacquer thinner is a widely used method for thinning oil-based paint in spray guns. It is important to thin the paint properly to achieve optimal results. By following the correct process and taking necessary safety precautions, lacquer thinner can be an effective tool for achieving the desired consistency and texture of thinned oil-based paint.
To thin oil-based paint with lacquer thinner, follow these three simple steps:
- Gathering necessary equipment: Before beginning the thinning process, gather all the necessary equipment, including the spray gun, paint container, measuring cup or scale, lacquer thinner, and a stirring stick or paddle.
- Straining paint for impurities: To ensure a smooth finish and prevent clogs in the spray gun nozzle, strain the oil-based paint through a fine-mesh strainer or cheesecloth into a clean container. This step helps remove any impurities or debris that could affect the performance of the spray gun.
- Mixing paint with lacquer thinner: Gradually add small amounts of lacquer thinner to the strained oil-based paint while stirring continuously with a stir stick or paddle. Start with a small ratio of 1 part lacquer thinner to 4 parts paint and adjust as needed. Continue adding lacquer thinner until reaching the desired consistency for spraying. It is crucial to mix thoroughly and slowly to ensure proper blending of the two substances.
Thin like a painter’s patience, turpentine adds the perfect touch of fluidity to oil-based paint for a picture-perfect spray.
Thinning with turpentine
Thinning oil-based paint with turpentine is a commonly used method to achieve the desired consistency for spray guns. Adding turpentine to the paint, helps to reduce its viscosity and makes it easier to spray onto surfaces.
Here is a 4-step guide to thinning oil-based paint with turpentine:
- Begin by gathering the necessary equipment, including a paint sprayer and a container for mixing the paint and turpentine.
- Strain the oil-based paint to remove any impurities or particles that may clog the sprayer nozzle. This step ensures a smooth application of the thinned paint.
- In the container, mix the oil-based paint with an appropriate amount of turpentine. The ratio of paint to turpentine will vary depending on the desired consistency and the manufacturer’s recommendations.
- Once mixed, check the consistency of the thinned paint by testing it on a similar surface or using a viscosity cup. Adjust the ratio of paint to turpentine if needed until you achieve your desired spray pattern.
It is important to note that when working with oil-based paints and thinning agents like turpentine, safety precautions should be followed:
- Wear protective clothing and gear such as gloves, goggles, and respiratory protection to prevent direct contact with the skin and inhalation of fumes.
- Ensure proper ventilation in your workspace by opening windows or using fans to remove any vapors or fumes.
- Follow the manufacturer’s recommendations regarding thinning ratios and application techniques for their specific product.
In addition, here are some suggestions for achieving the best results when thinning oil-based paint with turpentine:
- Test the thinned paint on a similar surface before applying it to your project to ensure compatibility and desired finish.
- Adjust the ratio of paint to turpentine based on your spraying equipment and technique to achieve optimal spray patterns.
- Properly store and dispose of any leftover materials to prevent environmental contamination.
By following these guidelines and precautions, you can successfully thin oil-based paint with turpentine for spray gun applications and achieve professional-quality results.
Thinning with mineral spirits
Before beginning the thinning process, gather all the necessary equipment including a container for mixing, a measuring cup, and appropriate safety gear such as gloves and goggles.
To ensure a smooth application, it is essential to strain the oil-based paint before mixing it with mineral spirits. This step helps remove any impurities or debris that might affect the overall quality of the thinned paint.
Using the measuring cup, carefully measure the amount of mineral spirits needed based on the manufacturer’s recommendations or personal preference.
Slowly pour the mineral spirits into the container with the strained paint while stirring gently but consistently until thoroughly mixed.
By following these steps, you can successfully thin oil-based paint using mineral spirits. It is important to note that each brand and type of paint may have different requirements for thinning ratios, so it’s recommended to test on a similar surface before proceeding with your project.
It is worth noting that while this method of thinning oil-based paints is commonly used, it is essential to take proper safety precautions. Make sure to wear protective clothing and gear such as gloves and goggles to avoid skin contact with both the paint and thinner. Additionally, ensure proper ventilation in your workspace by opening windows or using fans to avoid inhaling fumes.
Lastly, always refer to the manufacturer’s recommendations for specific instructions on handling and disposal of materials related to oil-based paints and thinning agents like mineral spirits.
Safety precautions when working with oil-based paint and thinning agents
When working with oil-based paint and thinning agents, ensuring safety is crucial. In this section, we’ll focus on the essential safety precautions to follow. We’ll explore the importance of wearing protective clothing and gear, the necessary ventilation requirements, and the significance of following the manufacturer’s recommendations. By understanding and implementing these precautions, you can ensure a safe and controlled environment during your paint thinning process.
Protective clothing and gear
Wearing appropriate protective clothing, such as coveralls or a smock, can help prevent paint from coming into direct contact with the skin and clothes. Using gloves, preferably made of chemical-resistant material, can protect the hands from potential skin irritation or absorption of harmful chemicals present in the paint or thinning agents. Wearing safety goggles or a face shield provides protection for the eyes against any splatters or fumes that may be emitted during the painting process.
In addition to these measures, it is important to follow specific precautions recommended by manufacturers regarding the use of protective clothing and gear. These guidelines may include additional protective equipment based on specific product recommendations and safety standards. By adhering to these guidelines, individuals can minimize their exposure to hazardous substances and ensure a safe working environment.
Remember, proper ventilation is key when working with oil-based paint; you don’t want your lungs to look like modern art.
Ventilation requirements
Proper ventilation is essential when working with oil-based paint and thinning agents. Good ventilation helps to prevent the buildup of fumes and ensures a safe working environment. It is important to have adequate ventilation in the area where you are working with oil-based paint and thinning agents. This can be achieved by opening windows, using fans, or working in a well-ventilated room.
Ventilation helps to remove any fumes or odors that may be emitted from the paint and thinning agents, reducing the risk of inhalation. In addition to providing fresh air circulation, ventilation also helps to minimize the concentration of volatile compounds in the air. These compounds can be harmful if inhaled in high concentrations for extended periods of time. By maintaining proper ventilation, you can help to reduce these health risks and ensure a safer work environment.
It is recommended to follow manufacturer’s recommendations regarding ventilation requirements when working with oil-based paint and thinning agents. Different products may have specific guidelines for optimal airflow and ventilation during use. By following these recommendations, you can ensure that you are using the product safely and effectively.
Manufacturer’s recommendations
Manufacturers provide specific recommendations for working with oil-based paint and thinning agents, ensuring safety and optimal results. Follow these guidelines for proper application:
- Follow the manufacturer’s instructions when selecting a thinning agent, as different brands of oil-based paint may require different additives.
- Use the recommended amount of thinning agent, typically listed on the paint can or in accompanying documentation.
- Mix the paint and thinning agent thoroughly, using a stir stick or similar tool, to achieve a homogenous consistency.
- Take note of any temperature or environmental conditions specified by the manufacturer that may affect the thinning process.
- Dispose of any leftover paint and thinning agent according to local regulations and guidelines provided by the manufacturer.
These recommendations are essential to ensure proper application and maintain the integrity of both the paint and sprayer equipment. By following these guidelines, users can avoid potential hazards and achieve satisfactory results.
It is important to note that some manufacturers may have additional specific recommendations regarding their particular brand or product. These recommendations may include suggestions for surface preparation, drying times between coats, or cleaning instructions for sprayers after use. Always refer to the manufacturer’s documentation for comprehensive guidelines tailored to their specific product.
By adhering to these manufacturers’ recommendations, users can confidently thin oil-based paint for a sprayer while minimizing risks and maximizing performance. Get ready to thin like a pro and spray like a boss with this step-by-step process for oil-based paint thinning.
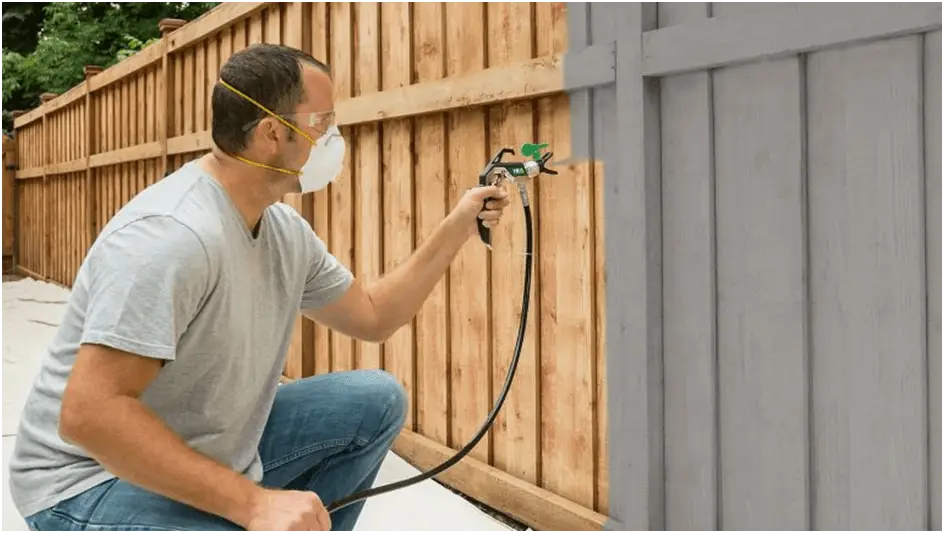
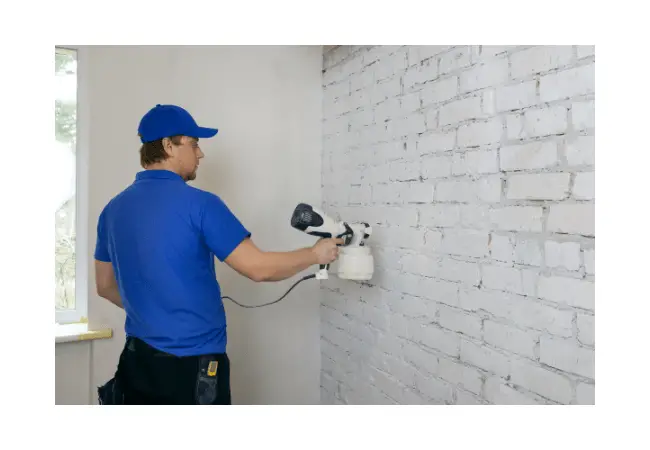
Step-by-step process for thinning oil-based paint for a sprayer
When it comes to thinning oil-based paint for a sprayer, a systematic approach is key. In this section, we will break down the step-by-step process to achieve the perfect consistency for your paint. From gathering the necessary equipment to checking the consistency of the thinned paint, we will guide you through each stage. So, put on your painter’s hat and let’s dive into the world of transforming oil-based paint for a smooth spraying experience!
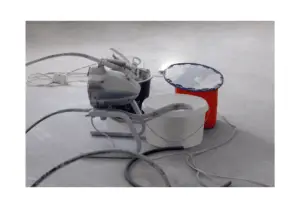
Gathering necessary equipment
It is crucial to gather the necessary equipment when thinning oil-based paint for a sprayer. This ensures a smooth and efficient process, resulting in optimal spray coverage and finish.
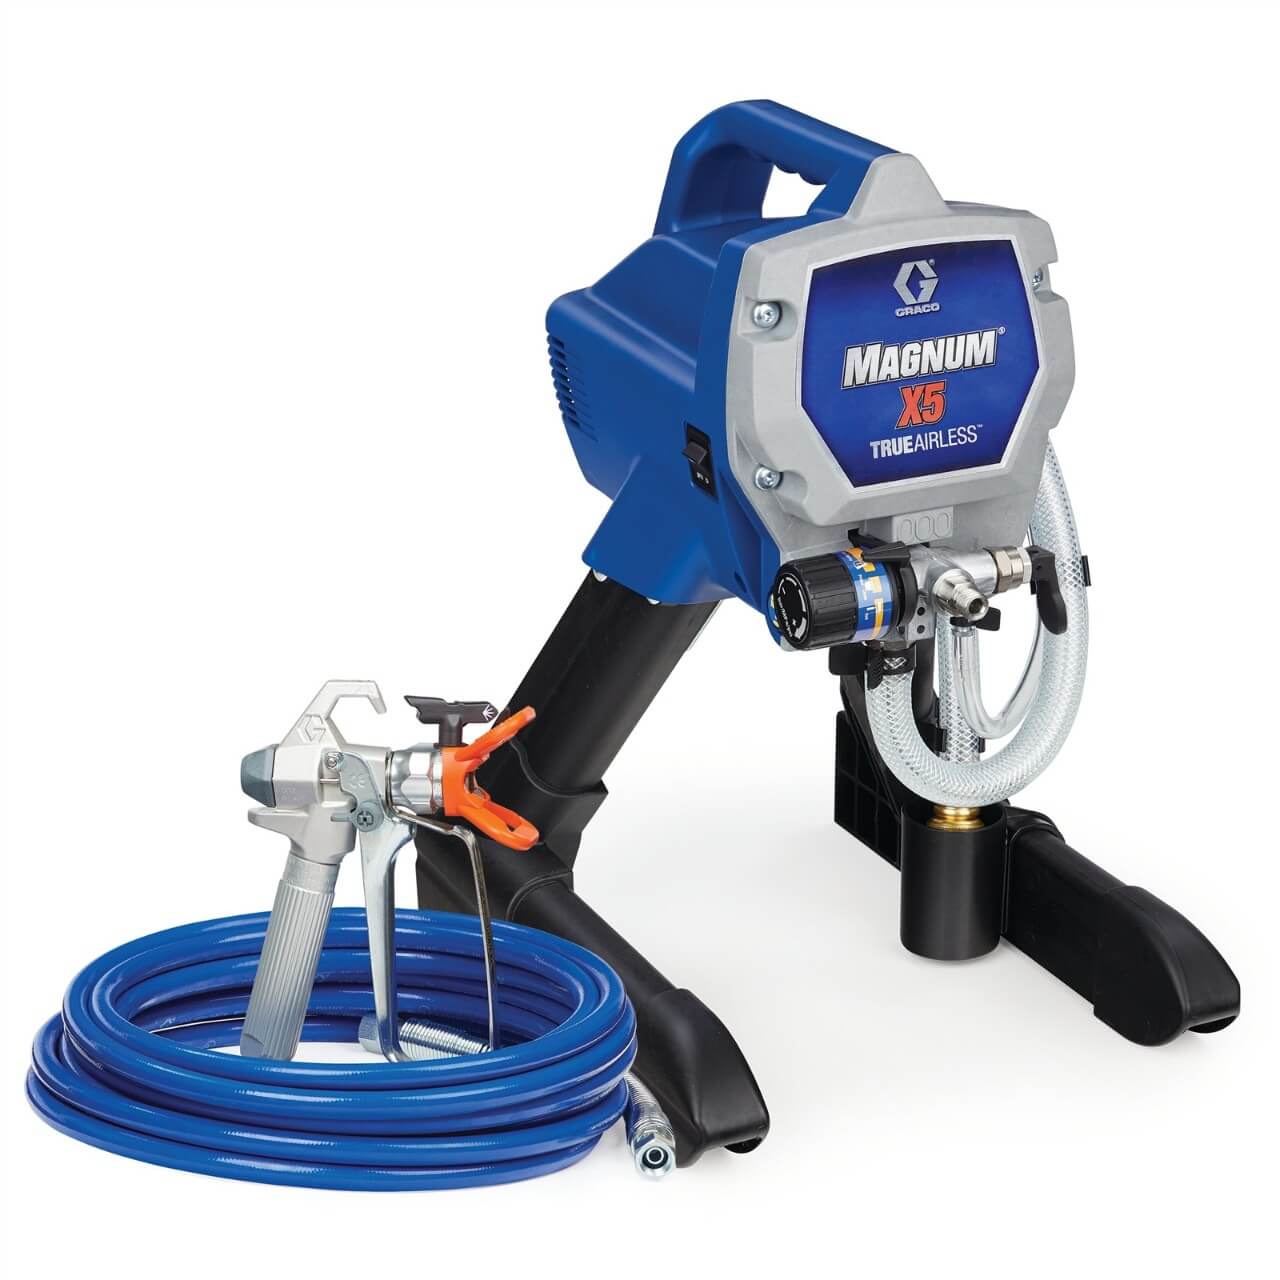
- Paint sprayer: Select a high-quality paint sprayer that is suitable for oil-based paints. Consider factors such as nozzle size and pressure settings.
- Paint container: Use a clean and sturdy container to hold the oil-based paint. A plastic or metal container with a lid is recommended to prevent spills and contamination.
- Thinning agent: Choose the appropriate thinning agent based on the manufacturer’s recommendations and desired consistency of the paint. Options include lacquer thinner, turpentine, or mineral spirits.
- Measuring tools: Use measuring cups or mixing ratios provided by the paint manufacturer to accurately measure the amount of thinning agent needed.
- Stirring utensils: Have sturdy stir sticks or paddles on hand to thoroughly mix the oil-based paint with the chosen thinning agent.
- Safety equipment: Protect yourself by wearing gloves, safety goggles, and a respirator mask to avoid any contact with hazardous materials.
Additionally, consider having disposable strainers or cheesecloth to strain the oil-based paint prior to mixing it with the thinning agent. This helps remove any impurities that could affect the finish of your project.
Don’t miss out on gathering all the necessary equipment before starting your project. Having everything ready will save you time and ensure a successful outcome. Get prepared today and enjoy smooth, consistent results while thinning oil-based paint for your sprayer.
Make sure your paint is as pure as your intentions by straining out any impurities.
Straining paint for impurities
Precisely straining paint for impurities is an essential step in ensuring a smooth and even application of oil-based paint. By removing any debris or lumps, this process helps to prevent clogging and guarantees a clean finish.
To begin, gather the necessary equipment, including a fine-mesh strainer or cheesecloth specifically designed for straining paint. It is crucial to ensure that the strainer is clean and free from any contaminants left over from previous use.
Next, place the strainer securely over a clean container. This container should be able to catch the strained paint without overflowing, so make sure to leave enough space for the paint to flow through.
Slowly pour the oil-based paint into the center of the strainer, allowing it to filter through gradually. It is important to pour the paint slowly to avoid spills or splatters that can create a mess.
Once the paint has been poured, you can collect the strained paint by using a spatula or scraper to gently press down on any remaining lumps or impurities in the strainer. This helps to extract as much paint as possible while leaving behind any undesired particles. Transfer the strained paint into a clean container that is ready for further thinning or direct use with a sprayer.
By following these steps, you can effectively strain oil-based paint, ensuring a smooth and flawless application while minimizing any potential issues caused by impurities.
However, it is crucial to note that while straining removes larger particles, it may not fully eliminate microscopic impurities such as dust or finer debris. In certain cases, additional filtration methods may be necessary to achieve an even higher level of purity when working with oil-based paints for sprayers. Using disposable filters can provide an added level of filtration that helps to ensure the paint is free from all types of impurities for a superior finish.
Mixing paint with the thinning agent
Here is a 5-step guide for mixing paint with the thinning agent:
- Gather necessary equipment: Ensure you have all the required tools, including measuring cups, stir sticks, and a clean container for mixing.
- Strain paint for impurities: Before mixing, strain the oil-based paint using a fine-mesh strainer to remove any debris or clumps that may affect the quality of your finish.
- Measure and mix: Follow the manufacturer’s instructions on how much thinning agent to add based on the type of paint and desired consistency. Use a measuring cup to accurately measure out the thinning agent, then slowly pour it into the container with the paint.
- Stir thoroughly: Use a stir stick to blend the thinning agent and paint together. Make sure to scrape the sides and bottom of the container to ensure an even blend.
- Check consistency: Once mixed, check the consistency of the thinned paint by dipping a test sprayer or brush into it. If it flows smoothly without dripping but still provides good coverage, you have achieved the desired consistency.
It is important to note that while these steps provide a general guideline, always refer to product-specific instructions from manufacturers for best results when mixing oil-based paints with thinning agents.
Checking consistency of thinned paint
The consistency of thinned paint is an important factor to consider when using oil-based paint with a sprayer. It ensures that the paint can be applied smoothly and evenly, resulting in a professional finish.
To check the consistency of thinned paint, follow these three simple steps:
- Pour a small amount of the thinned paint into a measuring cup or container.
- Dip a viscosity cup or a stirring stick into the paint.
- Slowly lift the viscosity cup or stirring stick out of the paint and observe how the paint flows off it.
By observing how the thinned paint flows off the viscosity cup or stirring stick, you can determine its consistency. Ideally, the thinned paint should have a smooth and even flow, without any clumps or excessive thickness. If it is too thin and watery, you may need to add more paint to achieve the desired consistency. Conversely, if it is too thick and does not flow easily, you may need to add more thinning agent or adjust the ratio of paint to thinning agent.
Checking the consistency of thinned paint is an essential step in achieving optimal results when using oil-based paint with a sprayer. It allows you to make necessary adjustments to ensure that the paint can be applied effectively and efficiently on your desired surface.
Tips for achieving best results when thinning oil-based paint
When it comes to achieving the best results for thinning oil-based paint, there are a few key tips to keep in mind. In this section, we’ll explore how testing thinned paint on a similar surface can help you gauge its effectiveness. Additionally, we’ll discuss the importance of adjusting the ratio to achieve your desired spray pattern. Finally, we’ll touch on the proper storage and disposal of materials to ensure both efficiency and safety. Stay tuned for expert advice on thinning oil-based paint for optimal spraying results.
Testing thinned paint on a similar surface
Testing the consistency of thinned paint on a similar surface is an essential step when using oil-based paint with a sprayer. By testing the thinned paint on a similar surface, you can evaluate its texture, coverage, and overall performance before applying it to your desired surface. This allows you to make adjustments to the thinning ratio or technique if necessary, resulting in a more effective and satisfactory painting process.
To test thinned paint on a similar surface, you can follow this 5-step guide:
- Prepare the surface: Clean and prepare a surface similar to the one you intend to paint. This ensures that the test accurately reflects how the thinned paint will perform on your desired surface.
- Apply the thinned paint: Use a brush or roller to apply the thinned paint evenly onto the prepared surface. Pay attention to factors such as coverage, adhesion, and texture while applying.
- Evaluate drying time: Allow the test area to dry fully according to the recommended drying time for the particular oil-based paint you are using. Observe how long it takes for the thinned paint to dry and whether any inconsistencies occur during this process.
- Assess texture and finish: Examine the texture and finish of the dried test area. Look for any streaks, blotches, or rough patches that may indicate an issue with thinning consistency or application technique.
- Compare results: Compare the appearance and performance of the test area with your desired outcome. Use this comparison to determine whether any adjustments need to be made to achieve your desired spray pattern and overall finish.
By following these steps and carefully evaluating how thinned oil-based paint performs on a similar surface, you can make informed decisions regarding thinning ratios and techniques for optimal results in your painting projects.
Adjusting ratio to achieve desired spray pattern
In the world of oil-based paint, achieving the perfect spray pattern is crucial. To accomplish this, you must carefully adjust the ratio of paint to thinning agent. By finding the right consistency, you’ll be able to achieve optimal spray application and coverage, resulting in a professional and even finish on your painted surface.
To help you achieve your desired spray pattern, here is a 4-step guide that incorporates the provided keywords:
- Start with a small amount: Begin by mixing a small amount of thinned paint using the recommended ratio of paint to thinning agent. This is the initial step towards achieving the spray pattern you desire.
- Test on a similar surface: Once you’ve mixed the thinned paint, apply a test spray on a similar surface, like scrap wood or cardboard. This will allow you to assess the consistency and coverage of the paint, ensuring it meets your expectations.
- Evaluate spray pattern: As you observe the spray pattern created by the sprayer, pay attention to its thickness and evenness. If the spray appears too heavy or uneven, it means you need to reduce the amount of thinning agent used. Conversely, if the spray is too light or inconsistent, increase the amount of thinning agent.
- Continuously adjust: Throughout your painting process, continuously make adjustments to meet your desired spray pattern. Regularly check and evaluate the consistency and quality of your sprayed paint until you achieve the results you desire.
In addition to adjusting the ratio, consider environmental factors like temperature and humidity. These conditions can impact the viscosity of the thinned paint, necessitating further modifications to maintain an optimal spraying consistency. Pay close attention to these factors throughout your painting process and make any necessary adjustments accordingly.
Achieving professional-level results with your oil-based paint sprayer requires attention to detail and continuous evaluation. Don’t settle for less than perfection – adjust and refine until you achieve the best possible spray pattern for your project. Start thinning your oil-based paint today and unlock the full potential of your sprayer!
Remember, it’s crucial to properly store and dispose of oil-based paint materials. By following the guidelines for storage and disposal, you can avoid any potential paint disasters.
Proper storage and disposal of materials
It is important to remember the keywords, “proper storage and disposal of materials,” when working with oil-based paints. To ensure the longevity of the paint and prevent accidents, store paint containers in a cool, dry place away from direct sunlight or sources of heat. Additionally, it is crucial to keep all containers tightly sealed to prevent evaporation or leakage.
When disposing of used thinning agents, paint cans, and other waste materials, it is essential to act responsibly and follow local regulations and guidelines. Proper disposal methods help protect the environment from contamination.
When handling oil-based paint and thinning agents, exercise caution. Wear appropriate protective clothing such as gloves, goggles, and a respirator mask to minimize direct contact with these substances. Working in a well-ventilated area is also necessary to avoid inhalation of fumes.
It is always recommended to refer to the manufacturer’s recommendations for specific instructions on storing and disposing of oil-based paint and its associated materials. Different brands may have varying guidelines based on their product composition.
Conclusion
To conclude, thinning oil-based paint for a sprayer requires careful consideration of the paint’s viscosity and the specific sprayer being used. The goal is to achieve a consistency that is suitable for spraying while still maintaining the paint’s integrity.
When thinning oil-based paint for a sprayer, it is important to use the appropriate thinner recommended by the paint manufacturer. Different types of thinners may be required for different oil-based paints, so it is essential to follow the manufacturer’s instructions. Additionally, it is important to gradually add the thinner to the paint, mixing well after each addition until the desired consistency is achieved. This process ensures that the paint is properly thinned without compromising its quality or performance.
Furthermore, it is important to note that thinning oil-based paint too much can result in an inferior finish, as the paint may become too watery and not adhere properly to the surface. On the other hand, not thinning the paint enough can cause clogs in the sprayer and lead to an uneven application. Therefore, it is crucial to find the right balance in thinning the paint to achieve optimal results.
In order to ensure successful thinning of oil-based paint for a sprayer, it is recommended to test the thinned paint on a small, inconspicuous area before proceeding with the entire project. This allows for adjustments to be made if necessary, ensuring that the desired results are achieved. Additionally, it is important to clean the sprayer thoroughly after each use to prevent any leftover residue from affecting future projects.
By following these suggestions and using the appropriate thinner, individuals can effectively thin oil-based paint for a sprayer, achieving a smooth and even application while preserving the paint’s quality.
Keywords: conclusion
Some Facts About How To Thin Oil Based Paint for Sprayer:
- ✅ Thinning oil-based paint for a sprayer is important for achieving a smooth finish and easy application. (Source: propaintersguide.com)
- ✅ Thinning can be done using lacquer thinner, turpentine, or mineral spirits. (Source: homeguidecorner.com)
- ✅ The recommended thinning ratio is typically 1 part thinning agent to 3 parts paint. (Source: househappy.co.uk)
- ✅ Straining the paint and using clean equipment are important steps to ensure quality results. (Source: kingsframingandartgallery.com)
- ✅ Thinning oil-based paint allows for faster coverage, a more consistent finish, and the ability to reach tight or hard-to-reach areas. (Source: paintspraypro.com)
FAQs about How To Thin Oil Based Paint For Sprayer
FAQ 1: How should I thin oil-based paint for a sprayer?
Answer: To thin oil-based paint for a sprayer, you can use a thinner such as mineral spirits or turpentine. Follow the manufacturer’s instructions and typically mix at a ratio of 1 part thinner to 3 parts paint. Stir the mixture thoroughly until it reaches a more liquid-like consistency.
FAQ 2: Can I use water-based paints instead of oil-based paints for spray guns?
Answer: Yes, water-based paints, also known as latex paints, are better suited for spray guns. They are easier to work with, offer quicker drying time, and can be cleaned up with water. However, oil-based paints have their advantages, such as durability, heat resistance, and richer colors.
FAQ 3: What are the safety precautions to take when thinning oil-based paint for a sprayer?
Answer: When working with oil-based paint and thinning agents, it is important to wear protective clothing, including a face mask and goggles. Work in a well-ventilated area to avoid inhaling harmful fumes. Follow the manufacturer’s instructions for proper handling, storage, and disposal of the materials.
FAQ 4: Can all types of paint sprayers handle oil-based paint?
Answer: No, not all paint sprayers are compatible with oil-based paint. Before using oil-based paint with a sprayer, check the instructions of your specific sprayer to ensure compatibility. Some sprayers may require different thinning ratios or additional equipment to effectively spray oil-based paint.
FAQ 5: How does thinning oil-based paint affect its characteristics?
Answer: Thinning oil-based paint can affect its characteristics such as color and drying time. Thinned paint may require additional coats for complete coverage. It is important to follow the recommended ratios and mixing instructions to achieve the desired consistency and avoid issues like sinking in or dripping messy edges.
FAQ 6: Can I use oils or oil-based mediums to thin oil-based paint for a sprayer?
Answer: Yes, oils such as linseed oil or safflower oil can be used for thinning oil-based paint, especially for glazing techniques. They result in a higher viscosity and glossier appearance. However, it is important to use oils carefully to avoid sinking in. Mixing oil-based mediums with solvents can also create different effects like faster drying or glossier finishes.
Leave a Reply