A paint sprayer can be a game-changer for any home improvement project, offering the ability to achieve a high-quality finish with less effort than traditional paint brushes or rollers. But like any tool, paint sprayers are not immune to operational problems. When your paint sprayer stops spraying, it can bring your project to a frustrating halt. Understanding the common issues that can plague these devices, from clogs to mechanical failures, is critical in troubleshooting and keeping your painting project on track.
This article aims to provide a comprehensive guide to diagnosing and fixing common issues of why is my paint sprayer not spraying, and tackling the question of what prevents your paint sprayer from working correctly. By understanding the various factors that can lead to this problem – such as improper maintenance, incorrect usage, or component wear and tear – you can better identify the root cause and apply the most effective solution. Whether you’re an experienced DIYer or a novice just starting out, this information will help you minimize downtime and keep your paint sprayer in peak operating condition.
Table of Contents
Key Takeaways:
- Lack of pressure or power may be causing the paint sprayer to not spray properly.
- Inconsistent fluid stream and spray pattern can indicate issues with the nozzle or air cap.
- Cleaning and maintaining the sprayer system regularly can help prevent clogs and ensure optimal performance.
Introduction: Understanding the MECE Framework and its importance in analyzing paint sprayer issues
Understanding the MECE Framework is crucial when analyzing issues with paint sprayers. The MECE (Mutually Exclusive, Collectively Exhaustive) Framework is a method that helps break down complex problems into distinct and comprehensive components. By applying this framework to paint sprayer issues, one can ensure that all potential causes and solutions are considered systematically and comprehensively.
Applying the MECE Framework to paint sprayer issues involves analyzing the problem in a manner that ensures all possible causes are explored, while also ensuring that these causes do not overlap or duplicate. This approach allows for a structured and organized analysis of the problem, minimizing the chances of overlooking key factors. By breaking down the issue into mutually exclusive components, it becomes easier to identify the root cause and determine the most effective solution.
One unique aspect of the MECE Framework is its ability to address all potential causes of paint sprayer issues, leaving no stone unturned. This ensures a well-rounded analysis, increasing the chances of finding the most appropriate solution. By considering all possible factors, such as clogged nozzles, insufficient pressure, or faulty equipment, one can identify the precise cause and take the necessary steps to rectify the problem.
Pro Tip: When analyzing paint sprayer issues, applying the MECE Framework can greatly enhance the efficiency and success of the troubleshooting process. By systematically breaking down the problem and considering all potential causes, you can ensure a comprehensive analysis and accurate identification of the issue.
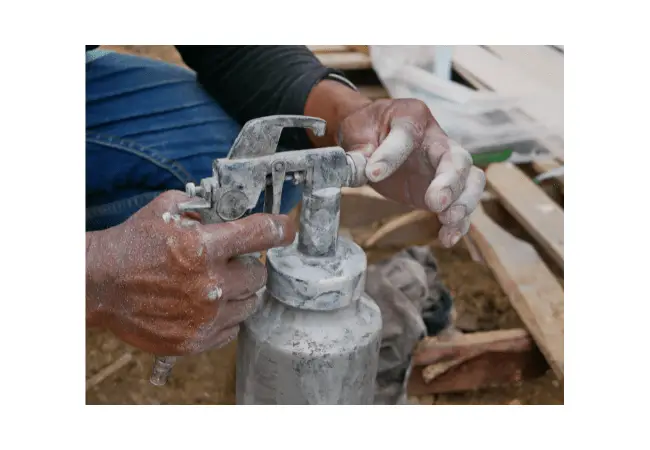
Common issues with paint sprayers
.jpg)
Discover the common issues that can arise with paint sprayers, including lack of pressure, inconsistent fluid stream, and spray pattern problems. Explore how these issues can impact your painting experience and learn the possible causes behind them. Uncover the solutions to sprayer startup problems, motor issues, and fluid leaks. Find out why your paint sprayer may not be spraying properly and how to troubleshoot these concerns effectively.
Lack of pressure or power
In paint sprayers, a lack of pressure or power can hinder the proper functioning of the device. This issue can arise due to various reasons, leading to inefficiencies in the spraying process. It is crucial to understand the root causes behind this problem and troubleshoot it effectively.
- The first common cause of a lack of pressure or power in a paint sprayer is an inadequate supply of air or fluid. This could be due to a clogged air cap or nozzle, low-pressure settings, or insufficient paint supply.
- Inefficient motor performance can also result in a lack of pressure or power. Motor problems such as faulty wiring, worn-out brushes, or a malfunctioning switch can restrict the sprayer’s ability to generate sufficient force.
- Improperly fitted seals and parts within the sprayer system can lead to leaks and loss of pressure. Identifying and replacing any missing or ill-fitting components is essential for maintaining optimal performance.
- Insufficient maintenance and cleaning practices can cause clogs in the spray gun filter or air passages, obstructing the flow of fluid and reducing pressure output.
- Inconsistent electrical connections, including loose wires or faulty switches, can also contribute to a lack of pressure from the sprayer.
To troubleshoot these issues efficiently, several techniques are available:
- Checking and adjusting the ON-OFF toggle switch and pressure control knob ensures that they are in their proper positions for optimal pressure output.
- Verifying the functionality of electrical covers and power lights helps identify any potential electrical problems affecting pressure generation.
- Tightening the nozzle and inspecting the air cap for any damage guarantees proper alignment and flow management during spraying operations.
- Cleaning debris or obstructions from air caps and passages allows for unrestricted airflow and improved pressure control.
- Regularly checking for clogs within the spray gun filter system is crucial in maintaining consistent spray patterns and preventing loss of pressure.
- Routine cleaning and maintenance of all spray gun parts, including seals and valves, help avoid the accumulation of residues that could impede pressure generation.
- Ensuring a clean and unclogged spray gun filter is important to maintain optimal pressure output.
It is worth noting that addressing the issue of a lack of pressure or power in paint sprayers requires careful troubleshooting techniques for both electrical and mechanical components. By following these guidelines, users can maintain their sprayer’s performance at an optimal level.
A true fact: According to a study published by The Family Handyman, one of the most common issues faced by DIY enthusiasts when using paint sprayers is the lack of pressure or power in their devices.
Inconsistent fluid stream and spray pattern
When using a paint sprayer, one common issue that may arise is an inconsistent fluid stream and spray pattern. This can cause uneven coverage and affect the overall finish of the paint job.
A 5-Step Guide to Addressing the issue of inconsistent fluid stream and spray pattern with a paint sprayer:
- Check the nozzle for any blockages or clogs that may be affecting the flow of paint. Clean or replace the nozzle as necessary.
- Inspect the air cap for any damage or wear that could be causing inconsistencies in the spray pattern. Replace if needed.
- Ensure that the sprayer is properly calibrated and adjusted according to the manufacturer’s instructions. This includes checking the pressure settings and making any necessary adjustments.
- Clean the air passages in the sprayer system to remove any debris or buildup that could be obstructing the flow of paint. Use a brush or compressed air to clear out any obstructions.
- Regularly maintain and clean all components of the sprayer system, including filters, seals, and parts, to prevent any issues that could lead to an inconsistent spray pattern.
Additionally, it is important to note that using high-quality paints and thinning them properly can also help improve the consistency of the fluid stream and spray pattern. Poor quality paints or incorrect thinning ratios can lead to clogs, inconsistency, or other issues with the sprayer. By following these troubleshooting techniques and maintaining your paint sprayer regularly, you can ensure optimal performance and achieve a consistent and professional-looking finish on your projects.
Spray pattern won’t adjust
When experiencing issues with a paint sprayer, one common problem that may arise is the inability to adjust the spray pattern. This can hinder the desired outcome of the painting project and needs to be addressed for optimal performance.
- Lack of Adjustability: The spray pattern may remain fixed, preventing any adjustments to its width or intensity.
- Stuck Adjustment Knob: The knob responsible for changing the spray pattern may become jammed or difficult to turn.
- Limited Range of Adjustability: The adjustment mechanism may only allow for minimal changes in the spray pattern, limiting the user’s options.
- Ineffective Spray Pattern Control: Despite attempting to adjust the pattern, it may still not achieve the desired result.
It is essential to troubleshoot and identify the underlying causes of a spray pattern not adjusting as expected. This issue can be caused by various factors such as a faulty adjustment knob mechanism, clogged nozzle or air passages, or even an improper setup of seals and parts within the sprayer system. A thorough inspection and cleaning of these components are necessary for resolving this problem.
To ensure optimal performance and avoid frustration during your painting project, it is crucial to address any issues with adjusting the spray pattern promptly. By troubleshooting and resolving these problems early on, you can achieve the desired results efficiently. Don’t let a malfunctioning spray pattern impede your progress – take action now to ensure a smooth painting experience.
Sprayer not spraying liquid properly
In professional settings, it is important to understand the issues that can arise when a paint sprayer is not spraying liquid properly. This problem can occur due to various reasons and can hinder the efficiency and effectiveness of the paint sprayer.
To troubleshoot the issue of a sprayer not spraying liquid properly, follow these 4 steps:
- Check the ON-OFF toggle switch and pressure control knob: Ensure that both the switch and knob are in the correct positions and functioning properly. Sometimes, a simple adjustment or resetting may resolve the issue.
- Tighten the nozzle and check the air cap: Loose connections can result in improper spray patterns. Tighten the nozzle securely to avoid any leakage or inconsistency in spraying. Additionally, inspect the air cap for any clogs or blockages that may be obstructing proper fluid flow.
- Clean the air cap and air passages: Over time, paint residue or debris can accumulate within the air cap and passages, leading to poor spray performance. Regularly clean these areas using appropriate cleaning solutions and brushes to ensure optimal functionality.
- Check for clogs and clean the spray gun filter: A clogged spray gun filter can restrict proper fluid flow, causing issues with spraying liquid effectively. Remove the filter according to manufacturer instructions and clean it thoroughly to remove any accumulated debris or contaminants.
By following these troubleshooting steps, you can address issues related to a sprayer not spraying liquid properly and with precision.
It is essential to note that regular cleaning and maintenance of your paint sprayer system is crucial for its optimal performance. Neglecting maintenance can cause various problems such as inconsistent spray patterns, lack of pressure or power output, motor problems, fluid leaks, etc., further hindering its ability to spray liquid efficiently.
To ensure maximum productivity and longevity of your paint sprayer, incorporate regular cleaning practices into your maintenance routine. By doing so, you minimize potential issues that could disrupt your workflow while benefiting from consistent and reliable spraying performance.
No one wants to deal with the frustration of a paint sprayer that does not spray liquid properly. By taking the time to troubleshoot and maintain your equipment, you can avoid unnecessary delays or complications in your painting projects. Don’t let a malfunctioning sprayer impede your progress – make sure to address any issues promptly and keep your painting endeavors on track!
Paint sprayer pattern problems: When your sprayer decides to create modern art instead of a smooth finish.
Paint sprayer pattern problems
- Checking the nozzle: The first step in addressing paint sprayer pattern problems is to check the nozzle. Ensure that it is properly tightened and aligned with the spray gun. A loose or misaligned nozzle can cause uneven spray patterns.
- Inspecting the air cap: Next, inspect the air cap of the sprayer. The air cap plays a crucial role in shaping and controlling the spray pattern. Make sure that it is clean and free from any obstructions or buildup.
- Cleaning air passages: Clogged air passages can also lead to paint sprayer pattern problems. Use a suitable cleaning solution to remove any debris or residue that may be blocking the airflow through the sprayer.
- Adjusting pressure settings: Incorrect pressure settings can result in an inconsistent spray pattern. Check and adjust the pressure control knob according to the manufacturer’s recommendations for optimal results.
- Testing with water: Finally, before using the paint sprayer on a project, it is advisable to perform a test spray with water to ensure that the spray pattern is even and consistent. This will help identify any remaining issues that need to be addressed.
By following these steps, you can effectively troubleshoot and resolve paint sprayer pattern problems, ensuring smooth and precise paint application.
In addition to these techniques, it is important to regularly maintain your paint sprayer system by cleaning and lubricating its components as recommended by the manufacturer. This helps prevent potential issues with the spray pattern and ensures optimal performance of your paint sprayer over time.
Sprayer starts up but does not draw in paint
The issue of a paint sprayer starting up but not drawing in paint is a common problem that can hinder the proper functioning of the sprayer. This issue occurs when the sprayer fails to pull in the paint from the container, resulting in no paint being sprayed onto the surface.
To troubleshoot this issue, you can follow these 5 steps:
- Check the suction tube: Ensure that the suction tube is properly connected and submerged in the paint container. If it is loose or not deep enough, it may not be able to draw in paint effectively.
- Clean the suction filter: The sprayer’s suction filter may become clogged over time with debris or dried paint particles. Remove the filter and clean it thoroughly to ensure smooth paint flow.
- Prime the pump: Sometimes, air pockets may form within the pump system, preventing proper paint suction. To eliminate these air pockets, prime the pump by filling a container with water and running it through the sprayer until water is consistently drawn into the system.
- Adjust fluid levels: Ensure that there is an adequate amount of paint or coating material in the container for proper suction. If the level is too low, it can cause issues with drawing in paint.
- Inspect and replace worn parts: Check for any worn or damaged parts within the fluid transfer system, such as gaskets or O-rings. Replace any faulty components that may be hindering proper suction.
By following these steps, you can address the issue of a sprayer starting up but not drawing in paint effectively and get your sprayer back to optimal performance.
In addition to these troubleshooting techniques, it is important to regularly clean and maintain your sprayer system to avoid any potential issues. Keeping all components clean and free from debris will help ensure consistent and reliable performance from your paint sprayer.
One common cause of this issue could be a clogged spray gun filter which restricts proper paint flow to the nozzle. Cleaning the spray gun filter regularly and ensuring it is free from any clogs can help prevent this problem.
In a true history, a professional painter encountered this issue while working on a project. Despite having a functional sprayer, it was not drawing in paint properly. After following the troubleshooting steps mentioned above, he discovered that the suction tube was not fully submerged in the paint container, causing the issue. Once he adjusted the tube’s position and ensured it was properly connected, the sprayer started drawing in paint correctly again. This experience highlighted how a simple oversight can lead to such a problem, but also how easily it can be resolved through proper troubleshooting techniques.
If your paint sprayer’s motor were a person, it would be the laziest employee at the office, just refusing to do any work.
Motor problems
- Lack of power or insufficient pressure: One common motor problem is the failure to generate enough power or pressure, resulting in an inadequate spray force. This can lead to uneven coverage and unsatisfactory results.
- Inconsistent fluid stream and spray pattern: Another motor-related issue is when the fluid stream and spray pattern become inconsistent. This can result in uneven application of paint, with areas that are oversprayed or undersprayed.
- Sprayer starts up but does not draw in paint: Some paint sprayers may experience a problem where the motor starts up but fails to draw in the paint from the container. This can be caused by issues such as a clogged tube or malfunctioning suction mechanism.
- Motor malfunctions: Finally, paint sprayers may encounter overall motor malfunctions, such as overheating, unusual noises, or failure to start. These problems can disrupt the entire spraying process and require attention for proper resolution.
It’s important to address these motor problems promptly to ensure optimal performance of the paint sprayer. Regular maintenance and troubleshooting techniques should be applied to identify and rectify any motor-related issues. By doing so, users can maintain a functional and efficient sprayer system that delivers consistent results throughout their painting projects.
Keywords: motor problems
Missing or ill-fitting seals and parts
- Seal issues: One common problem is when seals are missing or not properly fitted. The function of seals is to prevent leakage and ensure a secure connection between different parts of the sprayer. If these seals are missing or ill-fitting, it can lead to fluid leaks and inconsistent spray patterns.
- Part compatibility: Another issue arises when parts that are not compatible with the paint sprayer are used. Each sprayer model has specific requirements for its components, such as nozzles, air caps, and filters. Using incorrect or incompatible parts can result in poor spray performance and hinder the proper functioning of the sprayer.
- Wear and tear: Over time, seals and other parts of the paint sprayer may experience wear and tear. This can be due to repeated use, exposure to chemicals, or improper maintenance. If these worn-out parts are not replaced or repaired promptly, it can lead to a decrease in pressure, fluid leaks, and overall inefficiency of the sprayer.
- Poor installation: In some cases, issues may arise due to incorrect installation or assembly of seals and other components. It is essential to follow the manufacturer’s instructions carefully while installing these parts to ensure they are fitted correctly. Failure to do so can result in the malfunctioning of the paint sprayer.
Addressing missing or ill-fitting seals and parts in a timely manner is crucial for maintaining the optimal performance of your paint sprayer. By ensuring proper seal placement, using compatible components, regularly replacing worn-out parts, and correctly installing all elements, you can mitigate potential issues related to missing or ill-fitting seals and parts. This will help to ensure smooth operation and consistent spray patterns, leading to better paint application results.
Fluid leaks
- One possible cause of fluid leaks is a loose or damaged seal. If the seal around the nozzle or other components is not properly tightened or has become worn or torn, it can allow for liquid to escape.
- Clogs in the spray gun filter can also lead to fluid leaks. When the filter becomes blocked, it can create pressure buildup within the system, causing liquid to be forced out through any available openings.
- Another potential source of fluid leaks is a malfunctioning valve or pressure control mechanism. If these components are not functioning properly, they may not be able to effectively regulate the flow of liquid, resulting in leakage.
- Damage or wear to the hose connecting the sprayer to its power source can also contribute to fluid leaks. If there are cracks or holes in the hose, it can allow liquid to seep out during operation.
- Inconsistent cleaning and maintenance of the sprayer system can also lead to fluid leaks over time. If residue and debris are allowed to build up within the system, it can affect its ability to properly contain and direct liquid during spraying.
It’s important to address fluid leaks promptly as they can result in wasted paint, uneven spray patterns, and overall decreased performance of the paint sprayer system.
To troubleshoot fluid leaks, check for loose or damaged seals and tighten them accordingly. Clean and unclog the spray gun filter regularly. Inspect valves and pressure control mechanisms for proper functioning and replace any faulty parts if necessary. Ensure that hoses are intact and free from damage. Regularly clean and maintain the entire sprayer system to prevent buildup that could lead to leaks.
Troubleshooting techniques for paint sprayer issues
When it comes to troubleshooting paint sprayer issues, there are several techniques you can follow. From checking the ON-OFF toggle switch and pressure control knob to cleaning air passages and maintaining the sprayer system, we’ll cover all the important steps to keep your paint sprayer spraying smoothly. Let’s dive into each of these techniques and ensure that your painting projects stay on track.
Checking the ON-OFF toggle switch and pressure control knob
The ON-OFF toggle switch and pressure control knob are two important components that play a vital role in the operation of a paint sprayer. It is crucial to properly check these components to ensure that the sprayer functions at its optimal level.
To check the ON-OFF toggle switch and pressure control knob, it is recommended to follow these six steps:
- Inspect the ON-OFF toggle switch: It is important to ensure that the switch is in the correct position and securely connected to the power source. If there are any loose connections or damage, it is advisable to replace the switch.
- Test the pressure control knob: The pressure control knob should be turned clockwise to increase the pressure and counterclockwise to decrease it. While adjusting the pressure, it is advisable to listen for any unusual noises or vibrations.
- Verify power supply: To ensure that there is a stable power supply to the paint sprayer, it is important to check if other electrical devices in the vicinity are functioning properly.
- Perform a visual inspection: It is recommended to examine the exterior of the paint sprayer for any physical damage or signs of wear and tear. Loose wires, frayed cords, or bent pins should be looked for as they may affect the performance of the sprayer.
- Test functionality: Turning on the paint sprayer and observing if it starts up smoothly without any issues or delays is an important step. It is also important to check if both the toggle switch and pressure control knob respond accordingly.
- Seek professional assistance if needed: If any difficulties or abnormalities are encountered during this process, it is advisable to consult a qualified technician who can further troubleshoot and repair the paint sprayer.
By checking the ON-OFF toggle switch and pressure control knob, these essential components can be ensured to function correctly, thereby enabling proper spraying operations with the paint sprayer for achieving optimal results.
Troubleshooting electrical cover and power light
A 4-Step Guide to troubleshooting electrical cover and power light:
- Check the electrical cover for any visible damage or loose connections. Ensure that all wires are securely connected and there are no exposed or frayed wires that could potentially cause a malfunction.
- Inspect the power light on the paint sprayer. If the light is not turning on, try replacing the bulb or checking if it is properly screwed in. If the issue persists, there may be a problem with the wiring or internal components of the sprayer that requires professional assistance.
- Test the power source by plugging another device into the same outlet to see if it functions correctly. If other devices work properly, then the issue likely lies within the paint sprayer itself.
- If none of these steps resolve the problem, consult the manufacturer’s manual or contact their customer support for further guidance and troubleshooting steps specific to your paint sprayer model.
It is important to note that troubleshooting techniques may vary depending on different paint sprayer models and brands. It is always recommended to refer to your specific product manual for detailed instructions.
Overall, addressing any issues with the electrical cover and power light of your paint sprayer is crucial for maintaining optimal performance. By taking proactive measures to troubleshoot these problems, you can ensure that your paint sprayer functions efficiently and delivers consistent results without interruptions.
Tightening the nozzle and checking the air cap
To effectively address concerns related to tightening your nozzle and checking your air cap, it is important to follow these steps:
- Inspect the nozzle – Carefully examine the nozzle for any signs of damage or wear. Ensure it is securely tightened onto the paint sprayer gun. If there are any cracks or chips, replace the nozzle with a new one to ensure proper functionality.
- Check the air cap – Verify that the air cap is securely fastened to the paint sprayer gun. Inspect it for any dirt or debris that may be obstructing airflow. Clean it thoroughly with an appropriate solvent if necessary.
- Adjust the air cap – Depending on the desired spray pattern, adjust the position of the air cap accordingly. This can be done by rotating it clockwise or counterclockwise. Make sure it is tightly locked into place once adjusted.
- Test for proper airflow – Without paint in the sprayer, trigger the gun and ensure there is a steady flow of air coming out from both the nozzle and air cap. If there are any irregularities, further inspection and cleaning may be required.
- Reassemble and test – After performing all necessary checks and adjustments, reassemble all components and test with paint. Verify that the spray pattern is even, consistent, and free from any problems previously encountered.
By following these steps, you can effectively address concerns related to tightening your nozzle and checking your air cap. Properly securing these components will not only enhance performance but also help maintain optimal functionality over time.
Cleaning air cap and air passages
The cleaning and maintenance of the air cap and air passages in a paint sprayer is crucial for its optimal performance. Neglecting these components can lead to issues such as inconsistent spray patterns, clogs, and reduced efficiency. Therefore, it is important to regularly clean the air cap and air passages to keep the sprayer functioning properly.
To clean the air cap and air passages effectively, follow these 3 steps:
- Remove the air cap: Start by turning off the paint sprayer and disconnecting it from the power source. Then, unscrew the air cap located at the front of the spray gun. Carefully remove it without applying excessive force to avoid any damage.
- Clean the air cap: Dip a soft brush or toothbrush in a mixture of warm water and mild detergent. Gently scrub the inside and outside of the air cap to remove any paint residue or debris that may have accumulated. Pay close attention to the small holes or slits in the cap to ensure they are completely free of clogs.
- Clean the air passages: Use a cleaning brush or pipe cleaner to reach inside the passages where airflow occurs in your specific paint sprayer model. Insert it carefully into each opening and move it back and forth to dislodge any trapped particles or dried paint. Be thorough in this step as clogged air passages can significantly affect spray pattern consistency.
After completing these steps, reassemble all components, ensuring they are securely tightened and positioned correctly. Properly cleaning both the air cap and air passages will enhance performance by allowing for adequate airflow and maintaining consistent spray patterns throughout your painting projects.
It is worth mentioning that regular maintenance of these components will not only help prevent issues but also prolongs the overall lifespan of your paint sprayer system. By incorporating this simple cleaning routine into your regular maintenance schedule, you can ensure optimal performance every time you use your sprayer while avoiding potential troubleshooting scenarios in other parts of the system.
Clearing clogs and cleaning your spray gun filter: the secret to a sprayer that won’t turn your painting project into a modern art masterpiece.
Checking for clogs and cleaning spray gun filter
Checking for clogs and cleaning the spray gun filter is an essential step in troubleshooting paint sprayer issues. This process ensures that any blockages or debris that may affect the spraying performance of the paint sprayer are eliminated.
- Start by turning off the paint sprayer and disconnecting it from the power source to ensure safety.
- Remove the spray gun from the hose or airless pump, depending on the type of sprayer being used.
- Locate the filter, which is usually located near the inlet where the paint enters the spray gun. It is important to note that not all spray guns have filters, so this step may vary depending on your specific model.
- Carefully remove the filter and inspect it for any signs of clogging or dirt accumulation. If there is a significant buildup, clean it thoroughly using an appropriate solvent or by rinsing it with water if applicable. Make sure to remove all traces of dirt or debris.
By regularly checking for clogs and cleaning the spray gun filter, you can prevent issues such as inconsistent spray patterns or reduced pressure. This maintenance step helps ensure the optimal performance and longevity of your paint sprayer.
It is crucial to mention that different models of paint sprayers may have unique features in their filtration systems, so always refer to your manufacturer’s instructions for specific guidance on how to clean and maintain your spray gun filter.
Understanding how to properly check for clogs and clean the spray gun filter can save you time and money by avoiding unnecessary repairs or replacements. By incorporating this step into your regular maintenance routine, you can ensure that your paint sprayer consistently delivers high-quality results.
True History:
A professional painter once overlooked the importance of checking for clogs and cleaning their spray gun filter regularly. As a result, they experienced frequent issues with their paint sprayer, including inconsistent spraying patterns and reduced pressure. After consulting with a technician, they learned about the significance of this maintenance step and started incorporating it into their routine. Since then, they have noticed a significant improvement in the performance of their paint sprayer, which has allowed them to complete projects more efficiently and achieve better results.
Cleaning and maintaining the sprayer system
Cleaning and maintaining the sprayer system is crucial to ensure its proper functioning and safety. To start, disconnect the sprayer from the power source and release any built-up pressure in the system. This step is essential for safety reasons and to prevent accidental spraying.
Next, remove the spray gun from the sprayer, including the nozzle and air cap. Thoroughly clean these components using an appropriate cleaning solution or solvent. It is important to pay special attention to any clogs or debris that may have accumulated.
Inspect and clean the internal parts of the sprayer system, such as filters and fluid passages. You can use a brush or compressed air to remove any residue or obstructions that may affect the flow of paint. This step helps maintain the consistent delivery of excellent spray patterns.
Check all seals, gaskets, and O-rings for wear or damage. If any of these parts are faulty, replace them to ensure proper sealing and prevent leaks.
Reassemble the sprayer system, ensuring that all components are securely fastened. Double-check that the nozzle is tightly attached to prevent any leakage during operation.
Before using the sprayer again, it’s recommended to test it with clean water or a compatible flushing solution. This step ensures that all components are functioning properly and there are no remaining contaminants.
By following these steps regularly, you can maintain a clean and well-functioning sprayer system that consistently delivers excellent spray patterns and avoids any potential issues in your painting projects.
It’s worth noting that regular maintenance not only improves performance but also extends the lifespan of your paint sprayer equipment. This saves you time and money in the long run.
Now, it’s time to put on your detective hat and search for the culprit: a clogged spray gun filter. Regular cleaning and maintenance will help prevent such issues and keep your sprayer system in top-notch condition.
Checking and cleaning the spray gun filter
The spray gun filter is an important component of a paint sprayer. Regularly checking and cleaning the spray gun filter is crucial for optimal performance and to avoid any issues during the painting process.
-
- Step 1: Check for clogs or blockages
Ensure that the spray gun filter is not clogged or blocked, as this can disrupt the flow of paint and result in inconsistent spraying. Inspect the filter for debris or buildup, such as dried paint or particles, and carefully remove them using a soft brush or compressed air.
-
- Step 2: Clean the spray gun filter
Once any clogs or blockages are identified, it is essential to thoroughly clean the spray gun filter. Follow the manufacturer’s instructions to remove the filter from the spray gun. Rinse it with warm water and gently scrub it using a mild detergent or cleaning solution. Make sure to eliminate all dirt, paint, or debris. Rinse again until the water runs clear.
-
- Step 3: Reassemble and test
After cleaning, allow the spray gun filter to completely dry before reassembling it into the paint sprayer. Ensure that all components are properly aligned and secured according to the manufacturer’s instructions. Once reassembled, perform a test spray to check if any issues have been resolved and if the spray gun filter is functioning effectively.
By regularly checking and cleaning the spray gun filter, you can prevent potential problems like clogging or blockages that can hinder the proper functioning of your paint sprayer. It is an essential maintenance task that helps maintain optimal performance and ensures consistent results throughout your painting projects.
Conclusion: Maintaining and troubleshooting your paint sprayer for optimal performance
Maintaining and troubleshooting your paint sprayer is essential for optimal performance. Regular maintenance and addressing any issues promptly can help ensure that your sprayer functions effectively and provides high-quality results.
- Inspect and clean the paint sprayer regularly to prevent clogs and blockages. This involves removing any excess paint, debris, or residue from the sprayer components.
- Check the paint sprayer’s filters and replace them if necessary. Dirty or clogged filters can impede the flow of paint and affect the sprayer’s performance.
- Ensure that the paint sprayer’s nozzle is clean and free from any obstructions. A clogged or damaged nozzle can lead to uneven spraying or complete failure to spray.
- Check the paint viscosity and thin the paint if needed. Using paint that is too thick can cause the sprayer to clog or produce uneven coverage.
- Regularly inspect the paint sprayer’s hoses and connections to ensure they are secure and in good condition. Loose or damaged hoses can cause paint leakage or affect the sprayer’s performance.
- If the paint sprayer is not spraying, check the power source and make sure it is properly connected. Also, check the pressure settings and adjust them accordingly to achieve the desired spray pattern.
Finally, it is important to follow the manufacturer’s instructions and guidelines for your specific paint sprayer model. These instructions will provide further details on maintenance procedures and troubleshooting techniques to maximize your paint sprayer’s performance and longevity.
Some Facts About “Why Is My Paint Sprayer Not Spraying”:
- ✅ Insufficient piston-actuating air can cause no liquid to come out of the spray gun. (Source: Fusoseiki)
- ✅ A loose nozzle or worn-out air cap can result in an uneven spray pattern. (Source: Spraywell)
- ✅ Debris can get stuck in the liquid line, causing patchy or blocked spraying. (Source: Fusoseiki)
- ✅ Clogs can occur in the spray tip, spray gun filter, inlet screen, suction tube, and air filter. (Source: iFixit)
- ✅ Motor problems, lack of pressure, faulty electric outlet, damaged cords, or seized pump can prevent the paint sprayer from spraying. (Source: Tool Nerds)
FAQs about Why Is My Paint Sprayer Not Spraying
Why is my paint sprayer not spraying?
Answer: There can be several reasons why your paint sprayer is not spraying properly. Some common causes include a clogged suction filter, a loose suction tube at the inlet valve or end of the fluid pump, a stuck suction ball in the suction valve, a stuck, dirty, or worn-out outlet valve, insufficient paint or the suction tube not fully immersed in the paint, and the bypass knob (Prime Spray Valve) being in the “Spray” position. Checking and addressing these issues should help fix the problem.
What should I do if my paint sprayer has a loose nozzle and is producing an uneven spray pattern?
Answer: If your paint sprayer has a loose nozzle causing air to escape and producing an uneven spray pattern, you need to tighten the nozzle by turning it clockwise with a socket or line wrench. If the pattern remains uneven, try flipping the air cap to the opposite direction to determine the issue. If the problem persists, clean the air cap and clear the air passages. If that doesn’t work, consider replacing the air cap with a new one.
Why is my paint sprayer not picking up paint properly?
Answer: If your paint sprayer is not picking up paint properly, there could be several reasons behind it. Some common causes include a clogged suction filter, not enough paint reaching the spray gun due to the viscosity or length of the tube, debris stuck in the liquid line, insufficient grease on the piston set, or issues with the O-ring on the piston. You can try cleaning the suction filter, checking the paint flow, clearing any blockages, and ensuring proper lubrication to fix the problem.
What can I do if my paint sprayer is spitting or splattering?
Answer: Spitting or splattering paint can be frustrating, but there are a few things you can try to resolve the issue. First, make sure the reversible spray tip is in the SPRAY position, not the UNCLOG position. If that’s not the problem, check if the nozzle is loose, worn, or missing seals, as well as any paint build-up on the air cap or nozzle. Adjusting the air pressure, holding the gun closer to the surface, or using the correct paint viscosity can also help reduce spitting or splattering.
Why is my paint sprayer not maintaining pressure?
Answer: If your paint sprayer is not building or maintaining pressure, there are a few potential causes. You may need to replace or change the size of the spray tip, increase the pressure settings, clean the filters, check the valve, inspect the suction tube for air leaks, examine all connections, or service the fluid section. Additionally, thinning down the paint medium, straining the paint, or seeking advice from a service technician can also help fix the issue.
What should I do if my paint sprayer motor cuts out?
Answer: If your paint sprayer motor cuts out, there are a few possible reasons for this issue. It could be due to overheating, blocked vent holes, a faulty electrical outlet, damaged cords, a seized pump, or a damaged control/motor. Check for any obstructions blocking the vent holes, ensure proper ventilation, and try using a different electrical outlet to see if that resolves the problem. If the issue persists, you may need to have the motor or control unit inspected or replaced by a professional.
Leave a Reply