When it comes to tools that can significantly boost the efficiency of large painting jobs, paint sprayers are second to none. They offer the ability to coat large areas quickly while delivering a smoother finish than traditional brushes or rollers. However, like any equipment, a paint sprayer requires regular care and maintenance to keep it functioning optimally. Cleaning, in particular, is a critical aspect of this maintenance routine. Leaving paint in the sprayer can lead to clogging and poor performance while making the sprayer more difficult to clean in the future.
Whether you’re dealing with latex, oil-based paint, or a varnish, knowing how to clean a paint sprayer after each use is imperative. We will provide a detailed, step-by-step guide on how to effectively clean your paint sprayer, addressing the common challenges and offering tips on how to prevent potential issues. From the casual DIY hobbyist to the professional painter, this guide will ensure that your paint sprayer is always ready for the next project, helping you achieve the best finish every time.
Table of Contents
Key Takeaways:
- Importance of Cleaning a Paint Sprayer Gun: Regularly cleaning a paint sprayer gun is crucial for maintaining its functionality, preventing paint residue buildup, and ensuring efficient paint delivery and peak performance.
- Types of Paint Sprayer Guns: There are different types of paint sprayer guns, including airless spray guns, HVLP spray guns, and electric handheld spray guns. Understanding the type of gun you have will help you clean it properly.
- Cleaning Different Types of Paint Sprayer Guns: Each type of paint sprayer gun requires specific cleaning steps. For example, to clean an airless spray gun, you need to clean the unit, filters, gun, and hose, while an HVLP spray gun requires cleaning the paint cup, disassembling the gun for deep cleaning, and cleaning the spray nozzle and small parts.
- Additional Tips for Spray Gun Maintenance: Proper disposal of waste materials, preventing paint drying out between coats, and removing stuck-on paint from the gun and clothes are essential for spray gun maintenance. Innovative solutions like Safetykleen’s all-in-one parts cleaning services and Automatic Paintkleen machines can also help with efficient cleaning.
- Community Q&A and Conclusion: Answering common questions about cleaning spray guns, inviting readers to share their own tips and experiences, and emphasizing the importance of regular maintenance for longevity are important for a comprehensive conclusion.
Importance of Cleaning a Paint Sprayer Gun
Properly maintaining and cleaning a paint sprayer gun is vital for its functionality, performance, and paint delivery efficiency. This section will explore the importance of keeping a paint sprayer gun clean, including preventing paint residue buildup and ensuring peak performance. By adhering to proper maintenance practices, you can extend the lifespan of your paint sprayer and achieve optimal results in your painting projects.
Maintaining paint sprayer functionality
- Clean the unit, filters, gun, and hose: Regularly removing any paint residue or debris from these components helps prevent clogs and ensures smooth paint flow.
- Use recommended cleaning solutions: Different types of paints require specific cleaning solutions. Using the appropriate cleaning solution for water-based or oil-based paints helps maintain the integrity of the gun’s parts.
- Lubricate moving parts: Applying lubrication to movable components of the paint sprayer gun helps reduce friction and wear, ensuring smooth operation.
- Inspect and replace worn-out parts: Regularly check for any damaged or worn-out parts such as seals or gaskets. Replacing these parts in a timely manner prevents leaks and maintains optimal functionality.
Additionally, it is important to properly store the paint sprayer gun after each use to protect it from damage or contamination. This includes emptying and cleaning the paint cup, protecting delicate components from dust, and storing it in a clean and dry environment.
A pro tip for maintaining paint sprayer functionality is to keep a log of maintenance activities. This allows you to track when certain tasks were performed, such as cleaning filters or replacing parts, ensuring that regular maintenance is consistently carried out.
Keywords: maintaining paint sprayer functionality.
Preventing paint residue buildup
To prevent paint residue buildup in a spray gun, it is necessary to regularly clean and maintain the gun. Regular cleaning involves disassembling various parts of the gun such as the paint cup, nozzle, filters, and hose. Using specific cleaning solutions meant for water-based or oil-based paints ensures effective removal of any paint residues.
Cleaning an airless spray gun involves disassembling different parts such as filters, hoses, guns, and units for thorough cleaning. HVLP spray guns require cleaning of the paint cup and disassembling certain parts like the nozzle for deep cleaning. Electric handheld spray guns need proper cleaning of cups and flushing out all residual material from guns. Automotive spray guns necessitate removing air regulators along with careful disassembly for comprehensive cleaning using waste thinner.
Regular cleaning of the gun, filters, hose, and unit prevents paint residue buildup. Cleaning solutions specifically designed for water-based or oil-based paints should be used to clean the gun effectively. Proper maintenance and cleaning of the gun ensures that it delivers paint efficiently without clogging or splattering.
Preventing paint residue buildup also extends the lifespan of the sprayer gun by preventing damage to its internal components. By keeping the gun clean and free from paint residue, you can achieve consistent and professional-quality results with each use.
Ensuring efficient paint delivery and peak performance
Moreover, cleaning not only includes the outer parts of the gun but also involves disassembling certain components for deep cleaning. This ensures that all parts are free of any residual paint or debris that could affect the performance of the gun. It is also important to use the recommended cleaning solutions for water-based and oil-based paints as using improper solvents can damage the gun or result in inadequate cleaning. By following these steps, you can maintain efficient paint delivery and achieve peak performance with your spray gun.
Furthermore, in addition to regular cleaning and maintenance, there are additional tips for spray gun maintenance that can contribute to ensuring efficient paint delivery and peak performance. Proper disposal of waste materials prevents clogging or damage caused by debris in the system. Ensuring that paint does not dry out between coats reduces potential issues with uneven application or clogged nozzles. Cleaning stuck-on paint from both the gun itself as well as clothing helps to maintain functionality while also prolonging the lifespan of your equipment.
Types of Paint Sprayer Guns
When it comes to paint sprayer guns, there are different types that cater to specific needs. In this section, we will explore the variety of options available, including the highly efficient airless spray guns, the precision-focused HVLP spray guns, and the portable convenience of electric handheld spray guns. Each sub-section will shed light on the unique features and advantages of these paint sprayer gun variations.
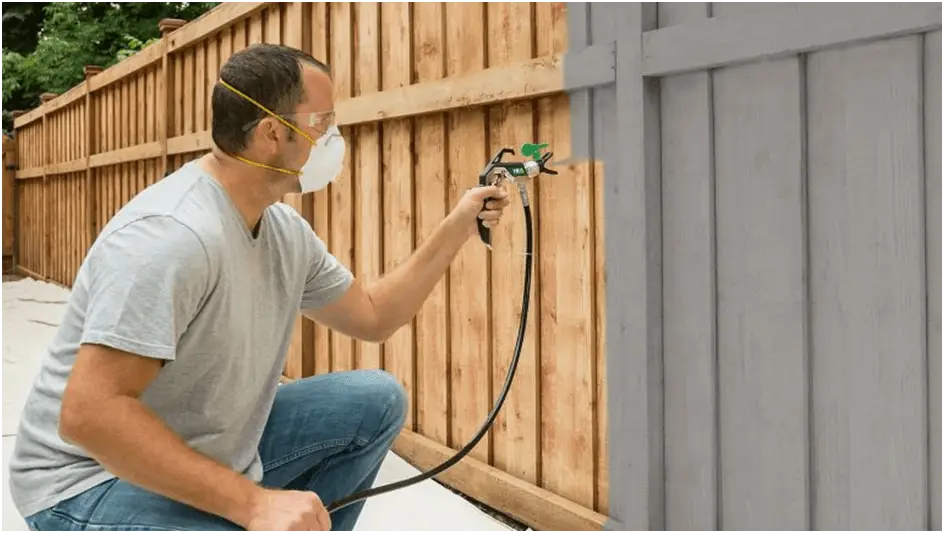
Airless spray guns
- They offer superior performance compared to other types of spray guns.
- With their ability to handle thick coatings and deliver consistent results, airless spray guns are widely used in various industries.
- These guns are particularly suitable for large-scale projects such as painting walls, exteriors, and industrial surfaces.
It is crucial to properly clean airless spray guns after every use to maintain their functionality and prevent paint residue buildup. Regular cleaning ensures that the gun operates at peak performance while preventing clogs or blockages that can affect the quality of paint delivery. Neglecting cleaning can lead to issues like uneven spraying or decreased efficiency.
To clean an airless spray gun effectively, one must thoroughly clean all components including the unit, filters, gun, and hose. This involves disassembling the gun and removing any residual paint by using recommended cleaning solutions designed for water-based or oil-based paints.
Proper maintenance of airless spray guns also includes additional tips such as ensuring proper disposal of waste materials, preventing paint from drying out between coats, and removing stuck-on paint from the gun and clothes.
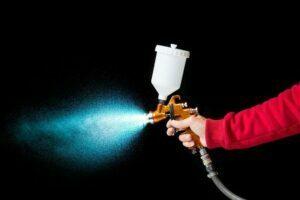
HVLP spray guns
In order to understand the importance of cleaning HVLP spray guns, it is essential to know how they function and their components. The following table provides an overview of the different parts that make up an HVLP spray gun:
| Component | Function |
|---|---|
| Spray Gun Body | Holds the paint and controls airflow and fluid flow |
| Fluid Nozzle | Determines the size of the spray pattern |
| Air Cap | Directs the airflow around the fluid nozzle to achieve desired atomization |
Proper cleaning of an HVLP spray gun is crucial for maintaining its functionality and achieving consistent results. It is recommended to clean the paint cup after each use to prevent residue buildup. Additionally, regular deep cleaning is necessary to ensure optimal performance. This involves disassembling the gun, cleaning all small parts, such as the spray nozzle, and thoroughly flushing out any remaining paint residues.
While previous paragraphs have covered general information about cleaning spray guns, unique details specific to HVLP guns have not been mentioned yet. When it comes to HVLP spray guns, it is important to pay attention to proper solvent usage for cleaning. Using solvents that are compatible with both water-based and oil-based paints ensures effective removal of any leftover residue without causing damage or clogs in the gun’s components.
By understanding the importance of regular maintenance and utilizing suitable cleaning techniques, professionals can maximize the lifespan of their HVLP spray guns while consistently achieving optimal results in their painting projects.
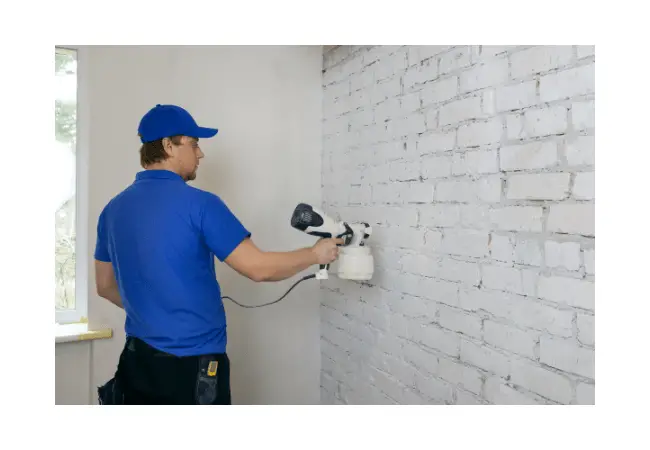
Electric handheld spray guns
When cleaning electric handheld spray guns, it is important to focus on areas such as the cup, nozzle, and small parts. These guns offer precise control over paint application, allowing for smooth and even coverage. The best part is that electric handheld spray guns are powered by electricity, eliminating the need for an air compressor. They typically have a built-in paint cup or container that holds the paint, making it easy to refill and continue painting.
Cleaning these spray guns is relatively straightforward, as they can be disassembled into smaller parts for thorough cleaning. Also, regular maintenance of electric handheld spray guns is essential to ensure their performance and longevity.
Cleaning the cup involves emptying any remaining paint and wiping out any excess material. Flushing the gun clean helps remove any remaining paint residue from the internal components. Additionally, cleaning the spray nozzle and small parts ensures proper functionality and prevents clogs or blockages.
Cleaning an electric handheld spray gun is not as thrilling as a crime scene investigation, but it’s crucial for maintaining the peak performance of the paint sprayer.
How to Clean an Airless Spray Gun
When it comes to cleaning an airless spray gun, there are a few key areas you’ll want to focus on: the unit, filters, gun, and hose. Each of these components plays a crucial role in maintaining the efficiency and longevity of your spray gun. Additionally, the choice of cleaning solution is vital, especially when dealing with different types of paints. In this section, we’ll explore the proper techniques and recommended cleaning solutions for ensuring your airless spray gun is in top-notch condition.
Cleaning the unit, filters, gun, and hose
- Start by disconnecting the paint sprayer from any power source and relieving pressure from the system. This can be done by turning off the power or releasing any remaining air or fluid pressure.
- Remove any attachments or accessories from the unit, such as filters or spray tips. These components should be cleaned separately according to manufacturer guidelines.
- Next, wipe down the exterior of the unit with a clean cloth to remove any dirt or debris. Pay special attention to areas around vents or openings that can accumulate dust.
- For cleaning the gun and hose, disassemble them according to manufacturer instructions. Use an appropriate cleaning solution recommended for your specific type of paint (water-based or oil-based) and follow proper safety precautions when handling solvents.
It’s important to thoroughly clean each part of the unit, including filters, gun, and hose, as residue can build up over time and affect the overall performance of your paint sprayer. Regular maintenance will ensure optimal functioning and longevity for your equipment.
Additionally, proper disposal of waste materials should be followed after cleaning to minimize environmental impact. To avoid paint drying out between coats, it’s advisable to keep your spray gun submerged in water or cleaner solution between use. If there is stuck-on paint on the gun or clothes after cleaning, special cleaners can be used to remove them effectively.
In pursuit of innovative solutions for cleaning paint sprayer guns, Safetykleen offers all-in-one parts cleaning services that provide effective removal of contaminants without damaging sensitive components. Another option is using Automatic Paintkleen machines, which offer efficient cleaning and help save time and effort in maintaining your spray gun.
Cleaning solutions that can handle even the messiest paint jobs, turning water-based and oil-based nightmares into squeaky clean sprayers.
Recommended cleaning solutions for water-based and oil-based paints
To effectively clean a paint sprayer gun, it is important to use the recommended cleaning solutions for water-based and oil-based paints. These solutions are specifically formulated to remove paint residue and keep the gun in optimal condition.
- For water-based paints, a mild detergent mixed with warm water can be used as a cleaning solution. This solution helps break down and remove water-based pigments from the gun.
- For oil-based paints, mineral spirits or paint thinners are commonly used as cleaning solvents. These solvents effectively dissolve oil-based pigments and make it easier to clean the gun.
- It is important to follow the manufacturer’s instructions when choosing a cleaning solution to ensure compatibility with the paint sprayer gun.
- After using the cleaning solution, it is essential to thoroughly rinse the gun with clean water to remove any residual solvent or detergent.
- Regularly inspecting and replacing filters in the spray gun can also help maintain its performance and prevent clogs caused by paint buildup.
While these cleaning solutions are effective for most paint sprayer guns, it’s important to note that some guns may require specific solvents or cleaners based on their design or materials. It is always best to refer to the manufacturer’s guidelines for proper cleaning instructions.
An additional helpful tip for maintaining a clean paint sprayer gun is to clean it immediately after each use. This prevents dried paint from accumulating and clogging the nozzle or other parts of the gun.
Overall, using recommended cleaning solutions for water-based and oil-based paints ensures that your paint sprayer gun remains in good working condition, delivering efficient and consistent results.
(Source: ‘1. Importance of Cleaning a Paint Sprayer Gun’)
How to Clean an HVLP Spray Gun
Cleaning an HVLP spray gun involves several crucial steps to maintain its functionality and ensure a flawless paint job. In this section, we will explore the essential sub-sections: cleaning the paint cup, disassembling the gun for deep cleaning, and cleaning the spray nozzle and small parts. By following these steps diligently, you can prolong the lifespan of your spray gun and achieve professional-level results in your painting projects. Remember, a properly cleaned spray gun is the key to achieving a smooth and even coating.
Cleaning the paint cup
To clean the paint cup effectively, follow these five steps:
- Empty the paint cup: Start by emptying any remaining paint from the cup into a container or waste disposal area. This will allow you to have a clear view of any dirt or residue that needs to be cleaned.
- Rinse with solvent: Next, rinse the paint cup with an appropriate solvent, such as mineral spirits or lacquer thinner. Use a brush or cloth to scrub away any stubborn deposits or dried paint. Make sure to thoroughly clean both the inside and outside of the cup.
- Remove any remaining debris: After rinsing, inspect the paint cup for any remaining debris or particles. Use compressed air or a small brush to remove any loose dirt or residue.
- Clean the lid and seals: Don’t forget to clean the lid and seals of the paint cup as well. These areas can accumulate dried paint and debris, which may affect proper sealing and cause leaks during spraying.
- Dry thoroughly before storage: Finally, ensure that the cleaned paint cup is completely dry before storing it. Any moisture left inside could lead to rusting or other damage over time.
By regularly cleaning your paint cup, you can prolong its lifespan and maintain optimal performance for your paint sprayer gun.
Additional Details:
It’s important to note that different types of paints may require specific cleaning solutions for effective removal from your spray gun’s components. Water-based paints typically require warm soapy water for cleaning, while oil-based paints may require more heavy-duty solvents like mineral spirits or turpentine.
True History:
A notable incident involving the importance of cleaning the paint cup occurred when a professional painter neglected to properly clean their gun after using oil-based paint. The residual paint left in the cup dried up and clogged the gun during the next use, resulting in uneven spray and wasted paint. This incident highlighted the significance of regular cleaning to prevent such issues and maintain peak performance of spray guns.
Unravel the mysteries of disassembling a gun for a deep cleaning spree!
Disassembling the gun for deep cleaning
Here is a 6-step guide on how to disassemble the gun for deep cleaning:
- Begin by disconnecting any power source and relieving pressure from the gun. This can be done by releasing any remaining paint or pressure through the nozzle.
- Remove the spray nozzle and any attachments from the front of the gun. Carefully unscrew or detach these parts, taking note of their proper placement for reassembly.
- Next, remove the paint cup or container from the gun body. This may involve unscrewing or detaching it from its holder or connector.
- Depending on the type of gun, there may be additional components that need to be disassembled, such as filters or air regulators. Consult your specific paint sprayer manual for guidance on these additional steps.
- Once all removable parts have been taken off, clean each component thoroughly with an appropriate cleaning solution based on whether you used water-based or oil-based paints. Use brushes or cloths to remove any stubborn paint residue from small crevices.
- After all parts have been cleaned and dried, reassemble them carefully in reverse order of disassembly. Make sure each piece fits snugly and securely before using the paint sprayer again.
It’s important to note that if you are unsure about how to properly disassemble your specific model of spray gun, always consult the manufacturer’s instructions or seek professional assistance.
Lastly, a pro tip for deep cleaning your spray gun is to keep track of how you dismantle it by snapping pictures with your smartphone along each step. These images can serve as a visual reference when you are reassembling the gun, ensuring that no parts are misplaced or skipped.
Cleaning the spray nozzle and small parts
Maintaining the cleanliness of the spray nozzle and small parts is crucial for ensuring optimal functionality and performance of a paint sprayer gun. Proper cleaning helps to prevent paint residue buildup, clogs, and blockages, which can affect paint delivery and result in an uneven finish. Cleaning these components regularly also helps to extend the lifespan of the gun.
To effectively clean the spray nozzle and small parts, follow these five simple steps:
- Disassemble the gun: Begin by carefully disassembling the paint sprayer gun according to the manufacturer’s instructions. This typically involves removing any removable parts such as the nozzle, needle, air cap, and fluid tip. Take care not to damage these components during disassembly.
- Rinse with cleaning solution: Prepare a cleaning solution suitable for your specific paint type (water-based or oil-based). Use a clean container to fill it with the appropriate cleaning solution. Place all disassembled parts into the container and let them soak for several minutes.
- Brush away residue: After soaking, use a soft-bristle brush or toothbrush to gently scrub away any stubborn paint residue from the spray nozzle and small parts. Pay close attention to hard-to-reach areas where buildup may be present.
- Rinse thoroughly: Once you have brushed away residue, rinse all components under warm running water to remove any remaining cleaning solution and loosened debris. Ensure that water flows freely through each part to confirm they are completely clean.
- Dry before reassembly: Before reassembling the spray gun, allow all components to air dry completely or pat them dry with a clean cloth if desired. It is important to ensure that there is no moisture left on any part before putting them back together to prevent corrosion or damage.
In addition to these steps, it is worth noting that different types of paint sprayer guns may have specific instructions or additional considerations when it comes to cleaning their spray nozzles and small parts. Therefore, always refer to the manufacturer’s guidelines for your specific paint sprayer gun model for the best cleaning practices.
It is important to follow proper cleaning procedures for maintaining a paint sprayer gun as neglecting this maintenance can cause damage to internal components and affect the spray pattern or paint flow. By keeping the spray nozzle and small parts clean, you can ensure consistent performance and extend the lifespan of your paint sprayer gun.
A true fact: Safetykleen offers all-in-one parts cleaning services, providing innovative solutions for effectively cleaning paint sprayer guns and other equipment.
Cleaning an electric handheld spray gun is a shocking experience, but not as shocking as the mess it could make if you don’t clean it properly.
How to Clean an Electric Handheld Spray Gun
Cleaning an electric handheld spray gun is essential for its optimal performance and longevity. In this section, we will explore the step-by-step process of cleaning this tool to ensure its efficient operation. From cleaning the cup to flushing the gun clean, and from cleaning the spray nozzle to tidying up the small parts, we will provide a comprehensive guide to help you maintain your electric handheld spray gun in top-notch condition. Get ready to learn the best practices for preserving the functionality of your paint sprayer gun.
Cleaning the cup
- Empty the cup: Start by emptying any remaining paint from the cup of the spray gun. This can be done by pouring out any excess paint into a separate container for disposal.
- Rinse with solvent: Next, rinse the cup with an appropriate solvent or cleaning solution recommended for the type of paint used. This will help to remove any residual paint stuck to the sides or bottom of the cup.
- Scrub and dry: Use a soft brush or cloth to scrub the inside of the cup, ensuring all traces of paint are removed. Once clean, dry the cup thoroughly before reattaching it to the spray gun for future use.
By following these simple steps, you can effectively clean the cup of your paint sprayer gun, maintaining its performance and ensuring optimal results with each use.
Flushing the gun clean
Here is a 3-step guide to flushing the gun clean:
- Begin by disconnecting the gun from the power source and removing any remaining paint in the cup. Carefully pour out or transfer any unused paint while being mindful of proper waste disposal procedures.
- Next, attach a clean container filled with an appropriate cleaning solution to the spray gun. The cleaning solution can vary depending on whether you are working with water-based or oil-based paints. Follow manufacturer recommendations for the best results.
- With the cleaning solution attached, turn on the sprayer and squeeze the trigger to allow the solution to flow through the gun and out of the nozzle. Continue spraying until all traces of paint have been flushed out and only clean solution is coming out. This will help remove any leftover residues and prevent clogging or buildup.
By following these steps, you can effectively flush your spray gun clean and maintain its peak performance.
It’s worth noting that regular cleaning of your spray gun is necessary not only for flushing out residual paint but also preventing drying between coats and removing stuck-on paint from both your gun and clothes. By incorporating these maintenance practices into your routine, you can prolong the lifespan of your spray gun and ensure consistent professional results with each use.
Cleaning the spray nozzle and small parts
To clean the spray nozzle and small parts, follow these steps:
- Disconnect the gun from the power source and remove any remaining paint from the cup or container.
- Remove the nozzle cap from the front of the gun, using a wrench if necessary.
- Carefully remove the spray nozzle from its housing and soak it in a cleaning solution suitable for your type of paint.
- Use a soft brush or toothbrush to gently scrub away any dried or stubborn paint residue on both the spray nozzle and small parts.
- Rinse all components thoroughly with water to remove any remaining cleaning solution or loosened paint particles.
- Allow all parts to dry completely before reassembling them back into place.
By following these steps, you can ensure that your spray nozzle and small parts are properly cleaned, preventing clogs and ensuring smooth, even application of paint.
It is important to note that different types of paint sprayer guns may have specific cleaning requirements for their nozzles and small parts. Always refer to your manufacturer’s instructions or user manual for detailed cleaning guidelines tailored to your specific model.
Regular maintenance such as cleaning the spray nozzle and small parts not only improves overall performance but also extends the lifespan of your paint sprayer gun. By keeping these components clean, you can enjoy consistent results and avoid costly repairs or replacements in the future.
How to Clean an Automotive Paint Gun
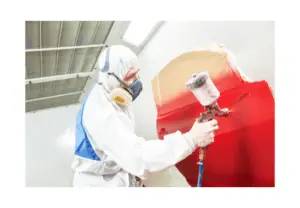
When it comes to maintaining your automotive paint gun, proper cleaning is key. In this section, we’ll cover the essential steps required to ensure the longevity and efficiency of your paint gun. From removing the air regulator to reassembling all the parts, we’ll guide you through each necessary process. With these steps, you can keep your paint gun in optimal condition, allowing for consistent and top-quality paint applications.
Removing the air regulator
To properly maintain your paint sprayer gun, it is important to regularly remove and clean the air regulator. This ensures that the gun operates efficiently and prevents any clogs from occurring.
To begin, start by turning off the air supply to the paint sprayer gun and release any built-up pressure in the system. This step is crucial for safety reasons.
Next, locate the air regulator on your specific model of paint sprayer gun. It is usually found at the base of the gun or on the handle. Using a wrench or pliers, carefully loosen and remove any fasteners securing the air regulator to the gun. Take caution to avoid damaging any surrounding components during this process.
Once the air regulator is removed, take the time to inspect it for any signs of dirt, debris, or clogs. Use a brush or compressed air to clean out any obstructions and ensure proper airflow. This step is vital in maintaining the performance of your paint sprayer gun.
After cleaning, reattach the air regulator securely to the paint sprayer gun, ensuring it is properly aligned with any associated connections. This will help guarantee that the gun functions smoothly and effectively.
By incorporating this simple maintenance routine into your maintenance routine, you can prevent clogs and ensure consistent, efficient performance from your paint sprayer gun.
In addition to maintaining the air regulator, it is also important to know how to make a clean sweep of excess paint. This involves tips for emptying the cup and wiping away any mess. Knowing these techniques can help keep your paint sprayer gun clean and ready for use.
Emptying the paint cup and wiping out excess material
- Step 1: Emptying the Paint CupTo begin, carefully remove the paint cup from the spray gun. Hold it over a suitable container or waste disposal area, then pour out any remaining paint. Be sure to handle the paint cup with care to avoid spills or splatters. Emptying the cup completely will prevent old or dried-up paint from mixing with new material during future use.
- Step 2: Wiping Out Excess MaterialAfter emptying the cup, take a clean cloth or paper towel and wipe out any residual material that may be lingering inside. Pay attention to corners, edges, and crevices where paint can accumulate. Ensuring that all excess material is removed will prevent it from clogging the spray gun’s nozzle or interfering with its internal components.
- Step 3: Thorough CleaningOnce you have emptied the paint cup and wiped away excess material, it is important to follow proper cleaning procedures as outlined for your specific type of paint sprayer gun (refer to paragraphs 3 or 4). This will ensure a thorough cleaning of all components involved and maintain peak performance for future painting projects.
It is important to note that emptying the paint cup and wiping out excess material should be done after each use of your spray gun, as leaving leftover paint or residue can lead to clogs and decreased spray quality over time. By incorporating this step into your regular maintenance routine, you can extend the lifespan of your paint sprayer gun and achieve optimal results in every application.
A true fact about cleaning a paint sprayer gun is that Safetykleen offers all-in-one parts cleaning services, including innovative solutions for cleaning paint sprayer guns. Their services provide a comprehensive and efficient approach to maintaining the functionality and longevity of your spray gun equipment (source: Reference Data).
Get creative with waste thinner and bid adieu to the grimy gunk in your paint gun.
Using waste thinner to clean the gun and all its parts
To properly clean the gun and all its parts using waste thinner, follow these six steps:
- Start by disassembling the gun according to the manufacturer’s instructions. This may include removing the air regulator, emptying the paint cup, and removing any small parts that can be taken apart.
- Wipe out any excess paint from the inside of the paint cup using a clean cloth or paper towel. Dispose of this waste material properly according to local regulations.
- Next, pour some waste thinner into a container large enough to submerge the gun and its parts. Place all disassembled parts into the container and ensure they are fully submerged in the waste-thinner.
- Allow the parts to soak in the waste thinner for a sufficient amount of time, typically recommended by the manufacturer, or until visible signs of paint residue have loosened.
- After soaking, use a brush or cloth to scrub away any remaining paint residue from each part individually. Pay close attention to hard-to-reach areas or small crevices where paint may have accumulated.
- Once all parts have been thoroughly cleaned, rinse them in clean water to remove any residual waste thinner. Dry each part completely before reassembling them according to manufacturer guidelines.
By utilizing waste thinner as a cleaning solution and following these steps diligently, you can ensure that your paint sprayer gun is well-maintained and ready for optimal performance.
In addition to using waste thinner for cleaning purposes, it is essential to properly dispose of any waste materials generated during the cleaning process. Follow local regulations for disposing of hazardous substances such as leftover liquid waste thinner or rags contaminated with paints or solvents.
Overall, regular cleaning and maintenance of a paint sprayer gun are crucial to its longevity and effectiveness. By incorporating proper cleaning techniques, such as using waste thinner and following the manufacturer’s guidelines, you can ensure that your paint sprayer gun delivers high-quality results every time.
Putting the pieces back together: reassembling the gun and parts like a puzzle master.
Reassembling the gun and parts
Reassembling the spray gun and its parts is an essential step in maintaining the functionality and peak performance of a paint sprayer. After cleaning the gun and its components, proper reassembly ensures that all parts are aligned correctly for efficient paint delivery.
Here is a 6-step guide on how to reassemble a paint sprayer gun:
- Place the nozzle back onto the front of the gun body. Ensure that it is tightly secured to prevent any leaks during operation.
- Reattach any small parts that were removed during disassembly, such as O-rings or seals. These parts help maintain proper pressure and prevent paint from leaking.
- Screw the paint cup or container back onto the spray gun body. Make sure it is properly tightened to prevent any spills or leaks while spraying.
- If your spray gun has any adjustable features, such as a fan control knob or pressure adjustment dial, set them to your desired settings.
- Reconnect any hoses or tubes that were detached during cleaning. Double-check these connections to ensure they are secure and free from leaks.
- Finally, if you removed the air regulator during disassembly, reattach it to the spray gun according to manufacturer instructions.
It’s important to note that different types of spray guns may have specific steps for reassembly, so it’s always recommended to consult your user manual for detailed instructions tailored to your particular model.
Regular maintenance and proper reassembly of all components contribute greatly to the longevity and reliable performance of a paint sprayer gun. By following these steps, you can ensure that your spray gun is ready for use whenever you need it.
Additional Tips for Spray Gun Maintenance
When it comes to maintaining your spray gun, there are some additional tips that can make all the difference. From proper disposal of waste materials to preventing paint from drying out between coats, and even removing stuck-on paint from both the gun and your clothes, these tips will ensure your spray gun remains in top-notch condition. Let’s explore these essential strategies for spray gun maintenance.
Proper disposal of waste materials
After completing your painting job, it is important to empty any remaining paint from the reservoir of your paint sprayer gun to ensure proper disposal of waste materials. You can do this by pouring the unused paint into a designated container. It is essential to avoid pouring excess paint down drains or throwing it into regular trash bins to prevent environmental contamination.
During the cleaning process, it is crucial to separate different types of waste materials for appropriate disposal. This includes separating solvent-based paints from water-based paints and ensuring that empty containers are rinsed thoroughly before discarding them. By separating waste materials, you can ensure that they are disposed of in the correct manner.
To dispose of your paint-related waste in a safe and environmentally friendly manner, it is recommended to utilize designated waste collection areas or facilities provided by many municipalities. These areas are specifically created for collecting hazardous waste materials, including paint. By taking advantage of these designated locations, you can ensure that your waste is disposed of properly.
When it comes to disposing of hazardous waste, it is important to follow local regulations. Different regions may have varying regulations, so it is crucial to familiarize yourself with these regulations and adhere to them accordingly. This may involve registering as a hazardous waste generator and obtaining necessary permits. Ensuring compliance with local regulations is essential for proper waste disposal.
In addition to proper disposal methods, it is worth considering recycling options for certain materials such as metal spray nozzles or plastic containers. Recycling can significantly reduce environmental impact and promote sustainability in the painting industry. By choosing recycling options, you contribute to the preservation of resources and help minimize waste.
If you are unsure about how to dispose of certain waste materials from your paint sprayer gun, it is always advisable to seek professional guidance. Professionals or local authorities who specialize in environmental services can provide valuable advice on responsible disposal methods specific to your location. By consulting these experts, you can ensure that you are disposing of your waste properly.
By following these guidelines for the proper disposal of waste materials, you can contribute to a cleaner environment while preserving the functionality and performance of your paint sprayer gun.
Preventing paint drying out between coats
To prevent paint from drying out between coats, there are several important steps to follow. First, it’s crucial to check the consistency of the paint in the container before applying the next coat. If the paint has thickened or dried out, you can add a small amount of water or an appropriate thinning agent to restore its fluidity.
Additionally, it’s essential to properly store your brushes and rollers when they are not in use. Cover them with plastic wrap or place them in sealed bags to prevent them from drying out. This will help maintain their moisture and ensure they are ready for use when you need them.
When applying multiple coats of paint, it’s important to use a wet edge technique. This involves overlapping each stroke slightly with the previous one while the paint is still wet. By doing so, you can blend the layers together and prevent noticeable lines or dry patches.
Excessive heat or airflow can cause the paint to dry out too quickly between coats. Therefore, it’s important to avoid exposing your painted surface to such conditions. Keep your work area well-ventilated, but be careful to avoid direct drafts or heaters that may accelerate drying time.
Planning your painting schedule strategically is also crucial. Consider factors such as temperature and humidity levels when deciding when to paint. Extremely hot or dry conditions can cause premature drying and affect the quality of your final finish.
If you are working on a large surface area, it’s recommended to work in smaller sections. Divide the area into manageable sections and complete one section at a time before moving on to the next. This approach allows you to focus on maintaining a wet edge within each section without rushing through multiple areas simultaneously.
By following these steps, you can effectively prevent paint from drying out between coats and achieve optimal results. Remember to monitor and adjust the paint’s consistency, store brushes, and rollers properly, use proper techniques, control the environment, plan your painting schedule, and work in manageable sections. Doing so will ensure a smooth and even paint finish.
Lastly, it’s worth mentioning that removing stuck-on paint from your tools and clothes is also important. After all, nothing ruins a fashion statement like a splash of latex white.
Removing stuck-on paint from the gun and clothes
To effectively remove stuck-on paint from your gun and clothes, follow these step-by-step instructions:
- Begin by using a scraper or putty knife to gently scrape off any excess paint from the surface of the gun or clothing. Make sure to be careful not to scratch or damage the material while doing so.
- Next, take a clean cloth or sponge and dampen it with warm water. Use this to gently rub the area where the paint is stuck. If needed, you can apply a small amount of mild soap or detergent to help break down the paint residue.
- For stubborn areas, it may be necessary to use a commercial paint remover specifically designed for the type of paint you are dealing with. Follow the instructions on the product label carefully, as different types of paint require different removal methods.
- Once the paint has been loosened, take a soft brush or toothbrush and use it to scrub away any remaining residue. It is important to be gentle to avoid causing any damage to delicate surfaces or fabrics.
- Rinse the area thoroughly with clean water to ensure that all traces of soap or paint remover are removed.
- Finally, allow the gun or clothing to air dry completely before using or wearing them again.
By following these steps, you can effectively remove stuck-on paint from your gun and clothing without causing any further damage.
It is worth noting that different types of spray guns may have specific cleaning requirements. Therefore, it is important to refer to the manufacturer’s guidelines for detailed instructions on how to clean your particular model.
Regular maintenance and cleaning will help prolong the lifespan of your spray gun and ensure optimal performance for future painting projects.
Say goodbye to messy clean-up and hello to effortless maintenance with these innovative cleaning solutions for your paint sprayer gun.
Innovative Solutions for Cleaning Paint Sprayer Guns
Discover innovative solutions for cleaning paint sprayer guns in this article. We will explore Safetykleen’s all-in-one parts cleaning services and the efficiency of Automatic Paintkleen machines. Learn about the benefits these solutions offer for effectively maintaining and cleaning your paint sprayer gun.
Safety-Kleen’s all-in-one parts cleaning services
- Safetykleen’s all-in-one parts cleaning services include cleaning solutions specifically formulated to safely and effectively remove paint residues.
- Their services cover not only the gun itself but also other crucial components such as filters, hoses, and units, ensuring a thorough and complete clean.
- Using advanced cleaning techniques and equipment, Safetykleen ensures that every part is properly cleaned without causing damage or compromising performance.
- By utilizing Safetykleen’s all-in-one parts cleaning services, users can save time and effort by entrusting their spray gun maintenance to professionals with extensive knowledge and experience in the field.
In addition to its comprehensive range of cleaning services, Safetykleen also offers innovative solutions such as Automatic Paintkleen machines. These machines provide an efficient way to clean paint sprayer guns by automating the process and reducing manual labor. With Safetykleen’s commitment to providing top-quality cleaning services, users can rely on them for reliable maintenance solutions tailored to their specific needs.
Furthermore, Safetykleen emphasizes the importance of regular maintenance for longevity in paint sprayer guns. By availing of their all-in-one parts cleaning services, users can ensure that their spray guns are consistently kept in optimal condition, allowing for efficient paint delivery and peak performance. Trusting leading industry experts like Safetykleen is key to maintaining the functionality and longevity of your valuable paint sprayer equipment.
Cleaning a paint sprayer gun has never been easier with Automatic Paintkleen machines – the efficient solution for maintaining peak performance.
Automatic Paintkleen machines for efficient cleaning
Automatic Paintkleen machines are an innovative solution for efficiently cleaning paint sprayer guns. These machines provide a convenient and effective way to remove paint residue and maintain the functionality of the gun.
- The Automatic Paintkleen machines are designed to streamline the cleaning process, saving time and effort for users.
- These machines utilize advanced technology to ensure thorough cleaning of all parts of the sprayer gun, including the nozzle and small components.
- By using Automatic Paintkleen machines, users can expect their spray guns to be properly cleaned, resulting in optimal performance and longevity of the equipment.
These machines offer a reliable and efficient method for maintaining paint sprayer guns. With their automated cleaning process, users can trust that their equipment will be thoroughly cleaned without having to manually disassemble and clean each individual part.
Additionally, by utilizing Automatic Paintkleen machines, users can ensure that no paint residue is left behind, preventing any buildup that could impact the performance of the sprayer gun over time.
Community Q&A and Conclusion
In the Community Q&A and Conclusion section, we’ll dive into answering common questions about cleaning spray guns, inviting readers to share their own tips and experiences, and emphasizing the importance of regular maintenance for longevity. So, get ready to discover expert advice and useful insights to keep your paint sprayer gun in top-notch condition. Let’s keep those spray guns clean and efficient for our next paint project!
Answering common questions about cleaning spray guns
Cleaning spray guns is an essential task to maintain their functionality and ensure efficient paint delivery. By preventing paint residue buildup, the spray gun can perform at its peak performance. There are different types of paint sprayer guns, including airless spray guns, HVLP spray guns, and electric handheld spray guns. Each type requires specific cleaning methods to keep them in optimal condition.
When it comes to cleaning an airless spray gun, it is important to clean not only the gun but also the unit, filters, and hose. Using recommended cleaning solutions for water-based and oil-based paints can help remove any leftover paint residue and prevent clogging.
For HVLP spray guns, attention should be given to cleaning the paint cup and disassembling the gun for deep cleaning. This includes cleaning the spray nozzle and small parts to ensure smooth paint flow.
Electric handheld spray guns require cleaning the cup as well as flushing the gun clean with a suitable solvent or cleaner. The spray nozzle and small parts should also be cleaned thoroughly.
Automotive paint guns require additional steps such as removing the air regulator, emptying the paint cup, wiping out excess material, and using waste thinner to clean all parts of the gun. Reassembling the gun is crucial after cleaning.
In addition to these specific cleaning methods for different types of spray guns, there are some general tips for spray gun maintenance. Proper disposal of waste materials is important to avoid environmental harm. It is also advisable to prevent paint from drying out between coats by keeping the gun covered or immersed in a suitable solvent or cleaner. Removing stuck-on paint from both the gun and clothes can help prolong their lifespan.
There are innovative solutions available for cleaning paint sprayer guns such as Safetykleen’s all-in-one parts cleaning services and Automatic Paintkleen machines that offer efficient cleaning options.
Answering common questions about cleaning spray guns helps users understand proper maintenance techniques. Readers are encouraged to share their own tips and experiences in the community Q&A section. Regular maintenance is emphasized to ensure the longevity of spray guns.
Share your spray gun cleaning wisdom and mishaps, because we all need a good laugh (and some helpful advice)!
Keywords: answering common questions about cleaning spray guns
Inviting readers to share their own tips and experiences
- One possible tip readers could share is a homemade cleaning solution that they have found to be effective in removing stubborn paint residue.
- Another valuable experience readers might have encountered is an innovative method for preventing paint from drying out between coats, ensuring smooth and consistent application.
- Some readers might also share their expertise in removing stuck-on paint from both the gun itself and any clothing or protective gear that may have come into contact with the paint.
- Additionally, readers might provide recommendations for alternative cleaning tools or equipment that have proved successful in achieving thorough and efficient results.
By inviting readers to actively participate by sharing their own tips and experiences, we can collaboratively expand our knowledge base on proper spray gun maintenance. The diverse range of perspectives shared by the community will offer invaluable insights that go beyond what is covered in the previous sections. These real-life experiences will inspire new approaches, promote experimentation, and encourage continuous improvement in tackling common challenges associated with cleaning paint sprayer guns effectively.
Emphasizing the importance of regular maintenance for longevity
Proper maintenance and regular cleaning of paint sprayer guns are of utmost importance for their longevity and optimal performance. By emphasizing the significance of regular maintenance, users can prevent issues such as paint residue buildup and ensure efficient paint delivery.
In order to maintain the functionality of a paint sprayer gun, it is essential to clean it regularly. This includes cleaning the filters, gun, and hose to avoid any clogs or blockages. Regular cleaning ensures smooth operation during painting projects.
Regular cleaning also plays a crucial role in preventing paint residue buildup. After each use, it is important to clean the spray gun to remove any excess paint that may have accumulated. This prevents the buildup of dried paint particles, which can affect the spray pattern and the quality of the finish.
To achieve efficient paint delivery and peak performance, it is recommended to clean your paint sprayer gun regularly. Different types of guns require specific cleaning methods, such as using recommended cleaning solutions for water-based or oil-based paints. Properly cleaning each part of the gun, including the cup, nozzle, and small parts, ensures smooth operation and consistent results.
In addition to regular cleaning, there are other tips for maintaining the longevity of a paint sprayer gun. Proper disposal of waste materials is important to ensure a clean working environment and prevent any potential hazards. Preventing paint from drying out between coats helps maintain a consistent flow during painting projects. Additionally, removing stuck-on paint from both the gun and clothes can help prolong the lifespan of the equipment.
It is important to recognize that innovative solutions are available for easy and efficient cleaning of paint sprayer guns. Companies like Safetykleen offer all-in-one parts cleaning services, which simplify the cleaning process. Automatic Paintkleen machines provide a convenient option for thorough cleaning without manual effort.
Some Facts About How To Clean a Paint Sprayer Gun:
- ✅ It is recommended to clean a paint sprayer gun after each use to maintain its longevity. (Source: Team Research)
- ✅ The main parts of a paint sprayer gun that need to be cleaned are the nozzle, white pick-up tube, and spray tip. (Source: Team Research)
- ✅ The nozzle of a paint sprayer gun can be cleaned by unscrewing the black air cap ring, removing the air cap ring and yellow-winged spray cap, and removing the black inner spacer. (Source: Team Research)
- ✅ The spray tip of a paint sprayer gun can be swapped or removed using the small tool that comes with the gun and can be cleaned with a small brush. (Source: Team Research)
- ✅ After cleaning all the parts, they can be put back together by reassembling the nozzle, air cap ring, yellow-winged spray cap, and black spacer. (Source: Team Research)
FAQs about How To Clean A Paint Sprayer Gun
1. How do I clean the nozzle of a paint sprayer gun?
To clean the nozzle of a paint sprayer gun, unscrew the black air cap ring, remove the air cap ring and yellow-winged spray cap, and remove the black inner spacer. Clean the nozzle by using warm soapy water and a small brush to remove any paint residue.
2. What should I use to clean the spray tip of my paint sprayer gun?
To clean the spray tip of a paint sprayer gun, use the small tool that comes with the sprayer to swap or remove the tip. Clean the spray tip using a small brush and warm soapy water to ensure it is free from any dried paint or debris.
3. How often should I clean my paint sprayer gun?
It is recommended to clean your paint sprayer gun after each use. Cleaning the gun after every use will ensure its longevity and prevent paint residue from drying inside, which can affect its functionality and performance.
4. Can I use water to clean a paint sprayer gun after using water-based paints?
Yes, water can be used to clean a paint sprayer gun after using water-based paints. It is important to check the spray material tin for the recommended cleaning solution, and in the case of water-based paint, water is the appropriate cleaning solution.
5. How do I clean a paint sprayer gun with solvent-based paints?
If you are using solvent-based paints with your paint sprayer gun, you will need to use the recommended solvent, such as paint thinner, for cleaning. The specific cleaning process may vary depending on the type and model of your sprayer, so refer to the manufacturer’s owner manual for step-by-step instructions.
6. How should I store my paint sprayer gun after cleaning?
After cleaning your paint sprayer gun, it is important to let it dry thoroughly before storing it away. Once dry, it is recommended to store the sprayer in a clean and dry area to protect it from damage and ensure it is ready for future use.
Leave a Reply