Maintaining and preserving the longevity of a paint sprayer requires thorough and regular cleaning, especially when the mess in question is dried paint. When a paint sprayer gets clogged with hardened paint, it can hamper its performance, reduce the quality of your paint job, and may even damage the device irreparably. This is why understanding how to properly clean this equipment after every use, and even after long periods of non-use, is crucial. A well-kept paint sprayer can provide years of reliable service, making every painting task a breeze and providing a professional finish every time.
This article provides detailed, step-by-step instructions addressing the important subject of How to Clean a Paint Sprayer With Dried Paint. If your paint sprayer has been neglected for a while and hardened paint is taking a toll on its performance, this comprehensive guide will help you navigate through the cleaning process. No matter if you’re a professional painter, a DIY enthusiast, or a beginner in the painting world, understanding this procedure can make a significant difference to your painting results and equipment lifespan.
Table of Contents
Key Takeaways:
- Cleaning a paint sprayer with dried paint is important to maintain its functionality and prevent potential problems.
- Follow safety precautions and wear protective gear, and gather the necessary tools and materials for cleaning.
- Clean the nozzle and filters by removing the nozzle, soaking it in warm water, scrubbing away dried paint, and cleaning the filters with warm water and mild detergent.
- Flush the system by using water to flush the paint sprayer, clear the paint cup and lid, and clean the inlet strainer. Follow tips for effective flushing and preventing future clogs.
- If dried paint is stubborn, consider using a paint stripper or remover, rubbing alcohol or acetone for difficult spots, hot water, and dish soap solution for a thorough cleaning, or pressure washing or paint thinner for oil-based paint.
- Proper maintenance and storage are essential, including regular cleaning after every use, avoiding solvents that may damage sprayer components, and properly storing the paint sprayer in a dry location.
- Effective cleaning methods ensure a clean and functional paint sprayer, ensuring longevity and avoiding issues with future projects.
Importance of cleaning a paint sprayer with dried paint
Cleaning a paint sprayer with dried paint is of utmost importance for maintaining the functionality and longevity of the equipment. If left uncleaned, dried latex paint can lead to several potential problems, causing issues in future projects. The reference data provides information on various safety precautions, equipment, and methods for effectively cleaning a paint sprayer with dried paint.
To clean a paint sprayer with dried paint, it is crucial to follow these six steps:
- Wear protective gear and disconnect the power source from the sprayer to ensure safety during the cleaning process.
- Start by removing the nozzle and soaking it in warm water to soften the dried paint. This will make it easier to scrub away later on.
- Scrub away the dried paint from the nozzle using a brush or cloth, making sure to remove any large pieces that may be stuck.
- Next, clean the filters by rinsing them with warm water and mild detergent. This will help remove any residue or build-up that may have occurred due to dried paint.
- Flush the system by running water through the sprayer. This will help clear out any remaining traces of dried paint and ensure that the sprayer is ready for future use.
- Lastly, clean the paint cup and lid as well as the inlet strainer to make sure all parts of the sprayer are thoroughly cleaned.
In addition to these steps, alternative solutions can be applied if there are stubborn spots of dried paint. Trying a paint stripper or remover can help dissolve tough spots of dried latex paint. Rubbing alcohol or acetone can be used for difficult areas that are hard to remove with other methods. A solution of hot water and dish soap can also be effective for thorough cleaning. For oil-based paints, pressure washing or using paint thinner may be necessary.
Proper maintenance and storage are essential after cleaning a paint sprayer with dried paint. Regular cleaning after every use is important to prevent any build-up or clogs. It is crucial to avoid solvents that may damage the components of the sprayer and store it in a dry location, ensuring its longevity and avoiding issues with future projects.
Overall, effective cleaning methods for a paint sprayer with dried paint are necessary to maintain clean and functional equipment. By following the appropriate steps and using alternative solutions when needed, one can ensure the longevity of their paint sprayer and avoid any potential problems in future projects.
Potential problems caused by dried latex paint in a sprayer
Potential problems can arise when dried latex paint accumulates in a sprayer. This build-up can lead to clogs and blockages, affecting the spray pattern and overall performance of the sprayer. The dried paint can also cause damage to internal components, such as the nozzle and filters, resulting in reduced efficiency and potentially costly repairs. Cleaning the sprayer regularly is crucial in preventing these issues and ensuring optimal functionality.
To effectively clean a sprayer with dried latex paint, several steps need to be taken. First, it is important to wear protective gear and disconnect the power source to ensure safety throughout the cleaning process. Necessary tools and materials, such as warm water, mild detergent, and brushes, should also be prepared beforehand.
- The cleaning process begins by removing the nozzle and soaking it in warm water. This helps soften the dried paint for easier removal.
- Scrubbing away any remaining paint and removing large pieces is essential in clearing any blockages that may have formed.
- Additionally, the filters should also be cleaned using warm water and mild detergent to remove any trapped paint particles.
- Flushing the system with water is another crucial step in cleaning a sprayer with dried paint. This involves running water through the sprayer to remove any residual paint from the internal components.
- Clearing the paint cup and lid ensures that there are no remnants of dried paint left behind that could affect future spraying sessions.
- Furthermore, cleaning the inlet strainer helps prevent any debris or dried paint from entering the sprayer during future use.
In some cases, stubborn areas of dried paint may require alternative solutions for effective removal. Paint strippers or removers can be used for more resistant spots while rubbing alcohol or acetone can help dissolve difficult areas. A solution of hot water and dish soap can provide thorough cleaning for less stubborn areas. For oil-based paints, pressure washing or using a suitable paint thinner may be necessary.
Proper maintenance and storage play significant roles in prolonging the lifespan of a paint sprayer. Regular cleaning after every use is important to prevent build-up and ensure functionality for future projects. It is crucial to avoid solvents that may damage the sprayer components and instead use recommended cleaning agents. Lastly, proper storage in a dry location protects the sprayer from moisture and other potential damage.
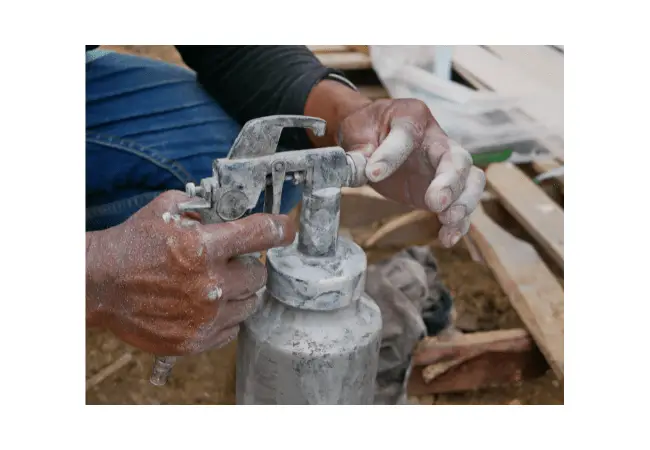
Safety Precautions and Equipment
.jpg)
To ensure your safety and effectively clean your paint sprayer with dried paint, it’s essential to follow proper safety precautions and have the right equipment in place. This includes wearing protective gear, disconnecting the power source, and using the necessary tools and materials for cleaning. By taking these measures, you can protect yourself from potential hazards and efficiently clean your paint sprayer for optimal performance.
Wear protective gear and disconnect the power source
Protective gear and disconnecting the power source is crucial before cleaning a paint sprayer with dried paint. Neglecting this step can lead to safety hazards and damage to the equipment. Cleaning a paint sprayer involves working with chemicals and high-pressure systems, making it important to wear proper protective gear to prevent any exposure or accidents. Additionally, disconnecting the power source ensures that the sprayer is not accidentally activated during the cleaning process, reducing the risk of injury.
To ensure your safety during the cleaning process, it is essential to follow these steps:
- Put on safety goggles, gloves, and a dust mask before starting the cleaning process to protect yourself from any potential harm.
- Ensure that the power source is switched off or disconnected to prevent any accidental operation of the sprayer. This will guarantee your safety and the proper cleaning of the equipment.
- Remove the spray gun from the paint sprayer unit without pressing the trigger to release any residual pressure. This step prevents any sudden releases of paint or pressure, avoiding accidents.
- Set aside any electrical cords or power sources far away from where you will be cleaning to avoid water damage or electrocution. It is crucial to keep them away from any liquid or moisture present during the cleaning process.
- Make sure your work area is well-ventilated to prevent inhalation of fumes or vapors. This will help to ensure that you are not exposed to any harmful or toxic substances present during the cleaning procedure.
- Only proceed with cleaning once you have taken all necessary safety precautions. Your safety should always be the top priority before starting any cleaning activity.
Furthermore, as an additional safety measure, ensure that no flammable materials are present in your work area. The solvents used for cleaning can pose a fire hazard if not handled properly. Keeping the area clear of any potential ignition sources will minimize the risk of fire accidents.
Pro Tip: Before wearing your protective gear and disconnecting the power source, familiarize yourself with the specific instructions provided by the manufacturer for your particular paint sprayer model. This will ensure that you are following the recommended safety procedures for your specific equipment.
Cleaning a paint sprayer is no joke, but with the right tools and materials, you’ll be laughing all the way to a spotless sprayer. Remember to prioritize your safety by wearing protective gear and disconnecting the power source before beginning the cleaning process.
Necessary tools and materials for cleaning
Paint sprayers are essential tools for any painting project, but they can become clogged and ineffective if not properly maintained. Cleaning a paint sprayer with dried paint is crucial to ensure its optimal performance and prevent potential issues in future painting projects.
These are the necessary tools and materials for cleaning a paint sprayer that has dried paint:
- Warm water
- Cleaning solution or mild detergent
- Nozzle cleaning brushes or small scrub brushes
- Bucket or container for soaking parts
- Soft cloth or rag for wiping down surfaces
Warm water is used to soak the nozzle and other removable parts to loosen the dried paint. A cleaning solution or mild detergent can be added to help break down stubborn stains. Nozzle cleaning brushes or small scrub brushes are essential for removing any remaining dried paint from the nozzle. A bucket or container is needed to hold the warm water and cleaning solution mixture for soaking parts. Finally, a soft cloth or rag is useful for wiping down surfaces after cleaning.
It is important to note that while these tools and materials are commonly used for cleaning a paint sprayer, it may be necessary to use additional items depending on the specific situation.
One suggestion is to use a toothbrush or small bristle brush to scrub away any stubborn dried paint particles from hard-to-reach areas like crevices or corners of the sprayer. These brushes can help dislodge any remaining debris and ensure a thorough cleaning. Additionally, using compressed air can help remove any loose particles that may have been missed during the initial cleaning process. Regular maintenance and cleaning after each use will also prevent the buildup of dried paint, making future cleanings easier and more effective.
Scrub away dried paint, because clogged sprayers make for colorful chaos.
Cleaning the Nozzle and Filters
When it comes to cleaning a paint sprayer with dried paint, one of the key tasks is to tackle the nozzle and filters. In this section, we’ll explore effective methods for cleaning the nozzle and filters to restore your paint sprayer’s functionality. From removing the nozzle for a thorough soak in warm water to scrubbing away dried paint, and finally cleaning the filters with mild detergent, we’ll guide you through the necessary steps to ensure smooth and efficient spray painting sessions.
Removing the nozzle and soaking it in warm water
- Begin by disconnecting the power source of the paint sprayer and wearing protective gear to ensure safety during the cleaning process.
- Locate the nozzle on the sprayer and carefully remove it from the device.
- Fill a container with warm water, ensuring there is enough to fully submerge the nozzle.
- Place the removed nozzle into the container of warm water and let it soak for a sufficient amount of time, allowing the warmth to soften any dried paint.
- After soaking, use a soft brush or cloth to gently scrub away any remaining dried paint on the nozzle until it is clean.
- Rinse the nozzle thoroughly with clean water to remove any residue or debris before reattaching it to the paint sprayer.
This method of removing the nozzle and soaking it in warm water helps to effectively remove dried latex paint from a paint sprayer, ensuring its proper functioning for future painting projects.
It is worth noting that using warm water aids in softening the dried paint, making it easier to remove from both the inside and outside surfaces of the nozzle.
Scrubbing away dried paint and removing large pieces
- Disconnect power source: Before starting the cleaning process, ensure that you have disconnected the power source to avoid any accidents or damage.
- Remove the nozzle and soak in warm water: Carefully detach the nozzle from the paint sprayer and place it in a container filled with warm water. Allow it to soak for several minutes to loosen the dried paint.
- Scrub away dried paint: Using a scrub brush or an old toothbrush, gently scrub off the dried paint from the nozzle. Be thorough but cautious not to damage any delicate parts of the sprayer.
- Remove large pieces: After scrubbing off as much dried paint as possible, carefully inspect the nozzle for any remaining large pieces of debris. Use tweezers or a small tool to remove them, ensuring that there are no obstructions left.
- Clean the filters with warm water and mild detergent: Once you have removed all visible dried paint from the nozzle, proceed to clean any filters present in your sprayer. Rinse them under warm water with a mild detergent to eliminate any remaining residue.
It is worth mentioning that individual steps may vary depending on your specific paint sprayer model.
To complement this cleaning method, using alternative solutions like paint strippers or rubbing alcohol can be effective for stubborn spots of dried paint.
Cleaning the filters with warm water and mild detergent: Filter out the paint gunk and dirt like a pro, because no one wants their sprayer spraying specks of dried paint on their masterpiece.
Cleaning the filters with warm water and mild detergent
Filters in a paint sprayer play a crucial role in ensuring a smooth and even application of paint. Cleaning these filters regularly is essential to maintain the efficiency and effectiveness of the sprayer. This process involves using warm water and mild detergent.
- Remove the filters from the paint sprayer.
- Soak the filters in warm water with a small amount of mild detergent.
- Gently scrub away any remaining paint particles or residue from the filters.
Cleaning the filters with warm water and mild detergent helps to dissolve dried paint and remove any clogs or blockages, allowing for better paint flow during future use of the sprayer. This method effectively removes stubborn paint without damaging the filters or other components of the sprayer.
By incorporating this cleaning step into your regular maintenance routine, you can ensure that your paint sprayer remains in optimal condition and continues to deliver high-quality results for your painting projects.
Flushing the System
Flushing the system is a crucial step in cleaning a paint sprayer with dried paint. In this section, we will explore various techniques to ensure a thorough flushing process. From using water to clear the paint sprayer and cleaning the inlet strainer to effective flushing tips and preventing future clogs, we have got you covered. Say goodbye to stubborn dried paint and keep your sprayer in top-notch condition.
Using water to flush the paint sprayer
The process of using water to flush the paint sprayer is essential for maintaining its functionality and ensuring a clean painting experience. Adequate flushing removes any dried paint residues that can clog the nozzle and filters, preventing potential issues during future projects.
- First, disconnect the power source and remove the nozzle from the paint sprayer.
- Soak the nozzle in warm water to soften the dried paint, making it easier to remove.
- Next, scrub away the dried paint from the nozzle using a brush or cloth, removing any large pieces.
- Clean the filters by rinsing them with warm water and using a mild detergent if necessary.
- Finally, flush the entire system with water by running it through the sprayer until it runs clear.
Flushing with water effectively clears out any remaining paint in the sprayer’s internal components. Additionally, it is important to clear any leftover paint from the cup and lid as well as clean the inlet strainer to ensure optimal performance. Following these steps will help prevent future clogs and ensure that your paint sprayer remains in good working condition for future projects.
Don’t let dried paint cramp your sprayer’s style – clear that cup and lid with ease!
Clearing the paint cup and lid
The process of clearing the paint cup and lid is an essential step in cleaning a paint sprayer with dried paint. It ensures that any remnants of paint are removed, allowing for a smooth and efficient spraying experience in future projects.
To clear the paint cup and lid effectively, follow these steps:
- Empty the residual paint from the cup: Begin by carefully pouring out any remaining paint from the cup into a suitable container. It is important to dispose of the paint properly according to local regulations.
- Remove the lid: Use caution while removing the lid to avoid spills or splatters. Most lids can be twisted or pried off gently. Set aside the lid for cleaning separately.
- Rinse the cup with warm water: Thoroughly rinse the cup using warm water to remove any residual paint or debris. Avoid using harsh chemicals or solvents as they may damage the cup material.
- Scrub away stubborn stains: For stubborn stains or dried paint, use a soft brush or sponge to scrub them off gently. Be careful not to scratch or damage the interior surface of the cup.
- Dry and reassemble: Once cleaned, dry both the cup and lid thoroughly before reassembling them back onto the sprayer. This helps prevent moisture buildup and potential issues during storage.
- Inspect for proper functionality: After clearing the paint cup and lid, ensure that they are properly attached and secure on the sprayer. Check for any signs of damage or wear that may require replacement parts.
By following these steps, you can effectively clear and clean your paint cup and lid, maintaining the optimal performance of your sprayer for future use effortlessly.
Cleaning the inlet strainer
The inlet strainer, an essential component of a paint sprayer, plays a crucial role in preventing debris and particles from entering the system. It is important to clean the inlet strainer regularly to maintain optimal performance and prevent clogs in the paint sprayer.
Cleaning the inlet strainer can be done by following these steps:
- Disconnect the power source and remove any remaining paint from the sprayer.
- Locate the inlet strainer, usually at the connection where the hose or paint cup attaches to the sprayer.
- Remove the inlet strainer from its housing by unscrewing or releasing any clips or fasteners.
- Rinse the inlet strainer thoroughly with warm water to remove any dried paint or residue.
- Inspect the strainer for any remaining debris and gently scrub it with a soft brush if necessary.
It is worth noting that using mild detergent can help in cases of stubborn paint build-up. Ensure proper drying before reattaching the cleaned inlet strainer back into its housing.
Cleaning the inlet strainer is an important step in maintaining a functional paint sprayer, as it helps prevent clogs and ensures steady paint flow during future projects.
A true history regarding cleaning the inlet strainer involves a professional painter who neglected regular maintenance of their paint sprayer’s inlet strainer. Over time, dried paint accumulated in the strainer, leading to decreased performance and frequent clogs during painting projects. By following proper cleaning techniques for the inlet strainer, they were able to restore their equipment’s functionality and avoid further issues in future endeavors.
Flushing away paint and preventing future clogs: the sprayer’s version of a cleanse and detox program.
Tips for effective flushing and preventing future clogs

Effective flushing and preventing future clogs are crucial aspects of maintaining a paint sprayer in optimal condition. Proper cleaning methods not only ensure the removal of dried paint but also contribute to the longevity and functionality of the sprayer for future projects.
Soaking the nozzle in warm water: Removing the nozzle and soaking it in warm water is an effective way to loosen dried paint. The warm water helps to soften the paint, making it easier to scrub away.
Scrubbing away dried paint: After soaking, gently scrubbing away the loosened dried paint is necessary to completely clean the nozzle. It is important to remove any large pieces of paint that may obstruct proper spray flow.
Cleaning filters with warm water and mild detergent: The filters in a paint sprayer also need regular cleaning. Using warm water and mild detergent helps to remove any remaining paint residue from the filters, ensuring that they function properly.
Flushing the system with water: Flushing the entire system with water is essential after removing dried paint. This process helps to clear any remaining traces of paint from the internal components, preventing future clogs.
Clearing the paint cup and lid: Thoroughly cleaning the paint cup and lid is important for preventing any dried or leftover paint from contaminating future projects. It ensures a clean starting point for each use.
Cleaning the inlet strainer: The inlet strainer is responsible for filtering out debris and preventing clogs. Cleaning it regularly ensures that it functions optimally, allowing a smooth flow of paint without any obstructions.
Trying alternative solutions for stubborn paint: In some cases, regular cleaning methods may not be enough to remove stubborn dried paint. Trying alternatives such as a paint stripper or remover, rubbing alcohol or acetone, hot water, and dish soap solution, or even pressure washing or paint thinner for oil-based paints can help in thorough cleaning.
Importance of regular cleaning and proper storage: Regular cleaning after every use is crucial for maintaining the sprayer’s effectiveness. Avoiding solvents that may damage its components and storing the paint sprayer in a dry location are also important factors in preventing future clogs and ensuring longevity.
Alternative Solutions for Stubborn Paint
When it comes to stubborn paint, sometimes traditional cleaning methods just won’t cut it. In this section, we’ll explore alternative solutions that can tackle the toughest paint residues. From trying paint strippers or removers to using rubbing alcohol or acetone for difficult spots, we’ll uncover effective techniques backed by expert advice. Additionally, we’ll discuss the power of a hot water and dish soap solution for a thorough cleaning, as well as the benefits of pressure washing or paint thinner specifically for oil-based paint. Say goodbye to dried paint dilemmas with these alternative solutions.
Trying a paint stripper or remover
A paint stripper or remover is a valuable tool when attempting to clean a paint sprayer with dried paint. This solution is specifically designed to break down and remove layers of paint from surfaces, making it an effective option for removing stubborn dried latex paint from a sprayer nozzle.
- A paint stripper or remover can effectively break down the dried latex paint, making it easier to remove.
- It can be applied directly to the affected areas of the sprayer, allowing the solution to penetrate and dissolve the dried paint.
- Using a brush or cloth, gently scrub away the dissolved paint and rinse thoroughly with water to ensure all traces of the stripper are removed.
In addition to its effectiveness in removing dried latex paint, a paint stripper or remover can also be used on other types of paint that may be more challenging to clean. Its powerful formula can tackle oil-based paints and other coatings as well.
Using a specific product for removing dried or stubborn paints such as a paint stripper or remover ensures that you have access to an effective solution for dealing with tough cleaning situations. Utilizing this method along with other cleaning techniques mentioned earlier in this article will help maintain the functionality and longevity of your paint sprayer throughout future projects.
Using rubbing alcohol or acetone for difficult spots
Stubborn spots of dried paint can pose a challenge when cleaning a paint sprayer. To effectively remove these hard-to-clean areas, rubbing alcohol or acetone can be used. These solvents are known for their ability to break down and dissolve paint, making them effective options for tackling difficult spots.
Using rubbing alcohol or acetone for difficult spots:
- Moisten a clean cloth or sponge with rubbing alcohol or acetone.
- Gently scrub the dried paint spots with a moistened cloth or sponge.
- Apply firm but gentle pressure to loosen and lift the paint from the surface.
- Continue scrubbing until the spot is fully cleaned, reapplying more solvent as needed.
- Rinse the area with warm water to remove any remaining residue.
- Dry the surface thoroughly before proceeding with further cleaning or painting.
By following these steps, you can effectively use rubbing alcohol or acetone to clean stubborn spots of dried paint from your sprayer, ensuring optimal performance and preventing future clogs.
Using hot water and dish soap solution for thorough cleaning:
In addition to using rubbing alcohol or acetone for difficult spots, another effective method for thorough cleaning of a paint sprayer involves using a hot water and dish soap solution. This mixture helps to loosen and dissolve dried latex paint, making it easier to remove from various components of the sprayer such as nozzles and filters. Simply soak these parts in the solution for a period of time to allow the paint to soften before scrubbing away any remaining residue.
Hot water and dish soap solution for thorough cleaning
To ensure thorough cleaning of the paint sprayer, using a hot water and dish soap solution is an effective method. This solution helps to break down and remove any dried paint residue from the sprayer components, ensuring optimal performance during future use.
- Soaking the nozzle and other removable parts: Begin by removing the nozzle from the paint sprayer and soaking it in a container filled with warm water and a small amount of dish soap. Allow it to soak for about 15-20 minutes to soften any dried paint stuck on the surface.
- Scrubbing away dried paint: After soaking, use a soft-bristle brush or toothbrush to gently scrub away any remaining dried paint from the nozzle. Be careful not to use excessive force, as this may damage the delicate components of the sprayer. Rinse thoroughly with water after scrubbing.
- Cleaning filters with warm water and mild detergent: Remove any filters present in the paint sprayer and clean them separately with warm water and mild detergent. Gently scrub away any dried paint or debris using a brush or sponge, ensuring that all surfaces are thoroughly cleaned. Rinse the filters well before reassembling them back into the sprayer.
It’s important to note that hot water and dish soap solutions can effectively clean most types of latex-based paints. However, for more stubborn or oil-based paints, alternative solutions such as paint strippers/removers or rubbing alcohol/acetone may be more suitable.
The above steps provide an overview of how to clean a paint sprayer using hot water and dish soap solution. By following these steps, you can ensure that your sprayer is properly cleaned and maintained for optimal performance in future projects without causing damage or clogs in its components.
Say goodbye to a stubborn oil-based paint with the power of pressure washing or the magic of paint thinner.
Pressure washing or paint thinner for oil-based paint
Pressure washing or using paint thinner are two effective methods for removing dried oil-based paint from a paint sprayer. Pressure washing involves using high-pressure water to dislodge and remove the paint. This method is particularly useful for large areas or stubborn paint stains. On the other hand, using paint thinner helps to dissolve the dried paint, making it easier to clean. It is important to choose a paint thinner specifically designed for oil-based paints to ensure the best results.
To pressure wash a paint sprayer, it is recommended to use a pressure washer with an appropriate nozzle attachment. The high-pressure water should be directed at the affected areas of the sprayer, effectively removing the dried oil-based paint. However, caution should be exercised when using this method as excessive pressure can damage the internal components of the sprayer.
Alternatively, using a paint thinner can be an effective solution for removing dried oil-based paint. Apply the appropriate type of paint thinner onto a clean cloth or sponge and gently rub the affected areas of the sprayer. The thinner will dissolve the dried paint, allowing it to be wiped away easily. It is important to follow all safety precautions when working with chemical solvents and ensure proper ventilation in the workspace.
In addition to pressure washing and using paint thinner, there are some additional suggestions for cleaning a paint sprayer that may have stubborn oil-based paint residue. One such suggestion is to use a wire brush or scraper to gently remove any remaining dried paint particles. Another option is to soak the affected parts in a mixture of warm water and mild detergent, which can help loosen and dissolve any remaining residue.
Overall, pressure washing or using a suitable type of paint thinner are effective methods for removing dried oil-based paints from a sprayer. It is important to choose the method that works best for your specific situation and always follows proper safety precautions when working with chemicals or high-pressure equipment. Regular cleaning and maintenance after each use will also help prevent future clogs and ensure the longevity of your paint sprayer.
Maintaining your paint sprayer is like caring for a delicate artist – neglect it, and you’ll be left with a mess that even Picasso couldn’t fix.
Proper Maintenance and Storage
Properly maintaining and storing your paint sprayer is crucial for its longevity and performance. In this section, we will explore why regular cleaning after each use is essential, the importance of avoiding solvents that can harm the sprayer components, and the significance of storing the paint sprayer in a dry location. By following these practices, you can ensure that your paint sprayer remains in optimal condition, ready for your next project.
Importance of regular cleaning after every use
Regular cleaning after every use of a paint sprayer is essential to ensure its longevity and avoid potential issues with future projects. Neglecting to clean a paint sprayer can result in dried paint clogging the nozzle and filters, which can affect the spray pattern and lead to an uneven application of paint. This can ultimately result in wasted paint and a poor-quality finish.
Cleaning the paint sprayer after each use helps to prevent dried latex paint from building up inside the system. The nozzle and filters should be removed and soaked in warm water to soften any dried paint, making it easier to scrub away. Additionally, using warm water and mild detergent to clean the filters helps remove any residue that may have accumulated.
Flushing the system with water is also an important step in maintaining a clean paint sprayer. This helps remove any remaining paint particles from the system, including the paint cup and lid, as well as the inlet strainer. Effective flushing techniques, such as using high-pressure water or utilizing a dedicated flushing solvent, can help prevent future clogs and ensure proper functionality.
For stubborn paint that is difficult to remove through traditional cleaning methods, there are alternative solutions available. Paint strippers or removers can be used for more stubborn spots while rubbing alcohol or acetone can help dissolve dried latex paint. For oil-based paints, pressure washing or using a suitable paint thinner may be necessary for thorough cleaning.
Proper maintenance and storage of the paint sprayer are equally important. Regular cleaning not only ensures optimal performance but also helps prolong the lifespan of the equipment. It is crucial to avoid using solvents that may damage various components of the sprayer while properly storing it in a dry location when not in use.
Avoiding solvents that may damage sprayer components
- Choose mild detergents or cleaning solutions specifically designed for paint sprayers. These products are formulated to effectively remove dried paint without damaging the internal components.
- Avoid using solvents like acetone, bleach, or strong chemicals as they can corrode the parts of the sprayer and cause irreversible damage.
- Instead, opt for gentle and natural cleaning agents such as dish soap or warm water mixed with vinegar. This mixture is effective in removing dried paint while being safe for the sprayer’s components.
- Always consult the manufacturer’s guidelines and recommendations regarding cleaning solutions to ensure you choose a solvent-free option that will maintain the longevity of your paint sprayer.
In addition to avoiding harmful solvents, it is essential to properly handle and store your paint sprayer after each use. Cleaning it thoroughly with appropriate solutions ensures its continued functionality and prevents any issues with future projects. Neglecting proper maintenance may lead to clogs, inefficiency, or even complete breakdowns.
To conclude, taking proactive steps to avoid solvents that may damage sprayer components is crucial for maintaining a functional and efficient paint sprayer. By following safe cleaning practices and using mild detergents or natural alternatives instead of harsh solvents, you can extend the lifespan of your equipment while achieving optimal painting results. Don’t risk damaging your valuable tool by using corrosive substances – opt for safer cleaning methods and enjoy worry-free painting experiences.
Keep your paint sprayer in a dry location, because a rusty sprayer is about as useful as a wet paintbrush.
Properly storing the paint sprayer in a dry location
To properly store the paint sprayer in a dry location, follow these 6 steps:
- Clean the sprayer thoroughly: Before storing the paint sprayer in a dry location, make sure to clean it and remove any residual paint. Refer to the previous sections on cleaning and maintenance for proper techniques.
- Disconnect power source: Prior to storing the paint sprayer, ensure that the power source is disconnected. This will prevent any accidental activation or damage while the sprayer is not in use.
- Remove any attachments: Take off any detachable parts or attachments such as nozzles, filters, or hoses. Clean these parts separately, as explained earlier.
- Store in a dry area: Choose a storage area that is dry and free from excessive humidity. Excessive moisture can cause rusting or damage to the components of the paint sprayer.
- Protect from dust and debris: To prevent dust and debris from accumulating while the sprayer is stored, use a cover or protective sheet. This will help keep the sprayer clean and prevent any obstruction of internal components.
- Position upright: To avoid potential leaks or spills, store the paint sprayer in an upright position. This will prevent any leftover paint from causing issues in the system.
It’s important to note that properly storing your paint sprayer is crucial for its longevity and to avoid problems when using it for future projects. Additionally, always refer to the manufacturer’s guidelines for specific instructions on how to best store your particular model of paint sprayer.
By following these proper storage practices, you can maintain your paint sprayer’s functionality and avoid unnecessary complications when working on future projects.
Finding a dried paint mess in your sprayer? Don’t worry, I’ve got you covered with these cleaning tips that will make your sprayer sing, I’m good as new!
Conclusion
A well-executed cleaning process is crucial to maintain the functionality and longevity of your paint sprayer, ensuring a hassle-free experience for future projects. In this conclusion section, we will discuss effective cleaning methods that guarantee a clean and functional paint sprayer. By following these strategies, you can prevent issues caused by dried paint and optimize your sprayer’s performance for years to come.
Effective cleaning methods ensure a clean and functional paint sprayer
Effective cleaning methods are crucial for maintaining a paint sprayer that is both clean and fully functional. Proper and regular cleaning ensures that the sprayer remains in good working condition, preventing potential issues and ensuring longevity for future projects.
To effectively clean a paint sprayer, follow these 4 steps:
- Removing dried paint from the nozzle and filters: Start by disconnecting the power source and wearing protective gear. Remove the nozzle and soak it in warm water to loosen any dried paint. Scrub away the remaining paint using a brush or cloth, making sure to remove any large pieces. Clean the filters with warm water and mild detergent to ensure they are free of any residue.
- Flushing the system: Use water to thoroughly flush the paint sprayers’ components. This includes clearing out the paint cup and lid, as well as cleaning the inlet strainer. Flushing helps remove any remaining paint particles or debris from inside the sprayer, ensuring it operates at optimum performance.
- Dealing with stubborn paint: If there are areas with stubborn dried paint that cannot be removed easily, alternative solutions can be employed. Options include using a paint stripper or remover specifically designed for latex paint, using rubbing alcohol or acetone for difficult spots, using a mixture of hot water and dish soap for a thorough cleaning, or opting for pressure washing or paint thinner for oil-based paints.
- Proper maintenance and storage: It is important to note that proper maintenance and storage also play key roles in preserving a clean and functional paint sprayer. Regularly cleaning the sprayer after every use prevents the build-up of dried paint residue, ensuring its continued effectiveness over time. Additionally, it is essential to avoid solvents that may damage components of the sprayer when choosing products for cleaning purposes. Lastly, storing the device in a dry location helps prevent moisture-related issues.
By following effective cleaning methods and implementing proper maintenance practices, you can ensure your paint sprayer remains in optimal condition throughout its lifespan. Neglecting these steps may lead to clogging, reduced efficiency, and overall subpar performance. Take the necessary steps to clean and maintain your paint sprayer, avoiding potential issues that may arise in future projects.
Ensuring longevity and avoiding issues with future projects.
To ensure the longevity of your paint sprayer and avoid issues with future projects, it is crucial to properly clean and maintain the equipment. Cleaning a paint sprayer with dried paint can prevent clogs and ensure optimal performance.
- It is important to wear protective gear and disconnect the power source before starting the cleaning process. This ensures personal safety and prevents any accidents. Additionally, gathering the necessary tools and materials for cleaning, such as warm water, mild detergent, nozzle cleaner, and soft brushes, will facilitate an effective cleaning process.
- Cleaning the nozzle and filters is an essential step in maintaining a functional paint sprayer. Removing the nozzle and soaking it in warm water helps soften dried paint for easier removal. Scrubbing away dried paint with a brush or nozzle cleaner will ensure that no residue remains. Similarly, cleaning the filters with warm water and mild detergent helps remove any clogs or debris that may affect the sprayer’s performance.
- Flushing the system is another important step in preventing future issues. Using water to flush the paint sprayer helps remove any leftover paint from the internal components. Clearing the paint cup and lid from any remaining paint residue ensures a clean working environment. Cleaning the inlet strainer further removes any impurities that may hinder proper functionality.
- For stubborn paint stains, alternative solutions can be used. Trying a paint stripper or remover can help dissolve difficult spots of dried latex paint. Rubbing alcohol or acetone can also be used for more stubborn stains. A hot water and dish soap solution can provide thorough cleaning for larger areas. In the case of oil-based paints, pressure washing or using a suitable solvent like paint thinner may be required.
- Proper maintenance after every use is key to ensuring longevity and avoiding issues with future projects. Regular cleaning prevents the buildup of dried paint that can lead to clogs or blockages within the equipment. It is important to avoid using solvents that may damage sprayer components during cleaning. Finally, properly storing the paint sprayer in a dry location helps protect it from damage and keeps it in optimal condition.
Some Facts About How To Clean a Paint Sprayer with Dried Paint:
- ✅ Cleaning dried latex paint from a paint sprayer requires disconnecting the sprayer, rinsing out the paint cup, and filling it with warm water. (Source: Team Research)
- ✅ Warm water and a soft bristle brush can help dislodge dried latex paint from paint sprayer parts. (Source: Team Research)
- ✅ Alcohol or paint thinner can be used to remove stubborn dried paint from a paint sprayer. (Source: Team Research)
- ✅ Regularly cleaning a paint sprayer after each use and taking proper precautions while painting can help prevent dried paint in the future. (Source: Team Research)
- ✅ It is important to rinse the paint sprayer thoroughly after cleaning to ensure it is ready for the next project. (Source: Team Research)
FAQs about How To Clean A Paint Sprayer With Dried Paint
How do I clean a paint sprayer with dried latex paint?
To clean a paint sprayer with dried latex paint, follow these steps:
- Disconnect the sprayer from any power source and wear protective equipment.
- Clean the nozzle by soaking it in a solution of warm water and dish soap for 15 minutes. Scrub away dried paint using a soft-bristled brush.
- Clean the filter by removing it from the sprayer and soaking it in a bucket of warm water with mild detergent. Rinse with clean water and allow it to air dry.
- Remove the paint cup and lid, fill it with warm water, and secure the lid. Place it back on the unit and run the sprayer until the water runs clear.
- Clean the inlet strainer by removing it from the sprayer and placing it in a bucket of warm water. Use a brush to scrub away dried paint, rinse with clean water, and allow it to dry before replacing it.
- Ensure all parts are dry before reassembling the sprayer.
What should I do before cleaning a paint sprayer with dried latex paint?
Before cleaning a paint sprayer with dried latex paint, take the following precautions:
- Disconnect the sprayer from any power source.
- Wear protective equipment, such as gloves and eye goggles.
- Lay down a drop cloth or rags to protect your workspace.
Can I use a solvent-based cleaner to clean a paint sprayer with dried latex paint?
Yes, you can use a solvent-based cleaner, such as mineral spirits or paint thinner, to clean a paint sprayer with dried latex paint. However, be cautious as these solvents can wear out gaskets and tubing over time. It is best to avoid using them if possible.
What are some alternative methods to clean a paint sprayer with dried latex paint?
Some alternative methods to clean a paint sprayer with dried latex paint include:
- Using a paint stripper or remover
- Trying isopropyl alcohol or acetone
- Using hot water and dish detergent
- Using a pressure washer (on suitable surfaces)
How often should I clean my paint sprayer to prevent dried latex paint?
To prevent dried latex paint, it is recommended to clean your paint sprayer thoroughly after every use. Regular cleaning and maintenance will help prolong the lifespan of the sprayer and ensure it continues to work effectively.
Are there any specific cleaning products I should use to clean a paint sprayer with dried latex paint?
There are specific cleaning products available for cleaning paint sprayers, such as professional gun cleaners and Goo Gone Latex Paint Clean-Up Wipes. However, you can also use common household items like warm water, dish detergent, and mild solvents like mineral spirits or paint thinner.
Leave a Reply