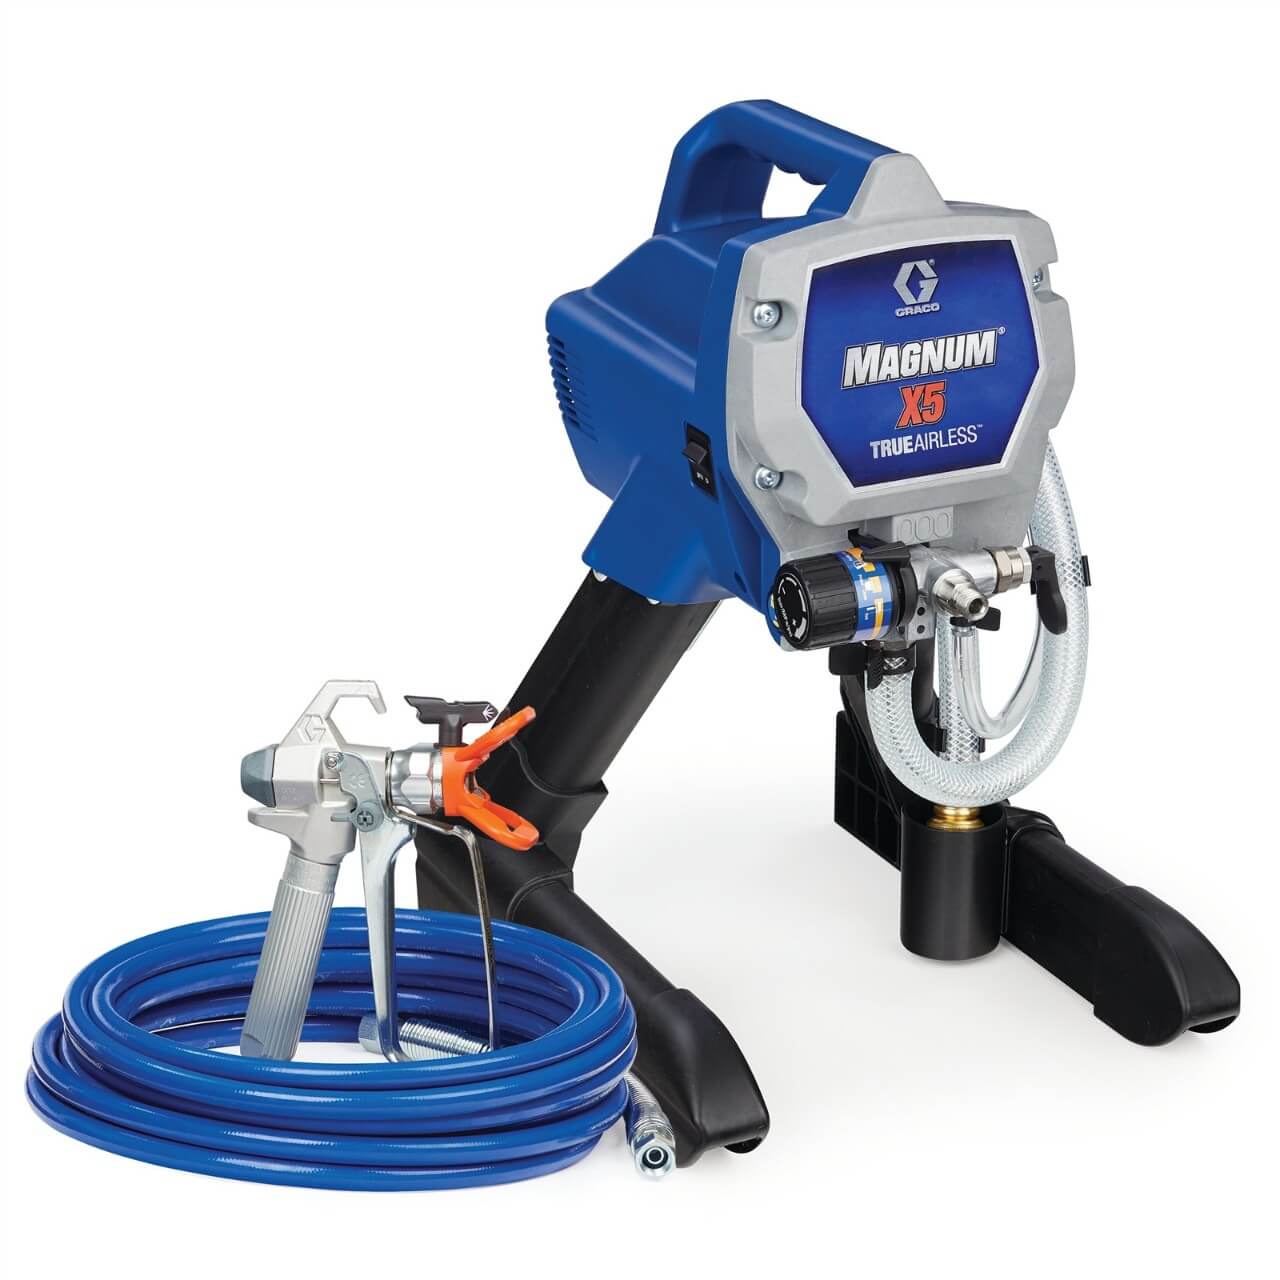
The world of painting has been revolutionized by tools like the paint sprayer, a device that not only makes large-scale painting jobs more manageable but also ensures a smooth, professional finish. However, to continue reaping the benefits of this valuable tool, it’s essential to maintain it properly. One critical aspect of this maintenance is regular cleaning. Over time, leftover paint can cause clogs and compromise the overall performance of your sprayer. Moreover, if not cleaned effectively, the device could become damaged and lose its longevity.
In this comprehensive guide, we will be answering the question of “steps of how to clean a paint sprayer”. From breaking down the different components of the sprayer and how to handle them, to a detailed, step-by-step walkthrough of the cleaning process, we will cover it all. This article is designed to help both beginners and seasoned DIY enthusiasts maintain their paint sprayers, ensuring their efficiency and lifespan. So, whether you’re using your sprayer for a personal project or for professional work, our guide will make sure you know how to keep it clean and ready for action.
Table of Contents
Key Takeaways:
- Regular cleaning and maintenance of a paint sprayer is essential for professional painters to ensure reliable equipment, extended lifespan, and cost savings.
- Neglecting proper cleaning can lead to potential damage and issues, resulting in high repair frequency and decreased performance of the sprayer. It is crucial to maintain efficient performance and longevity of the equipment.
- A step-by-step guide to cleaning a paint sprayer includes cleaning the sprayer after each use, focusing on cleaning the main parts of the sprayer and cleaning different types of paint guns. Using warm water and soap or paint thinner, depending on the type of paint used is recommended for cleaning.
- Precautions such as protecting oneself while cleaning, using specific cleaning solutions and tools, proper drying and reassembly of the sprayer, and taking preventive measures for maintaining the sprayer’s longevity are important to ensure safe and effective cleaning.
- Cleaning a paint sprayer is crucial for professional painters to maintain the equipment’s longevity, ensure efficient performance, and achieve cost savings. Following the step-by-step guide and tips provided can lead to effective cleaning and proper maintenance.
Importance of cleaning and maintaining a paint sprayer for professional painters
A properly cleaned and maintained paint sprayer is of utmost importance for professional painters. Neglecting the cleaning process can lead to potential damage and issues, resulting in high repair frequency. By taking care of their equipment, painters can ensure its reliable performance, extended lifespan, and cost savings in the long run. The expertise of painters like Nick Slavik and Craig Gustafson supports the significance of cleaning a paint sprayer to maintain its efficiency.
To understand the importance of cleaning and maintaining a paint sprayer, let’s follow a 3-step guide:
- Cleaning the paint sprayer after each use is crucial. It is recommended to clean the sprayer after every use as part of project clean up. This not only prevents paint build-up and clogging but also ensures that the sprayer operates smoothly for future projects. The HomeRight Finish Max Extra paint sprayer is highly recommended for cleaning purposes.
- Cleaning the main parts of the paint sprayer is essential for its efficient functioning. Focus on thoroughly cleaning the nozzle and other specific parts, following these step-by-step instructions: Start by disassembling the spray gun and removing any remaining paint or residue. Use warm water and soap or paint thinner depending on the type of paint used. Clean all detachable parts separately using a brush or cloth.
- Different types of paint guns require specific cleaning processes to maintain performance and avoid damage:
- Gravity-fed guns: Remove any excess paint from the cup before disassembling it for thorough cleaning.
- HVLP guns: Pay close attention to cleaning both the air cap and fluid tip to prevent any blockages.
- Airless guns: Flush out any remaining material by running an appropriate solvent or water through the gun.
In addition to these steps, it is important for painters to take precautions while cleaning their sprayers. This includes wearing protective gear such as gloves, goggles, and masks to avoid contact with harmful chemicals. Using recommended cleaning solutions and tools, ensuring proper drying and reassembly of the sprayer, and taking preventive measures to maintain its longevity is also essential for effective cleaning.
Understanding the importance of cleaning a paint sprayer, professional painter Nick Slavik experienced first-hand how neglecting this maintenance can have costly consequences. With regular cleaning and maintenance, he was able to prolong the lifespan of his equipment while also reducing repair costs. This real-life example reinforces the significance of proper cleaning practices for professional painters.
With a clean paint sprayer, you’ll save more than just money—your equipment will stick around longer, unlike that friend who always ‘borrows’ your stuff.
Benefits of reliable equipment, extended lifespan, and cost savings
Reliable equipment, extended lifespan, and cost savings are significant benefits that professional painters can enjoy by ensuring the proper cleaning and maintenance of their paint sprayers. Neglecting to clean a paint sprayer can lead to potential damage and issues, requiring frequent repairs. By regularly cleaning the sprayer, painters can maintain its efficient performance and longevity, saving them from costly replacements or repairs in the long run.
- Reliable Equipment: A well-maintained paint sprayer ensures reliable performance during painting projects. It helps professional painters achieve consistent results without interruptions caused by clogged nozzles or other malfunctions.
- Extended Lifespan: Regular cleaning and maintenance contribute to the extended lifespan of a paint sprayer. By preventing the build-up of dried paint or debris, painters can avoid premature wear and tear, prolonging the life of their equipment.
- Cost Savings: Proper cleaning reduces repair frequency and minimizes the need for expensive replacements. Painters who prioritize maintenance save money by avoiding unnecessary repairs or investing in new equipment prematurely. They also minimize downtime due to equipment failure.
Furthermore, following a step-by-step guide for cleaning a paint sprayer and adhering to expert advice from professionals like Nick Slavik and Craig Gustafson can provide additional insights for maintaining reliable equipment, extending its lifespan, and saving costs.
By emphasizing these benefits, professional painters are encouraged to make cleaning a routine part of their project clean-up process. Regular cleaning after each use using recommended products like the HomeRight Finish Max Extra paint sprayer helps prevent build-up and maintain the peak performance of the equipment.
Learn from the pros, because even Nick Slavik and Craig Gustafson know that cleaning a paint sprayer is no laughing matter.
Reference to expert advice and experience of Nick Slavik and Craig Gustafson
Text:
Nick Slavik and Craig Gustafson, both respected experts in the field of professional painting, provide valuable advice and share their extensive experience when it comes to cleaning and maintaining a paint sprayer. Their expertise is widely recognized in the industry, making their insights highly valuable for professional painters looking to optimize the performance and lifespan of their equipment.
Slavik, a renowned painter known for his attention to detail and commitment to quality craftsmanship, emphasizes the importance of regular cleaning as part of proper maintenance for a paint sprayer. He emphasizes that neglecting proper cleaning can lead to potential damage and issues that can diminish the efficiency and effectiveness of the sprayer over time.
Gustafson, an experienced painter with a deep understanding of different types of paint sprayers, provides specific recommendations for cleaning various parts of the sprayer. His step-by-step instructions offer practical guidance on how to effectively clean the nozzle and other important components.
In addition to their expert advice, Slavik and Gustafson underscore the significance of using appropriate cleaning solutions and tools. They emphasize the importance of protecting oneself while cleaning and stress the need for proper drying and reassembly after every cleaning session. By following their recommendations, painters can maintain their equipment’s longevity and ensure consistent performance.
Professional painters who follow these expert suggestions will benefit from enhanced reliability in their equipment, extended lifespan through proper maintenance techniques, and ultimately save money by minimizing repair frequency. The combined knowledge and experience shared by Nick Slavik and Craig Gustafson provide invaluable guidance for professionals seeking effective methods to clean and maintain their paint sprayer equipment.
Why cleaning a paint sprayer is necessary: Because neglecting proper cleaning is like asking Picasso to paint with a clogged brush.
Why cleaning a paint sprayer is necessary
Properly cleaning your paint sprayer is critical for its performance and longevity. Neglecting this essential task can lead to potential damage, high repair frequency, and decreased efficiency. In this section, we’ll explore the reasons why cleaning a paint sprayer is necessary. By understanding the importance of maintaining a clean sprayer, you can ensure optimal results and save yourself from cost-intensive repairs in the long run.
Explanation of the potential damage and issues caused by neglecting proper cleaning
Neglecting proper cleaning of a paint sprayer can lead to significant damage and a variety of issues. Over time, paint residue can build up inside the sprayer, clogging essential components and affecting the overall performance. The nozzle, in particular, is prone to clogging, which can result in uneven spray patterns and reduced productivity.
Furthermore, inadequate cleaning can also lead to premature wear and tear of the paint sprayer. Paint particles left behind can cause corrosion and damage to sensitive parts of the equipment, such as seals and pistons. This not only reduces the efficiency of the sprayer but also increases the frequency of repairs and maintenance needed.
Additionally, neglected cleaning can have costly consequences for professional painters. A poorly maintained sprayer may require more frequent replacements due to irreparable damage or reduced lifespan. This incurs unnecessary expenses that could have been avoided with regular cleaning and maintenance.
To prevent these potential issues, it is crucial to incorporate proper cleaning into your regular routine after each use. By following a step-by-step guide for cleaning a paint sprayer and using recommended cleaning solutions and tools, you can ensure optimal performance and longevity for your equipment.
In addition to preventing damage and issues caused by neglecting proper cleaning, regular maintenance also allows professional painters to consistently deliver high-quality results. With a clean and well-maintained sprayer, you can achieve consistent spray patterns, accurate color application, and overall better finishes on your projects.
Overall care for your paint sprayer should be given equal importance as its usage during painting tasks. Neglecting this aspect might result in decreased efficiency levels of the equipment leading towards wear and tears sooner than expected. So it is necessary that at any cost, proper action must be taken instantly when noticed or else professionals end up making a great loss just because they missed taking steps for an area like these shadows while painting walls or even properly cleaning their spray machine afterward.
Neglecting proper cleaning turns your paint sprayer into a regular at the repair shop.
Mention of the high repair frequency due to inadequate cleaning
The neglect of proper cleaning can lead to a high frequency of repairs for paint sprayers. When a paint sprayer is not cleaned adequately, it can result in various issues and damage over time. The buildup of dried paint and residue can clog the nozzle, causing inconsistent spray patterns or even complete blockage. This can lead to uneven application and wasted paint. Additionally, neglected cleaning can cause the internal components of the sprayer, such as seals and valves, to deteriorate faster, requiring frequent replacements and repairs.
- Buildup of dried paint and residue can clog the nozzle
- Clogged nozzle leads to inconsistent spray patterns or complete blockage
- Inconsistent spray patterns result in uneven application and wasted paint
- Internal components like seals and valves deteriorate faster without proper cleaning
- Deteriorated components require frequent replacements and repairs
- Frequent repairs increase the overall cost of maintaining the sprayer
It is crucial to prioritize proper cleaning to maintain efficient performance and prolong the lifespan of a paint sprayer. Without regular cleaning, these devices are prone to breakdowns caused by debris or clogging, leading to interruptions during painting projects and costly repairs. Taking steps to prevent repair needs due to inadequate cleaning can ultimately save time and money for professional painters.
Importance of maintaining efficient performance and longevity of the sprayer
Ensuring the efficient performance and longevity of a paint sprayer is of utmost importance for professional painters. Neglecting proper maintenance and cleaning can lead to potential damage and issues that may hinder the sprayer’s functionality. According to expert advice from Nick Slavik and Craig Gustafson, inadequate cleaning often results in high repair frequency, which can be both time-consuming and costly.
To maintain efficient performance, it is crucial to clean the paint sprayer after each use. This not only ensures that any residual paint is removed but also prevents clogging and build-up, which could affect the sprayer’s functionality. Incorporating cleaning as part of project clean-up helps establish a routine and reinforces the importance of maintaining the equipment.
When it comes to cleaning the main parts of the paint sprayer, particular attention should be given to cleaning the nozzle and other specific components. Proper step-by-step instructions should be followed, using warm water and soap or paint thinner depending on the type of paint used. By thoroughly cleaning these key parts, professional painters can guarantee optimal performance while avoiding potential damage.
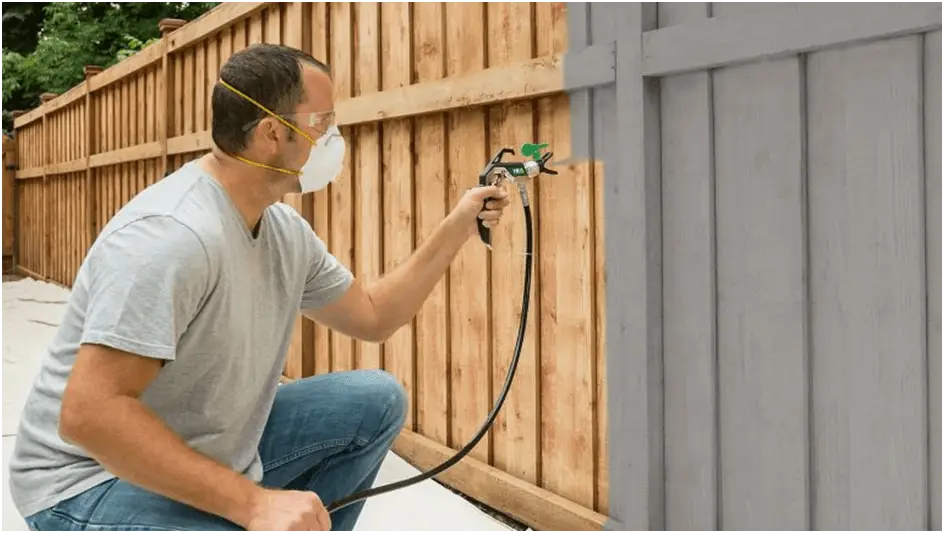
Different types of paint guns require specific cleaning processes for effective maintenance. There are three main types: airless, HVLP (high volume low pressure), and conventional spray guns. Each type necessitates unique cleaning techniques tailored to its design. Properly cleaning these paint guns not only ensures their longevity but also helps maintain consistent performance throughout various painting projects.
Step-by-step guide to cleaning a paint sprayer
In this step-by-step guide, we will walk you through the process of cleaning a paint sprayer. From cleaning the paint sprayer after each use to tackling the main parts of the sprayer and even dealing with different types of paint guns, we’ve got you covered. So grab your cleaning supplies and let’s dive into the key steps to ensure your paint sprayer stays in top condition for your next project.
Cleaning the paint sprayer after each use
To effectively clean a paint sprayer after each use, follow these four key steps:
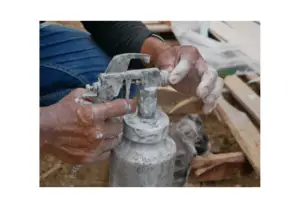
- Step 1: Disassemble the sprayer – Start by disassembling the main parts of the paint sprayer, such as the nozzle, air cap, and fluid needle. This allows for thorough cleaning of all components and removes any residual paint or debris.
- Step 2: Clean with warm water and soap/paint thinner – Depending on the type of paint used, either warm water and soap or paint thinner should be used for cleaning. Gently scrub all parts with a brush or cloth to remove any remaining paint particles or build-up.
- Step 3: Rinse thoroughly – After cleaning with soap or paint thinner, rinse all parts under running water until no traces of residue remain. This ensures that there is no leftover cleaner or dissolved paint within the sprayer.
- Step 4: Dry and reassemble – Once rinsed, dry all components thoroughly using a clean cloth or air compressor. It is crucial to ensure that no moisture is left behind, as this can lead to rusting or clogging in future uses. Finally, reassemble the sprayer carefully, making sure all parts are securely fitted.
These steps offer a systematic approach to cleaning a paint sprayer after each use, ensuring its longevity and reliable performance for professional painters like Nick Slavik and Craig Gustafson who rely on their expertise and experience in maintaining their equipment’s optimum condition.
Remembering to clean your paint sprayer after every use not only promotes efficient performance but also prevents potential damage or expensive repairs. By following this step-by-step guide, you can ensure a clean and well-maintained paint sprayer for your future projects.
Reference to the recommendation of cleaning a paint sprayer after every use
Cleaning a paint sprayer after every use is highly recommended for professional painters. Neglecting this crucial step can lead to potential damage and issues with the equipment, resulting in high repair costs and decreased performance. Experts like Nick Slavik and Craig Gustafson emphasize the importance of regular cleaning to maintain the efficiency and longevity of the sprayer.
To ensure proper cleaning after each use, follow this 5-step guide:
- Start by disconnecting the sprayer from the power source and relieving any pressure by activating the trigger.
- Remove any remaining paint from the container and flush it with warm water or an appropriate cleaning solution.
- Disassemble the nozzle, filter, and other removable parts according to the manufacturer’s instructions.
- Clean each part thoroughly using warm water and mild soap or a paint thinner suitable for the type of paint used.
- Rinse all components with clean water to remove any residue, then dry them thoroughly before reassembling the sprayer.
Additionally, it is important to take precautions while cleaning, such as wearing protective gloves and eyewear to prevent any contact with harmful chemicals or paint particles.
While it is essential to clean a paint sprayer after every use, there are also other aspects of maintenance that need attention. Regularly inspecting and lubricating moving parts, storing the sprayer in a clean and dry environment, and following recommended preventive measures will further contribute to its longevity.
A professional painter once shared their experience of neglecting proper cleaning of their paint sprayer. Due to this negligence, they encountered frequent clogs in the nozzle which affected their work efficiency. After learning about the importance of regular cleaning, they made it a routine practice which significantly improved their overall performance as a painter.
Cleaning a paint sprayer after each use not only ensures project clean-up but also avoids turning your sprayer into an abstract art exhibit of dried paint.
Importance of including cleaning as part of project clean up
A clean and properly maintained paint sprayer is essential for professional painters. It is important to include cleaning as part of project clean-up to ensure the efficient performance and longevity of the equipment. Neglecting proper cleaning can lead to potential damage and issues, resulting in high repair frequency. By incorporating cleaning into project clean-up, painters can save on costs by avoiding unnecessary repairs and extending the lifespan of their paint sprayers.
Expert advice from Nick Slavik and Craig Gustafson emphasizes the importance of regular cleaning. They highlight that cleaning a paint sprayer after each use is crucial. This recommendation not only helps to maintain the sprayer’s efficiency but also ensures that it is always ready for future projects. As part of this cleaning process, specific parts such as the nozzle should be given extra attention to prevent clogs and blockages.
To effectively clean a paint sprayer, warm water, and soap or paint thinner should be used, depending on the type of paint used. Each type of paint gun may require different cleaning processes, so it is important to familiarize oneself with these variations. Properly drying and reassembling the sprayer after cleaning will further contribute to its longevity.
Cleaning a paint sprayer is crucial for professional painters unless you’re into abstract art created by clogged nozzles.
Mention the recommended HomeRight Finish Max Extra paint sprayer for cleaning
The HomeRight Finish Max Extra paint sprayer is highly recommended for cleaning purposes. Its effectiveness and efficiency in removing paint residues make it an excellent choice for professional painters. This sprayer is specifically designed for easy cleaning after each use, ensuring that painters can maintain its performance without any build-up or clogging issues.
To clean the paint sprayer effectively, it is important to focus on specific parts such as the nozzle, spray tip, and filter. The HomeRight Finish Max Extra paint sprayer provides easy access to these parts, allowing for convenient and thorough cleaning. By following the step-by-step instructions provided in the reference data, professional painters can ensure that their paint sprayers are properly maintained.
In addition to its convenience and ease of use, the HomeRight Finish Max Extra paint sprayer is compatible with a variety of cleaning solutions. Whether painters prefer warm water and soap or paint thinner, they can choose the most suitable cleaning solution based on the type of paint used. This versatility adds to the sprayer’s reliability and effectiveness in maintaining a clean and efficient painting process.
By investing in the recommended HomeRight Finish Max Extra paint sprayer for cleaning, professional painters can extend the lifespan of their equipment while saving on repair costs. Its user-friendly design and effective cleaning capabilities make it a standout tool in the industry. Just like cleaning a clogged artery is crucial for a healthy heart, regular maintenance of the paint sprayer is crucial for a successful and mess-free painting job.
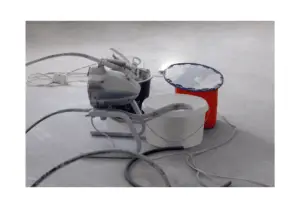
Cleaning the main parts of the paint sprayer
Cleaning the main parts of a paint sprayer is essential for maintaining its efficient performance and longevity. Neglecting proper cleaning can lead to potential damage and issues with the sprayer, resulting in a high frequency of repairs. To ensure that the sprayer operates smoothly and lasts longer, it is crucial to pay attention to cleaning its main components.
- Nozzle Cleaning
The nozzle is one of the main parts of a paint sprayer that requires meticulous cleaning. Start by detaching the nozzle from the sprayer according to the manufacturer’s instructions. Use warm water and soap to remove any dried or excess paint thoroughly. For solvent-based paints, consider using paint thinner instead of soap. Pay close attention to any clogs or blockages in the nozzle and use a small brush or toothpick to clear them out gently. - Cleaning Other Parts
Apart from the nozzle, there are several other important parts of a paint sprayer that need regular cleaning. These may include filters, hoses, and gun bodies, among others. Carefully detach these parts from the sprayer and clean them using warm water and soap or an appropriate cleaning solution recommended by the manufacturer. Ensure that all paint residues are removed entirely before reassembling the sprayer. - Different Types of Paint Guns
Depending on the type of paint gun being used (conventional, HVLP, or airless), there may be slight variations in their cleaning processes. It is essential to understand these differences and follow specific cleaning instructions accordingly. Regularly clean each type of paint gun to prevent any buildup or damage that could affect its performance.
In summary, ensuring that the main parts of a paint sprayer are properly cleaned is crucial for maintaining its efficient operation. By following these step-by-step guidelines and paying attention to each part’s cleanliness, professional painters can extend their equipment’s lifespan and enjoy cost savings through reduced repair frequency.
Pro Tip: Remember to always refer to the manufacturer’s instructions for cleaning your specific paint sprayer model as they may have additional recommendations or considerations.
When it comes to cleaning a paint sprayer, don’t forget to give extra attention to the nozzle and other specific parts – they may seem small, but their cleanliness can make a big difference in your paint job.
Importance of focusing on cleaning the nozzle and other specific parts
Cleaning the nozzle and other specific parts of a paint sprayer is of utmost importance. Neglecting to clean these parts can lead to clogging, uneven spraying, and reduced efficiency. The buildup of dried paint particles or residue can obstruct the smooth flow of paint through the nozzle, resulting in distorted patterns or blockages.
To ensure effective cleaning, it is crucial to focus on removing any accumulated paint or debris from the nozzle, as well as other relevant parts such as the needle, air cap, and fluid passages. This meticulous cleaning helps maintain the sprayer’s precision and prevents any obstruction that may hinder its functionality. By paying attention to these specific areas during the cleaning process, professional painters can maximize their sprayers’ performance.
To clean these specific parts properly, step-by-step instructions can be followed. This involves carefully disassembling the nozzle and other removable parts using appropriate tools like brushes and pipe cleaners to remove any residual paint or debris. Warm water and soap can be used for water-based paints, while paint thinner may be necessary for oil-based paints. Thoroughly rinsing and drying each component before reassembly ensures that they are ready for future use.
It is worth noting that different types of paint guns may have variations in their specific parts that require cleaning. Therefore, it is essential to consult the manufacturer’s instructions or seek expert advice to understand the unique cleaning requirements of each type of paint gun effectively.
A true fact about this topic is that professional painters Nick Slavik and Craig Gustafson emphasize the importance of properly cleaning a paint sprayer’s nozzle and other specific parts. They have shared their expertise and experience in recommending thorough cleaning processes as part of routine maintenance to ensure consistent and reliable spraying results.
Step-by-step instructions for cleaning the paint sprayer
- Start by cleaning the paint sprayer after each use. It is highly recommended to clean the sprayer after every use, as part of project clean up. This ensures that any leftover paint or residue is removed, preventing clogging and build-up. The HomeRight Finish Max Extra paint sprayer is an excellent choice specifically designed for easy cleaning.
- Focus on cleaning the main parts of the paint sprayer, particularly the nozzle and other specific components. Clearing any blockages in the nozzle will help maintain proper spray patterns and prevent uneven application of paint. Use warm water and soap or a suitable paint thinner depending on the type of paint used.
- Different types of paint guns require different cleaning processes. There are three main types of paint guns – airless, HVLP (high volume low pressure), and conventional spray guns. Each type needs to be cleaned according to its specific requirements to ensure optimal performance and avoid any damage.
- Proper precautions should be taken while cleaning a paint sprayer to protect oneself from harmful chemicals or fumes. It is also essential to use recommended cleaning solutions and tools for effective results without causing any harm to the equipment.
- After cleaning, make sure to thoroughly dry all parts before reassembling the sprayer. This helps prevent moisture-related issues such as rusting or corrosion that could compromise its functionality.
By following these step-by-step instructions and taking preventive measures, professional painters can ensure their paint sprayers are properly maintained and have an extended lifespan, resulting in cost savings in terms of repairs or replacement.
Clean your paint sprayer with warm water and soap or paint thinner, because neglecting it is like asking for a Jackson Pollock disaster.
Use of warm water and soap or paint thinner depending on the type of paint used
The cleaning process for a paint sprayer varies depending on the type of paint used. Warm water and soap or paint thinner are commonly used for cleaning, but the specific choice depends on the type of paint being used. This is because different paints require different solvents to break down their components effectively.
To clean a paint sprayer when using water-based paints, warm water, and soap are recommended. These can help to remove any residue or build-up left behind by the paint. Simply fill a container with warm water and a small amount of soap, then submerge the relevant parts of the sprayer and scrub them gently with a brush. Rinse thoroughly afterward to ensure all soap residues are removed.
For oil-based paints or other solvent-based finishes, such as varnish, lacquer, or shellac, using paint thinner is necessary for proper cleaning. Paint thinners are powerful solvents that can break down these types of coatings effectively. When cleaning with paint thinner, make sure to follow safety precautions and use in a well-ventilated area. Soak the relevant parts of the sprayer in a container filled with enough paint thinner to cover them completely. Allow them to soak for several minutes before scrubbing gently with a brush to remove any remaining residues.
It is important to note that when working with any type of solvent-based cleaner, it is crucial to follow safety guidelines and use protective measures such as gloves and masks. Additionally, always refer to manufacturer instructions for the specific type of sprayer being used as there may be variations in cleaning methods depending on the model.
By considering the type of paint being used and selecting an appropriate cleaning method involving warm water and soap or paint thinner accordingly, professional painters can ensure that their paint sprayers remain in optimal condition for efficient performance and longevity.
Why make cleaning a paint sprayer a messy job when you can make it sprayer clean with these easy steps?
Cleaning different types of paint guns
To ensure proper cleaning of different types of paint guns, follow these five steps:
- Disassemble the paint gun: Begin by carefully disassembling the various parts of the paint gun, including the nozzle, air cap, fluid needle, and fluid tip. This will allow for thorough cleaning of each individual component.
- Remove excess paint residue: Use a brush or cloth to remove any excess paint residue from the disassembled parts. Pay close attention to hard-to-reach areas such as crevices or small openings to ensure all traces of paint are removed.
- Soak in cleaning solution: Fill a container with an appropriate cleaning solution based on the type of paint used (warm water and soap or paint thinner). Place the disassembled parts into the solution and allow them to soak for a recommended amount of time, typically 15-30 minutes.
- Scrub and rinse: Using a soft brush or sponge, scrub each part thoroughly to remove any remaining paint residue. Rinse each component with clean water to ensure all cleaning solutions and debris are removed completely.
- Dry and reassemble: After rinsing, pat dry each part with a clean cloth or towel. Ensure that all components are completely dry before reassembling the paint gun. Follow the manufacturer’s instructions for proper reassembly to ensure optimal performance.
By following these steps, you can effectively clean different types of paint guns, whether it’s an HVLP (High Volume Low Pressure), airless, or gravity feed sprayer. Properly maintaining and cleaning your paint gun will help maintain its performance, extend its lifespan, and prevent any potential damage.
Explanation of the three main types of paint guns
Paint sprayers are essential tools for professional painters, allowing them to efficiently and effectively apply paint to various surfaces. However, it is crucial to understand the different types of paint guns available in order to choose the right one for a specific project.
- Airless Paint Sprayers: These types of paint guns utilize high pressure to atomize the paint, creating a fine mist that can be evenly distributed onto surfaces. Airless sprayers are commonly used for large-scale projects such as commercial buildings or exterior painting. They are known for their speed and ability to cover large areas quickly.
- HVLP Paint Sprayers: High Volume Low Pressure (HVLP) spray guns work by using a steady stream of air to push the paint out at a slower pace compared to airless sprayers. This results in less overspray and higher transfer efficiency, making HVLP guns ideal for detailed work and interior projects where precision is required.
- Compressed Air Paint Sprayers: These paint guns use compressed air from an external source to propel the paint onto surfaces. They offer versatility in terms of spray patterns and can handle various viscosities of paint. Compressed air spray guns are often used for automotive painting or intricate detailing.
Each type of paint gun has its own unique benefits and considerations, making it important for painters to have a good understanding of their characteristics before deciding on which one to use for a particular job.
It is worth noting that while cleaning and maintaining a paint sprayer is important regardless of the type, each gun may require slightly different cleaning processes due to variations in design and functionality. Taking the time to properly clean and maintain these tools will not only optimize their performance but also prolong their lifespan, ultimately saving painters time and money in the long run.
Different types of paint guns require specific cleaning processes to maintain performance and avoid damage because you wouldn’t want your sprayer to go from painter to fainter.
Specific cleaning processes for each type of paint gun
Cleaning a paint sprayer is necessary to ensure its efficient performance and longevity. Neglecting proper cleaning can lead to potential damage and various issues, resulting in high repair frequency. In order to clean different types of paint guns effectively, specific cleaning processes are recommended.
Here is a 6-step guide for the specific cleaning processes for each type of paint gun:
- Disassemble the paint gun: Begin by carefully disassembling the paint gun according to the manufacturer’s instructions. This may involve removing the nozzle, needle, and other removable parts.
- Clean the nozzle: The nozzle is a crucial component that requires thorough cleaning. Use a small brush or toothbrush to remove any dried paint particles or debris from the nozzle.
- Soak in cleaning solution: Depending on the type of paint used, prepare a suitable cleaning solution such as warm water and soap or paint thinner. Submerge the disassembled parts in the cleaning solution for a recommended period of time.
- Scrub and rinse: After soaking, scrub each part with a brush or sponge to remove any remaining paint residue or stains. Rinse thoroughly with water to ensure all cleaning solution is removed.
- Dry thoroughly: Once all parts have been cleaned and rinsed, allow them to dry completely before reassembling the paint gun. Use a clean cloth or paper towel to absorb any excess moisture.
- Reassemble and test: Carefully reassemble all parts as per the manufacturer’s instructions. Before using the paint gun again, perform a test spray to ensure proper functioning and cleanliness.
It is important to follow these specific cleaning processes for each type of paint gun in order to maintain their performance and avoid potential damage.
In addition to these steps, there are some suggestions that can further enhance the effectiveness of cleaning a paint sprayer:
- Use appropriate protective gear such as goggles, gloves, and masks while handling cleaning solutions or performing maintenance tasks.
- Ensure the cleaning solutions and tools are compatible with the type of paint gun being cleaned. Refer to the manufacturer’s recommendations for specific cleaning products.
- Properly dry and store the paint sprayer after cleaning to prevent any moisture or dirt buildup that can affect its performance.
- Regularly inspect and maintain the paint sprayer to identify any signs of wear or damage. Addressing these issues promptly can prevent costly repairs in the long run.
By following these suggestions and specific cleaning processes for each type of paint gun, professional painters can ensure their equipment remains reliable, efficient, and has an extended lifespan.
Proper cleaning ensures your paint sprayer performs like a pro, preventing damage and keeping your reputation untarnished.
Mention of the importance of proper cleaning to maintain performance and avoid damage
Proper cleaning is essential to maintain the performance and integrity of a paint sprayer, preventing damage and ensuring optimal functionality. Neglecting to clean a paint sprayer regularly can result in clogged nozzles, uneven spray patterns, and decreased efficiency. Over time, this can lead to costly repairs or even the need for a complete replacement of the equipment. By diligently cleaning the paint sprayer after each use and following the recommended steps, professional painters can avoid these issues and prolong the lifespan of their valuable equipment.
Cleaning a paint sprayer after each use is not only important for maintaining its performance but also for avoiding potential damage. When the paint dries inside the sprayer nozzle or other parts of the equipment, it can create blockages that impede proper functioning. Additionally, leftover paint residue may mix with new paint and affect the quality of the application. By thoroughly cleaning all components of the paint sprayer after every use, professional painters can prevent these issues and ensure consistent performance.
To clean a paint sprayer effectively, it is crucial to focus on specific parts like the nozzle which are more prone to clogging. Step-by-step instructions should be followed using warm water and soap or an appropriate paint thinner depending on the type of paint used. Different types of paint guns may require slightly varied cleaning processes, but it remains equally important for each type to be properly cleaned to maintain performance and avoid any potential damage.
In addition to proper cleaning techniques, there are certain precautions that professional painters should take when handling a paint sprayer. It is essential to mention the importance of wearing gloves, safety goggles, and masks while cleaning to avoid any contact with harmful chemicals or fumes. Furthermore, mentioning the importance of using recommended cleaning solutions and tools will ensure thorough and effective results without causing any damage to the equipment. Once cleaned, allowing the sprayer to dry completely before reassembling is crucial for preventing any moisture-related issues in future uses. Following these tips and guidelines, professional painters can extend the lifespan of their paint sprayer and optimize its performance.
Tips and precautions for cleaning a paint sprayer
To ensure the longevity and optimal performance of your paint sprayer, it’s crucial to know the proper tips and precautions for cleaning. In this section, we’ll cover important measures to protect yourself during cleaning, recommendations for specific cleaning solutions and tools, the proper drying and reassembly process, as well as preventive measures for maintaining the sprayer’s longevity. Stick around to discover the key insights that will keep your paint sprayer in top-notch condition!
Importance of protecting oneself while cleaning
Ensuring personal safety is of utmost importance when cleaning a paint sprayer. Neglecting protective measures can lead to potential hazards and harm. Proper safety precautions must be followed to prevent accidents and minimize risks during the cleaning process.
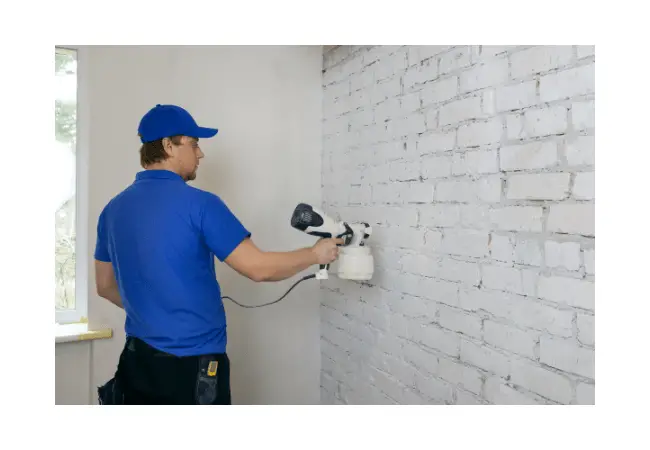
When cleaning a paint sprayer, it is crucial to wear appropriate personal protective equipment (PPE) such as gloves, safety goggles, and a respirator. These items shield the individual from direct contact with chemicals or harmful substances that may be present in the paint or cleaning solutions.
Additionally, it is essential to work in a well-ventilated area to avoid inhaling fumes or vapors that may arise during the cleaning process. Adequate ventilation helps maintain healthy air quality and reduces the risk of respiratory issues caused by exposure to toxic substances.
Furthermore, it is recommended to read and understand the manufacturer’s instructions for proper handling of the paint sprayer and related cleaning materials. This ensures that individuals are aware of any specific safety guidelines or precautions related to their particular equipment.
It is important to prioritize protecting oneself while cleaning a paint sprayer and be aware of the importance of personal safety throughout the entire process. By following these essential safety measures, individuals can minimize the risks associated with cleaning and ensure a safe and healthy cleaning environment.
Recommendations for specific cleaning solutions and tools
Cleaning a paint sprayer requires specific cleaning solutions and tools to ensure effective and thorough cleaning, maintaining the equipment’s performance and longevity. When it comes to recommendations for specific cleaning solutions, it is important to consider the type of paint used. The reference data mentions using warm water and soap or paint thinner depending on the type of paint. These solutions are effective in removing any residue or build-up from the sprayer components. Additionally, using a brush or cloth can help in effectively cleaning the nozzle and other specific parts of the sprayer.
Furthermore, selecting the right tools for cleaning is equally important. The reference data suggests using a recommended HomeRight Finish Max Extra paint sprayer for cleaning, which can help in achieving optimal results. This specific tool is designed to facilitate easy maintenance and cleaning of paint sprayers after each use.
True Fact: According to expert advice from Nick Slavik and Craig Gustafson mentioned in the reference data, neglecting proper cleaning can lead to potential damage and issues with a paint sprayer’s performance.
Ensure your sprayer is as dry as your humor before reassembling it after cleaning.
Proper drying and reassembly of the sprayer after cleaning
After cleaning a paint sprayer, it is crucial to properly dry and reassemble the sprayer to ensure its optimal functionality and longevity. Neglecting this step can lead to issues such as clogged or damaged parts, which can affect the overall performance of the sprayer.
To properly dry and reassemble the sprayer after cleaning, follow these three steps:
- Thoroughly dry all components: After cleaning the various parts of the paint sprayer, it is essential to ensure that they are fully dried before reassembly. Use a clean cloth or towel to remove any moisture from the surfaces, paying particular attention to hard-to-reach areas. This step will help prevent any residual water or cleaning solution from causing corrosion or other damage.
- Reassemble the sprayer with care: Once all components are dried, carefully reassemble the paint sprayer according to the manufacturer’s instructions. Be sure to align each piece correctly and tighten any screws or fasteners securely. Double-check that all connections are snug but not overly tightened to avoid damaging delicate parts.
- Test the sprayer before use: Before using the paint sprayer again, perform a quick test run to ensure that everything is working properly. Fill the paint reservoir with water or a test solution (as recommended by the manufacturer) and spray a small amount onto a scrap surface or into a container. Check for any irregularities in spray patterns, flow rates, or leaks. If any issues are detected, disassemble and inspect the affected area for proper reassembly.
Properly drying and reassembling a paint sprayer after cleaning is essential in maintaining its longevity and efficient performance. By following these steps diligently, professional painters can ensure that their equipment remains in excellent condition for future projects without encountering unnecessary issues.
Preventive measures to take for maintaining the sprayer’s longevity
Preventive measures play a crucial role in ensuring the longevity of a paint sprayer. By taking proactive steps to maintain the sprayer, professional painters can avoid potential issues and maximize the lifespan of their equipment. Through proper care and regular maintenance, they can prevent costly repairs or replacements in the future.
- Regular Cleaning: Cleaning the paint sprayer after each use is essential for preventing clogs and buildup that can affect its performance. Following the recommended guidelines for cleaning can help remove any residual paint and ensure optimal functioning.
- Proper Storage: Storing the paint sprayer in a clean and dry environment when not in use helps protect it from dust, dirt, and moisture that may cause damage or corrosion.
- Maintenance Checks: Regularly inspecting the sprayer for any signs of wear or damage allows painters to address potential issues before they become major problems. This includes checking the hoses, fittings, and seals for leaks or loose connections.
- Lubrication: Applying lubricant to necessary parts of the paint sprayer according to the manufacturer’s instructions helps prevent friction and ensures smooth operation.
- Use Quality Materials: Using high-quality paints, filters, and other related materials not only enhances the finish but also minimizes the chances of clogging or damaging the internal components of the sprayer.
Taking these preventive measures promotes efficient performance and increases the overall lifespan of a paint sprayer. By investing time into maintenance tasks such as cleaning, storage, regular checks, lubrication, and using quality materials, professional painters can optimize their equipment’s longevity.
Furthermore, it is important to note that neglecting these preventive measures may result in frequent breakdowns or malfunctions which could lead to unnecessary expenses.
In fact, experts Nick Slavik and Craig Gustafson who have extensive experience in painting professionally recommend taking preventive measures as an integral part of maintaining the sprayer’s longevity.
Cleaning a paint sprayer may not be the most thrilling task, but it’s the secret to keeping your equipment and your bank account happy.
Conclusion
In the conclusion, we will recap the importance of cleaning a paint sprayer for professional painters. We will emphasize the benefits of proper maintenance and the longevity it brings to the equipment. Lastly, we will encourage readers to follow the step-by-step guide and tips provided for effective cleaning.
Recap of the importance of cleaning a paint sprayer for professional painters
Ensuring the cleanliness of a paint sprayer is of utmost importance for professional painters. Neglecting proper cleaning can lead to potential damage and issues that may hinder the efficient performance and longevity of the sprayer. By following a step-by-step guide and taking necessary precautions, painters can maintain reliable equipment, extend its lifespan, and achieve cost savings.
Proper cleaning after each use is highly recommended. It should be included as part of the project clean-up to ensure the sprayer’s optimal performance. Experts like Nick Slavik and Craig Gustafson emphasize the importance of this practice. The recommended HomeRight Finish Max Extra paint sprayer is known for its efficient cleaning capabilities.
Cleaning the main parts of the paint sprayer, particularly the nozzle and other specific areas, is essential. Step-by-step instructions must be followed to ensure thorough cleaning. Warm water and soap or paint thinner are used depending on the type of paint used in order to achieve optimal results.
Different types of paint guns require different cleaning processes. Understanding these variations is crucial. Whether it’s an airless, conventional, or HVLP paint gun, proper cleaning is necessary to prevent damage and maintain its performance.
While engaging in the cleaning process, it is important for painters to protect themselves by wearing appropriate protective gear. The use of recommended cleaning solutions and tools ensures effective cleaning outcomes. Proper drying and reassembly techniques contribute to preventing any damage or malfunctions in future uses.
Proper maintenance of your paint sprayer ensures a longer lifespan, unlike my plants which meet their demise within a week.
Emphasis on the benefits of proper maintenance and longevity of the equipment
Proper maintenance and longevity of the equipment are crucial for professional painters. Regular cleaning of a paint sprayer ensures its efficient performance and extends its lifespan, leading to significant benefits in the long run. Neglecting proper maintenance can result in potential damage and issues, requiring frequent repairs that can be costly and time-consuming. Expert advice from professionals like Nick Slavik and Craig Gustafson emphasizes the importance of cleaning a paint sprayer regularly to maintain its optimum functionality. By following a step-by-step guide and taking necessary precautions, professional painters can ensure the reliable operation and durability of their equipment.
To emphasize the benefits of proper maintenance and longevity of the equipment, it is important to highlight the consequences that can arise from neglecting cleaning tasks. Failure to clean a paint sprayer after each use can lead to clogging, buildup of dried paint residues, and deterioration of essential parts such as nozzles. These issues not only compromise the quality of work but also hamper the overall efficiency of the sprayer. Inadequate cleaning practices also increase the frequency of repair needs, resulting in additional expenses for professional painters. Therefore, by prioritizing regular cleaning routines, painters can avoid these problems and ensure smooth operation throughout their projects.
In addition to regular cleaning after each use, it is equally important to focus on cleaning specific parts of the paint sprayer thoroughly. The nozzle plays a critical role in achieving an even spray pattern and consistent coverage. Hence, special attention should be given to its proper maintenance. Utilizing warm water and soap or paint thinner (depending on the type of paint used) helps remove any leftover residue from both internal and external components. By following step-by-step instructions provided by experts like Nick Slavik and Craig Gustafson, professional painters can effectively clean various types of paint guns while maintaining their performance without risking any damage.
Furthermore, professional painters should take certain precautions during cleaning tasks for their safety. Wearing appropriate personal protective equipment such as gloves, goggles, and masks prevents any potential harm from cleaning solutions or paint residues. Using recommended cleaning solutions and tools ensures effective cleaning without causing damage to the equipment. After cleaning, proper drying and reassembly are essential to prevent any moisture-related issues or malfunctioning of the sprayer. Taking preventive measures such as regular inspection and maintenance routines can significantly contribute to the longevity of the paint sprayer.
According to the advice and experience shared by Nick Slavik and Craig Gustafson, ensuring proper maintenance through regular cleaning not only enhances the overall performance but also prolongs the lifespan of a paint sprayer. By investing time in thorough cleaning after each use and following the step-by-step guide provided, professional painters can reap the benefits of cost savings, reliable equipment, and extended durability.
Encouragement to follow the step-by-step guide and tips provided for effective cleaning.
Following the step-by-step guide and tips provided for effective cleaning of a paint sprayer is highly encouraged. Proper maintenance and regular cleaning of the sprayer not only improve performance but also extend its lifespan, ensuring cost savings for professional painters. Neglecting proper cleaning can lead to potential damage and issues, resulting in frequent repairs and decreased efficiency of the equipment. To avoid these problems, it is essential to follow a comprehensive cleaning routine after each use.
Here is a four-step guide to encourage adherence to the step-by-step guide and tips for effective cleaning:
- Clean the paint sprayer after each use: It is recommended to clean the paint sprayer after every use as part of the project clean-up. This ensures that any leftover paint or residue does not dry up and clog the nozzle or other parts of the sprayer. The HomeRight Finish Max Extra paint sprayer is an excellent choice for this purpose.
- Focus on cleaning the main parts: Pay special attention to cleaning crucial parts such as the nozzle, as they are more prone to clogging and buildup. Follow specific instructions provided in the step-by-step guide to ensure thorough cleaning.
- Use appropriate cleaning solutions: Depending on the type of paint used, warm water and soap or paint thinner should be utilized for effective cleaning. Carefully select suitable cleaning solutions and tools based on expert advice.
- Take preventive measures for longevity: In addition to regular cleaning, it is vital to protect oneself while handling chemicals during the process. Proper drying and reassembly of the sprayer after cleaning should be ensured to prevent any damage or malfunction in future uses.
To further encourage following these steps, it is important to understand that proper maintenance not only enhances performance but also saves costs in terms of repairs and replacement of equipment. By diligently adhering to these guidelines, professional painters can achieve optimal results with their paint sprayers while enjoying its extended lifespan and efficient functioning without unnecessary disruptions.
Some Facts About How To Clean a Paint Sprayer:
- ✅ Cleaning and maintaining a paint sprayer is crucial for professional painters to ensure reliable equipment, extended lifespan, and cost savings. (Source: Team Research)
- ✅ Attach laminated procedure cards to the paint sprayer to help new employees learn the step-by-step cleaning process. (Source: Team Research)
- ✅ Recovering coating left in the paint sprayer can save money by avoiding the need to buy extra paint for touch-ups. (Source: Team Research)
- ✅ Aim for 96% cleanliness when cleaning the paint sprayer to minimize waste and disposal efforts. (Source: Team Research)
- ✅ Proper cleaning and maintenance of a paint sprayer can extend its lifespan to 20 years or more. (Source: Team Research)
FAQs about How To Clean A Paint Sprayer
1. What is the best methodical cleaning procedure for a paint sprayer?
To clean your paint sprayer properly, follow a step-by-step procedure:
- Step 1: Disassemble the sprayer, removing the paint container, spray tip and guard, paint gun handle, fluid needle, nozzle, and other removable parts.
- Step 2: Scrape off dried paint flakes and pre-soak the parts in a cleaning solution.
- Step 3: Clean the spray gun and other removable parts using a cleaning solvent and small brushes.
- Step 4: Rinse the parts thoroughly and flush the sprayer system with a flushing solution.
- Step 5: Dry and reassemble the sprayer, perform a test spray, and store it properly.
2. How often should I clean my paint sprayer?
It is recommended to clean your paint sprayer after each use to maintain optimal performance and prevent clogs.
3. What cleaner should I use to clean the paint sprayer?
For water-based products, warm water and soap (such as dawn dish soap) are suitable for cleaning. For oil-based products, mineral spirits are recommended.
4. How do I clean a Wagner paint sprayer?
To clean a Wagner paint sprayer:
- Step 1: Empty the paint container and rinse it, along with the suction tube, using warm water and soap or the appropriate cleaning solution.
- Step 2: Spray the cleaning solution through the paint sprayer to remove any remaining product.
- Step 3: Disassemble the sprayer head and clean all the parts thoroughly with a brush and cleaning solution.
- Step 4: Allow the parts to dry completely before reassembling the sprayer.
5. How do I clean a paint sprayer with dried latex paint?
To clean a paint sprayer with dried latex paint:
- Step 1: Disassemble the sprayer, removing the paint container, spray tip and guard, paint gun handle, fluid needle, nozzle, and other removable parts.
- Step 2: Scrape off dried paint flakes and pre-soak the parts in a cleaning solution.
- Step 3: Clean the spray gun and other removable parts using a cleaning solvent and small brushes.
- Step 4: Rinse the parts thoroughly and flush the sprayer system with a flushing solution.
- Step 5: Dry and reassemble the sprayer, perform a test spray, and store it properly.
6. How can I maintain optimal performance for my paint sprayer?
To maintain optimal performance for your paint sprayer:
- Read the manufacturer’s owner manuals and follow their instructions.
- Clean the sprayer regularly, especially after each use.
- Use compatible paint and materials.
- Use appropriate filters to prevent clogs.
- Lubricate moving parts as recommended.
- Properly store the sprayer.
- Inspect the sprayer for any damage before each use.
- Follow safety guidelines and precautions.
- Seek professional servicing when needed.
Leave a Reply