If your cabinets are old and outdated but you’re not ready to replace them, update them with new paint. Paint can work wonders on everything, and kitchen cabinets are no exception.
If you want to update your kitchen without spending a lot of money, knowing how to paint kitchen cabinets is the perfect DIY solution.
There are other ways to freshen up worn kitchen cabinets, such as by coating or replacing them. But both methods are much more expensive than painting.
Also, overhaul and replacement generally require you to hire professionals. When painting cabinets, you can do it all yourself, if you prefer.
Painting kitchen cabinets can be exhausting and you can easily hire a professional to do the job. But if you are up for the challenge and want to save money, do it yourself. Follow the steps below to learn the best way to paint kitchen cabinets.
Table of Contents
Before You Start
Painting wooden kitchen cabinets generally mean painting surfaces that are visible when the cabinet doors and drawers are closed, although some backs are painted.
Areas that are painted:
- Closet doors: front and rear.
- Drawer fronts: front and rear
- Cabinet boxes: sides and bottom
Areas that are not painted:
- Shelving
- Inside cabinet boxes
- Top of Cabinet Boxes
When to paint kitchen cabinets
The quality of the paint job is highly dependent on conditions such as temperature, humidity, and air quality.
If you are painting the cabinets indoors outdoors, such as under a patio awning, wait for warmer temperatures for a better paint cure.
Also, make sure the air is clean to prevent particles such as pollen from settling on wet paint.
If you are painting doors and drawer fronts in a climate-controlled work area, you can paint any time of year.
Security considerations
Protect yourself when cleaning, sanding, priming, and painting your wooden kitchen cabinets by wearing respiratory protection.
Particle masks are sufficient for sanding. Wear eye protection. When sanding with the oscillating sander, wear hearing protection.
Materials and Tools
Some paint guns are highly developed and can pump paint directly from the bucket that the paint comes in. Most of these sprayers don’t even require the latex paint to be thinned.
- Water-based latex paint
- Primer
- Painter’s tape
- Shop towels
- 10-inch micro paint roller covers
- Sealable plastic bags
- Wood Filler
- 10-inch micro roller handle
- Cleaning sponge
- Shop vacuum
- Tapered sash brush
- Cordless drill
- Paint tray
- Paint Sprayer (Optional)
How to Paint Kitchen Cabinets: Step by Step Instructions
Now there is an easier way to paint kitchen cabinets, without destroying the heart of your home in the process.
We’ve been admiring DIY kitchen makeovers that involve little more than paint applied to boring wooden cabinets.
Prepare the Work Area and Tools
First, start by opening your paint can and use your paint shaker to mix it for about 30 to 60 seconds.
You can also agitate the paint by holding it with both hands and tilting it from side to side for about 30 to 60 seconds.
When removing the paint stirrer, watch the paint on the stick to see how it drips. Most latex paints will drip in one long stream, then drip smaller until the dripping finally stops.
Identify and prepare a work area outside of the kitchen where you can paint cabinet doors and drawer fronts.
Ideally, this would be a garage so that the large door can be opened for ventilation, along with a heating source if you are painting in colder seasons.
Or you can choose a basement or an unused room in your house, as long as either can be ventilated to the outside.
Lay a plastic sheet on the floor and tape the edges. Place a workbench or easels on the plastic.
Have all of your tools close at hand, including the sander, sandpaper, brushes, roller and covers, buckets, paint, and primer.
A successful paint job relies on diligent prep work, with the first steps focusing on preparing the room and cabinets for painting.
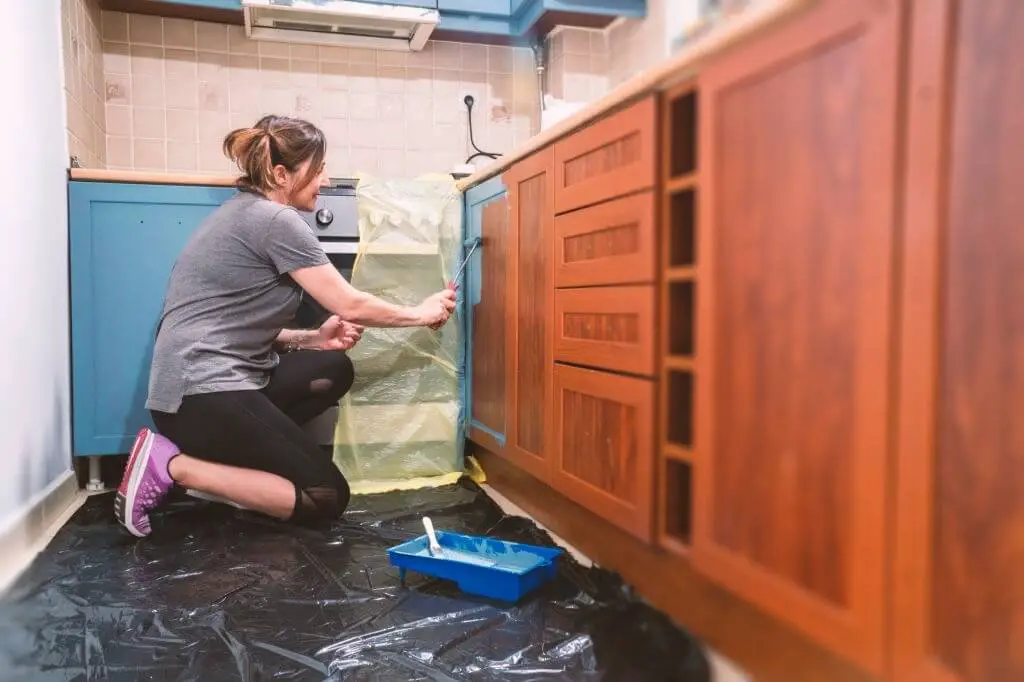
- Start by emptying cabinets, clearing counters, and removing freestanding appliances.
- Tape resin paper to countertops and floors, and to protect the rest of the home from dust and fumes, place plastic sheeting on backsplashes, windows, fixtures, and interior doors.
- Mask the wall around the cabinets.
- Set up a workbench to paint doors, drawers, and shelves.
Remove Cabinet Doors and Hardware
When you’re ready to get started, clean kitchen countertops, empty cabinets, and cover backsplash and appliances.
Remove all hinges, hardware, doors, screws, and drawers from your cabinets.
Use masking tape to label each door with a number and its corresponding location as you remove them to remind yourself which one goes where.
If you’re painting just the drawer fronts, you won’t have to remove the attached slides.
If you need to remove the slides, mark them and also their locations.
Place the hardware and screws in plastic bags inside the cabinets, where they will be easy to locate when you’re ready to put everything back together.
Remove all items from inside the cabinet boxes. Remove or uninstall all obstructions such as lights, hood fans, hooks, or wire racks.
Lastly, remove the door dampers by peeling them off with your fingernail or unscrewing them. Also, unscrew all accessories, then bag and identify them.
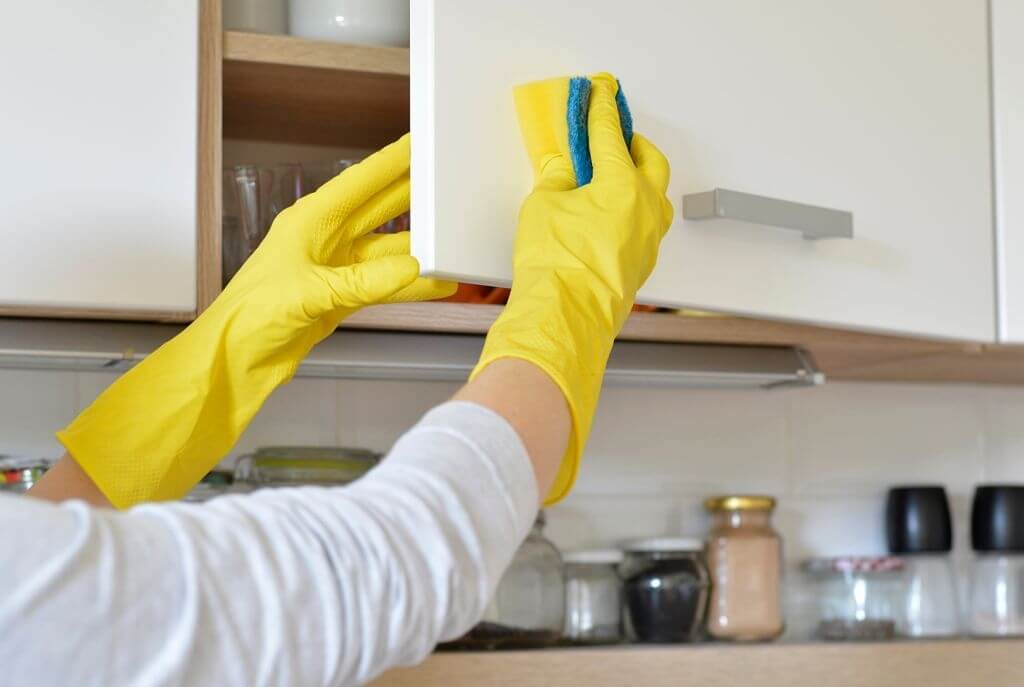
Clean all the surfaces
Kitchens are work areas, so grease, steam, and food splashes are common.
You’ll want to prep all the doors and drawers properly to make sure the paint sticks.
Begin this process by scrubbing your cabinets to get rid of any grease or residue. Clean all surfaces to be painted with a solution of one part trisodium phosphate and four parts water.
Rinse, but do not soak cabinets. Let them dry completely.
Clean Cabinet Boxes
- Open windows to ventilate and put on safety gear. With an abrasive pad dipped in a liquid degreaser, scrub all surfaces.
- Hold a rag underneath to catch the drops. Before the degreaser evaporates, quickly wipe the residue away with another clean cloth dampened with degreaser.
- If you are relocating the hardware, fill the old screw holes with a two-part polyester wood or car body putty.
- The filling shrinks a bit, so lightly fill the holes.
- As soon as it sets, remove the excess with a sharp paint scraper. If it sets completely, sand it smooth.
- Use a foam sanding block to scrape the surfaces of the cabinet, drawers, and doors. This is a light sanding intended to give the primer something to adhere to, so do not sand bare wood. Use an antistatic cloth to remove sanding dust before continuing.
- Vacuum the cabinets inside and out to make sure no dust will mar the finish, then wipe them with an antistatic cloth for an extra measure.
Sand Doors, Drawer Fronts, and Boxes
With the doors and drawer fronts in the work area, sand them with the oscillating sander and 120-grit sandpaper.
Use the sander on all flat areas of doors and drawer fronts: fronts, backs, and edges. For bevels or other textured areas, switch to a hand sanding sponge.
With the cabinet boxes still in place in the kitchen, cover the kitchen countertops and floor with plastic sheeting and sand the cabinet boxes.
When sanding, your goal is to scrape the surfaces for better adhesion of paint and primer, not sand all coatings.
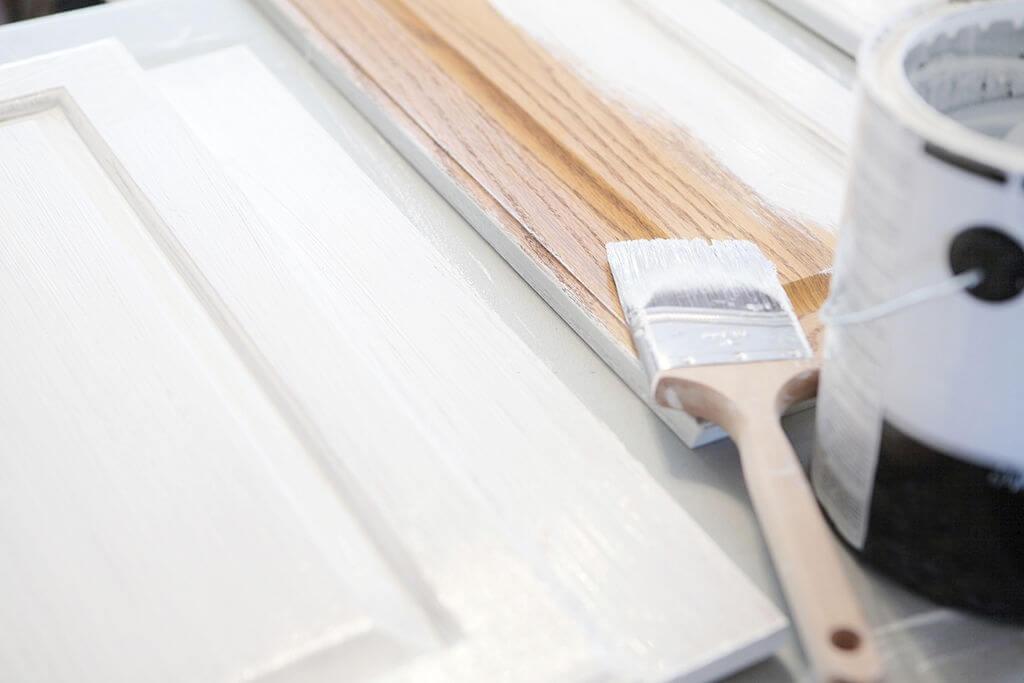
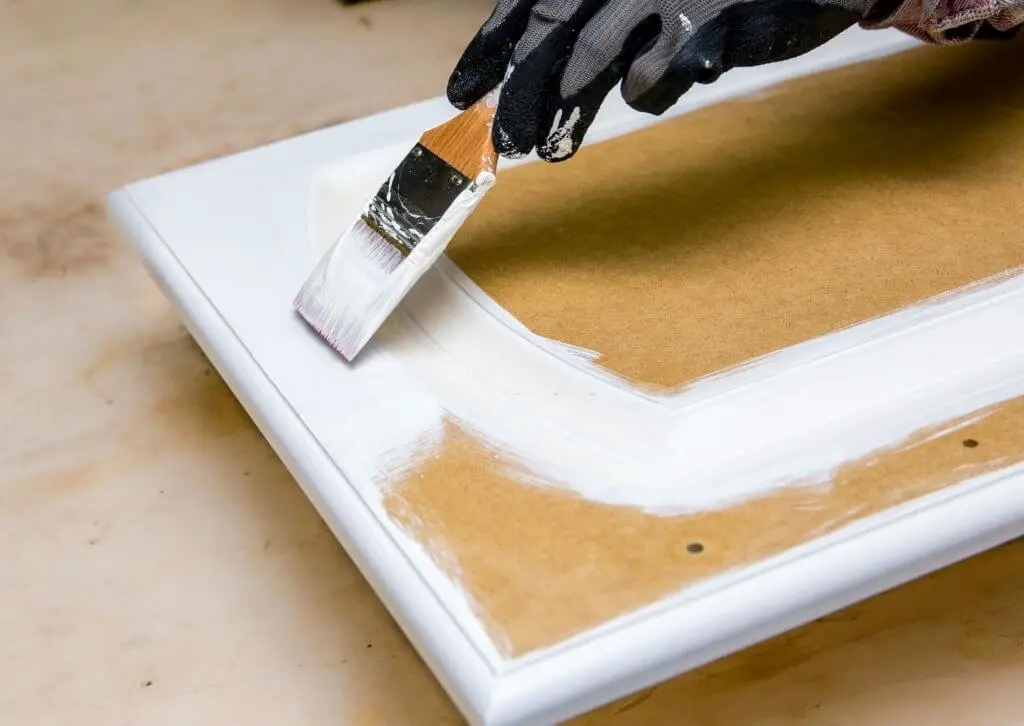
Prime Doors and Drawer Fronts
Use a damp cloth to remove dust from the doors and drawer fronts. Pour mixed or stirred primer into a coated paint tray.
Rub the trim brush into the primer and paint the detailed areas on the doors and drawer fronts. Continue painting with a 10-inch roller on flat areas.
After all, the materials have completely dried for at least two hours, sand them lightly with 220-grit sandpaper on the oscillating sander.
Do not sand bare wood. The goal is to smooth out any bumps and dried drops from the primer.
Prime Cabinets
Clean dust from sanded cabinet boxes with a damp sponge. Apply painter’s tape to kitchen walls or backsplash to protect them from paint.
Prime the cabinet edges with the trimming brush. Continue to spread the primer with the 10-inch roller.
As with doors and drawer fronts, wait at least two hours and then sand the cabinet boxes with finer 220-grit sandpaper on the oscillating sander.
Paint Cabinets
Paint cabinet doors, drawer fronts, and boxes in a similar manner as you did with the primer coat.
Paint the edges with the brush, then paint the large interior areas with the 10-inch roller. Allow at least two hours between coats.
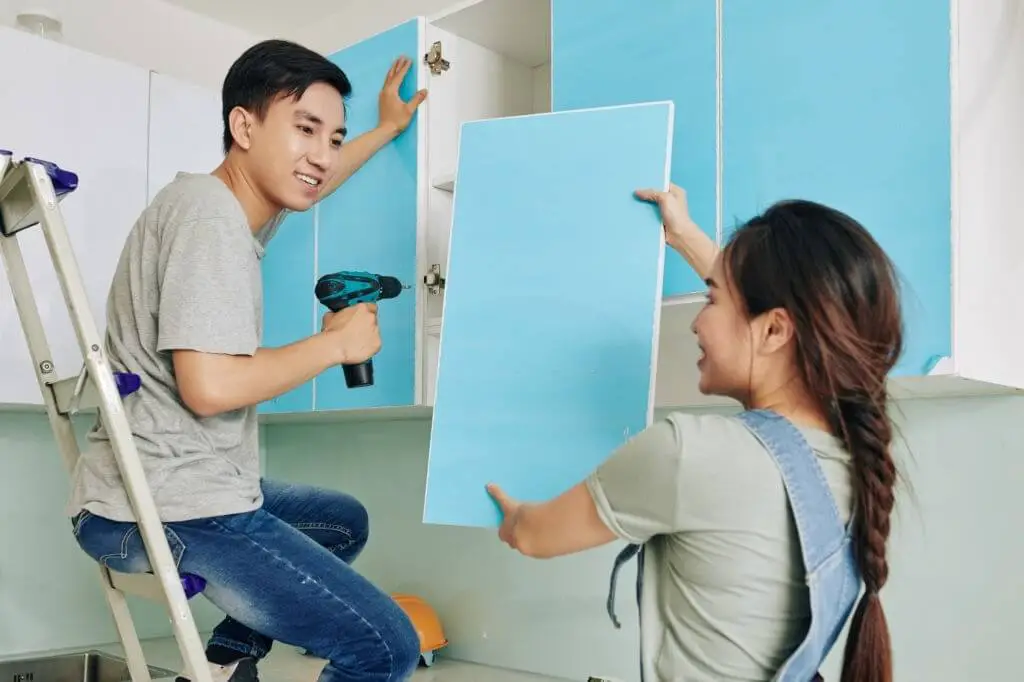
When everything is completely painted and dry, reassemble your cabinets by replacing the drawer fronts on the drawers.
Using the cordless drill or manual screwdriver, screw the drawer fronts back into the drawer boxes. Replace the doors and drawers, too, replacing all hinges and hardware.
Kitchen Cabinet Painting Tips
The consistency and drying time of the paint allow you to work on the doors in place and no sanding is necessary. I don’t recommend this method if you want to use regular latex or oil-based paint.
Color
Don’t worry if you can’t find the color you want in Satin Enamel paint. You can mix any color you want from the colors available on your line.
For my cabinets, I used Bright White, mixed with Natural Sable.
I wanted a soft warm white that wasn’t too pure. Adding a little brown gave me exactly what I was looking for.
Make sure to mix enough paint for your entire project. You don’t want to try to match colors when you run out of paint in the middle!
Brush Strokes
If you use a mohair roller, you shouldn’t get paint bubbles or roller texture. But if you do, just drag a soft, dry brush over the rolled-up area as soon as you’re done with a section.
Move in the direction of the wood grain as you go, and any brush strokes will be nearly invisible.
Don’t Go Overboard on Sanding
You should sand the cabinets before you start your kitchen cabinet painting project to give the new paint a good surface to grip. But you don’t need sanding to leave the wood bare.
If your cabinets are factory finished, lightly sand with 120-grit sandpaper or a sanding sponge.
If the surface is rough from a previous paint job or poor varnish job, start with thicker 100-grit paper to remove any bumps. Then sand again with 120 grit to remove sanding marks.
Choose the Right Paint for Kitchen Cabinets
Read the label and choose a paint that is formulated for painting carpentry and cabinets. And remember, brighter surfaces bring out imperfections, so unless he’s a very meticulous painter, consider an eggshell or satin gloss.
If your paint seems too thick and won’t level after applying, try mixing with a paint conditioner like Floetrol.
Read the instructions for the correct ratio of conditioner to paint. Conditioned paint is usually easier to apply and dries to a smoother finish.
Buy a Good Quality Brush
If you decide to paint with a brush, splurge on a good one. For cabinets, a 2 in. A brush like the one shown here is almost perfect.
Keep it clean and it will last for many paint jobs. Paint stores often offer the widest selection and the best advice.
Dampen your brush. It is easier to clean your brush if you moisten it with water (before you start painting.
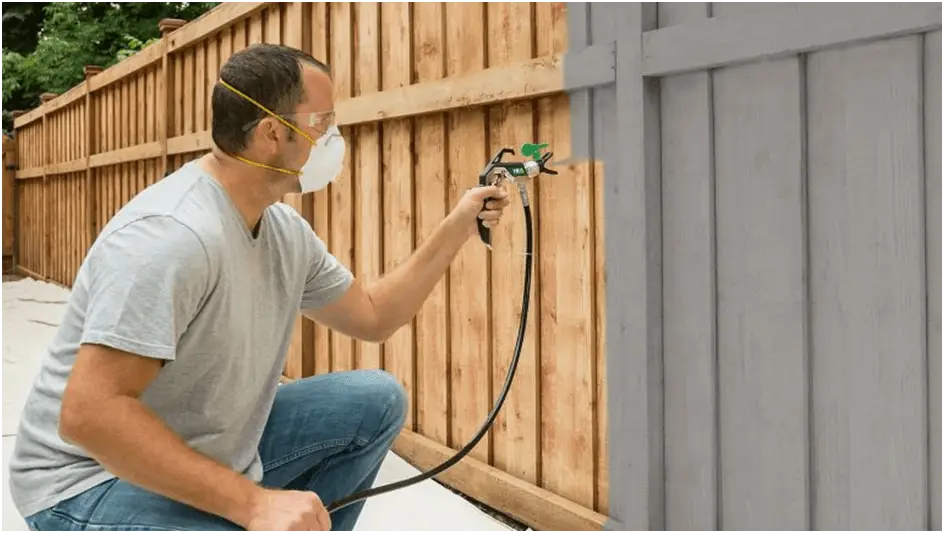
Consider Spray-Painting the Doors
With a little practice and a good sprayer, you can achieve good finish quality by spraying your doors.
A professional airless sprayer will work best for spraying undiluted water-based finishes. But you can also get great results with a high volume, low pressure (HVLP) sprayer.
Just be sure to thin the paint according to the instructions and apply several thin coats instead of one thick.
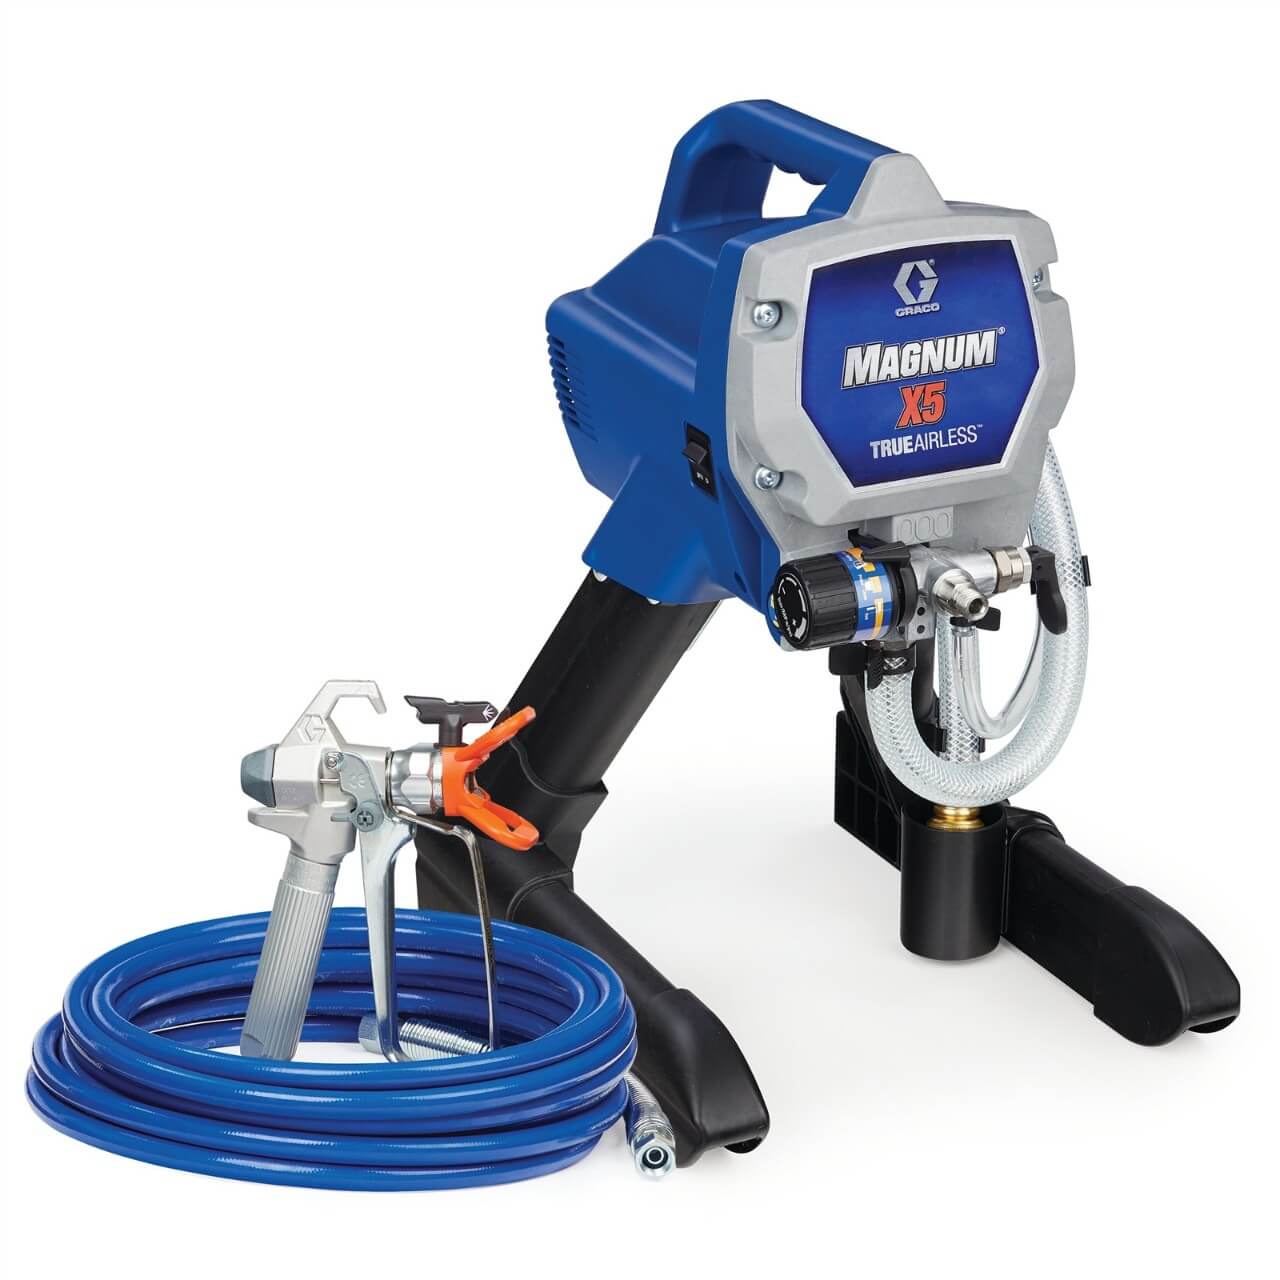
You can check out Airless Paint Sprayer.
Double-Check for Defects After Priming
The first paint prep step after cleaning grease from cabinets is usually to fill in unwanted holes, dents, and dents with caulk or wood putty.
After sanding, dusting, and priming the cabinets, it’s a good idea to check everything in bright light to detect and fill in any remaining holes or dents. These problems are usually easier to spot after preparation.
We prefer to fill with an oil-based caulking compound like MH Ready Patch because it bonds well and dries hard for a long-lasting repair.
But other fillers will work too. The downside to this extra round of caulk is that you will have to re-prime the patched areas.
Choose a Fast-Drying Primer
Do you want to speed up the project? Choose a quick-drying primer for the first coat.
Use an under enamel primer. Water-based paint has come a long way, and some high-quality alkyd acrylic hybrids compete with oil-based paint. Still, many professional painters prefer oil-based paint, especially for priming.
Oil-based paint dries slowly and levels well. This gives you more work time and fewer brush marks.
Plus, when dry, oil-based primers like Benjamin Moore Fresh Start Enamel Underbody sand easily and provide a perfect base for the finish coat.
Frequently Asked Questions (FAQs)
How Much Does it Cost to Paint Kitchen Cabinets?
Renovating a kitchen is one of the most expensive remodeling projects you can undertake, and replacing cabinets can account for nearly 40 percent of that cost.
Cabinets for a 10-by-12-foot kitchen can easily top $5,000, and your new cabinets may be of lower quality than the ones you’re replacing.
In fact, the cost of painting shouldn’t exceed $200, plus a weekend or two of your time.
What Type of Paint Do I Need for Cabinets? Oil or latex?
Latex paints have steadily improved, leading some professionals to forgo oil-based paints entirely.
Because they dry quickly and clean with water, latex paints are easier to use than oil-based paints.
But many professionals still prefer oil-based topcoats, arguing that they form a harder, more durable paint film and level out for a smoother finish surface.
Latex paints also take longer than oil-based paints to fully cure. Meanwhile, they are susceptible to damage.
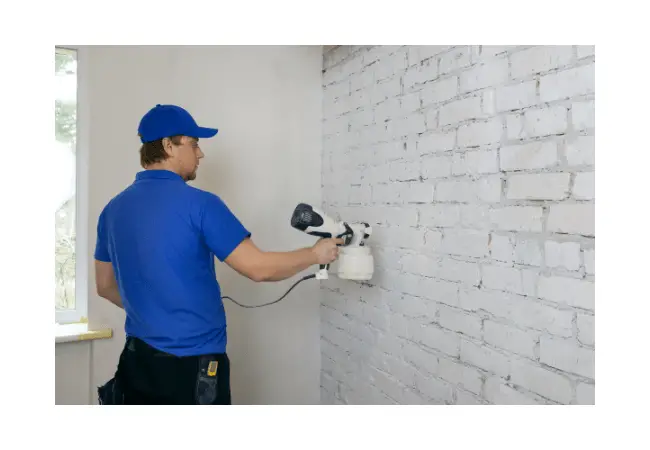
Brush or Spray Paint?
A spray finish is the smoothest option, but there is a learning curve to getting it right.
You will also likely have to rent the spray equipment, which increases your costs, and you will have to mask all areas of the kitchen that could be accidentally sprayed, including countertops, cabinet interiors, and appliances, which is a process. time-consuming.
For these reasons, we recommend that you choose to use high-quality brushes.
Invest in a good 3 to 4-inch wide square brush, the straight ends of which will do a short job with large flat panels, as well as an angled brush in the 2½ or 3-inch wide range, which will help you get paint in. the corners of the doors with moldings and can clad the door frames in a single pass.
Regular or faux finish?
If you’re open to spicing up the look of your kitchen, adding a faux finish can transform your style into the shabby chic, rustic, country, or modern.
Crisp enamel, which is available at paint stores, can, with very little effort, give your cabinets a worn look. Simply apply the polish over a dry base coat, brushing in one direction, and let it dry.
Finish with a flat topcoat of base color brushed perpendicular to the glaze. The paint will begin to crack as it dries, a process that takes about an hour.
Similarly, the slowly aged look can be achieved with a little paint magic.
Simply dip the tip of a brush in a color lighter than cabinets and dab the excess onto a cloth until the brush is almost dry, then lightly scrape the surface of the detail edge, corners, and seams.
Should I Paint My Cabinets?
However, before you go to the paint store, examine your cabinets to see if they can be resurrected in the first place.
Even the highest quality paint job cannot revive cheap cabinets that have become brittle over time.
Thin sheets peel or delaminate, chipboard cabinet bottoms or shelves warp or break, and hanging rails come loose.
If these are the issues you are dealing with, it would be best if you replaced the kitchen cabinets.
Assuming everything is still in good shape and working order, let’s examine some of the questions you’ll need to address before you start painting your kitchen cabinets.
Leave a Reply