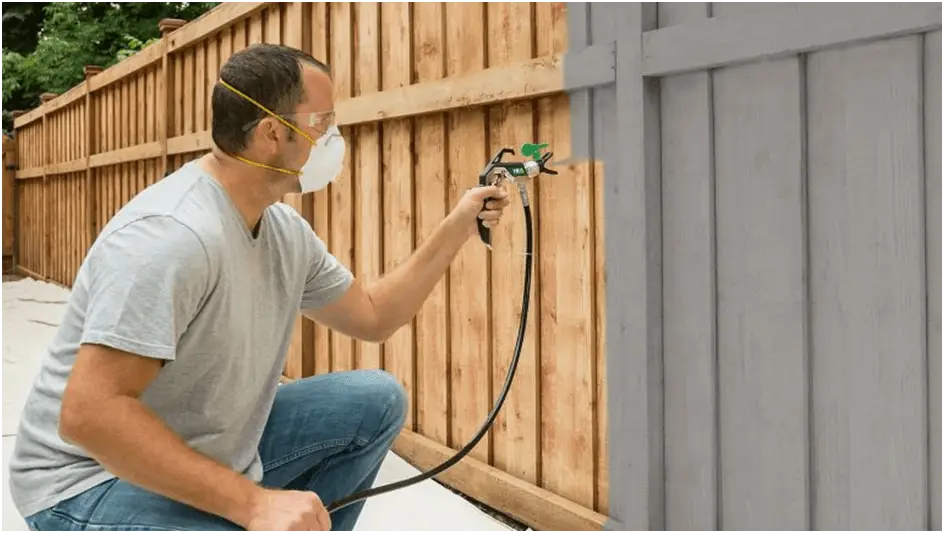
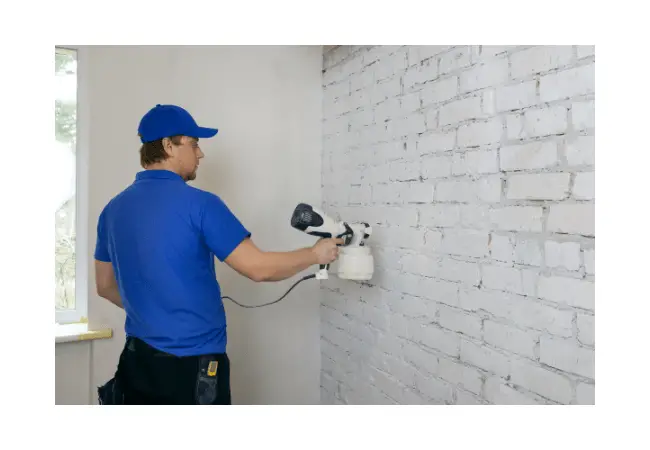
Using a paint sprayer will help you finish your painting project faster. Using a paint sprayer will allow you to apply consistently, even coats of paint that create a professional-looking finish.
The most important thing to know about using a paint sprayer and how to clean a paint sprayer properly.
If you skip this cleaning or try to take a shortcut, you could end up having to buy a new paint sprayer.
In this article, we are going to explore how to clean your paint sprayer. It is essential that you clean it properly after each use, and we have a step-by-step guide and some important tips that will show you exactly how you can do it.

So if you have a paint sprayer or have been looking at one and have no idea how to clean it, this is the article for you!
Table of Contents
What you need to know about cleaning a Paint Sprayer
Before we dive into the steps, it’s important to know a few things about paint sprayers first, such as how to protect your health when working with paint, and how to avoid damaging your spray gun in the process.
Make sure you know what you are doing
Always practice and read each step carefully.
Even if you think cleaning an airless paint sprayer sounds easy, one misstep can ruin your paint gun and cost you a large sum of money when you buy a new one.
Always wear protective clothing
Some forms of paint are extremely toxic, and even if you know you are using relatively safe paint, you will want to protect your clothing and skin.
Along with clothing, you should also always protect your eyes while working with paint sprayers, as paint can irritate your eyes or even cause permanent vision loss.
Your health is paramount, so whatever you do, don’t risk cleaning your paint sprayer unless you have all the right equipment.
Always have your instruction manual at hand
If you are having trouble cleaning your paint sprayer, it is always helpful to have the manual with you.
Most paint gun manuals come with a section that describes how to disassemble and clean your paint sprayer, so you always know what to do.
Just remember to be careful if you need to use paint thinner, mineral spirits, or any other spray cleaner that may contain harmful chemicals.
Supplies You’ll Need to Clean a Paint Sprayer
Please note that the exact set of supplies will depend on the type of paint you have been working with, so we will write it down alongside the affected items.
- Nitrile Gloves
- Protective goggles
- Protective outerwear such as overalls
- Water (for water-based paint)
- Mineral spirits (for oil-based paints)
- Soft bristle brush
- Paint pot
- Trash can
- Rag
How to Clean a Paint Sprayer – Step by Step Instructions
We have decided to divide the paint sprayer cleaning process into 5 easy to follow steps. This will ensure that you know exactly what to do and in what order to do it.
Follow all cleaning steps in the correct order when cleaning a paint sprayer. Start by removing any excess and then clean the filters, tip, and gun.
- Release air pressure
- Clear out the remaining paint
- Clean the pump
- Scrub the spray gun
- Clean the filter and tip
Release air pressure
Before you start cleaning your paint gun, you will have to go through the pressure relief procedure.
First, you need to activate the trigger guard so as not to accidentally spray yourself. You will then need to turn off the paint gun before reducing the pressure to the lowest possible setting.
The next step is to reverse the pattern of your gun’s spray tip. Once done, disengage the trigger lock and move your trash can closer to the unit.
Point your paint sprayer at the waste bin and pull the trigger. Keep holding the trigger until all built-up pressure has been released and the gun is safe to work with.
Clear out the remaining paint
You will then need to remove any remaining paint from the gun system before you begin cleaning the components.
Remove both the tip and guard from the gun before beginning to wash off the paint.
At this point, you need to remove the drain tube and liquid inlet from your paint bucket. Place the liquid intake in your wash liquid bucket.
Next, place the drain tube into your waste pail and switch the prime valve to the “spray” setting. If you want to save the remaining paint, point the gun at your paint bucket.
If you don’t mind wasting any paint left in the system, put it in the trash can.
Turn the gun on and hold the trigger while gradually increasing the pressure.
If you are going to drain paint into your paint bucket, switch to your waste bucket once you see the paint stream start to end, as the wash fluid will start to come out of the gun.
When the paint is out of the system and you only see wash fluid coming out of the nozzle, release the trigger on the paint gun and turn it off.
Clean the pump
The next step is to clean the pump itself. He will start by pointing his paint gun at his trash can.
Hold down the trigger and turn on the on / off switch. At this point, turn the switch off and release the trigger on the paint gun. Change the prime valve to “prime” and turn the gun back on.
Watch the drain tube as the flushing fluid circulates through the pump system. After a while, the liquid coming out of the drain tube should be clear, with no signs of paint inside.
When the liquid coming out of the drain tube is completely clear, remove the liquid inlet from the washing liquid. Move the on / off switch to the off position and you are ready to continue cleaning the paint gun.
Scrub the spray gun
Now is the time to get into the small parts of the spray gun. Since these are different-sized parts, you also need different-sized cleaning brushes to fit in all the small spaces.
Some of the pieces are more fragile than others, so having some softer brushes on hand is also a good idea.
For example, plastic and rubber seals break easily, so use a softer brush.
The sprinkler guard will need to be removed and cleaned separately, it will also need to be rinsed under a tap.
With spray tip, spray guard, hose, and gun filter removed, hold gun upside down under rapid flow of water and hold trigger. You want the water to flow into where the filter was previously and out of the spray area.
Do this for about 60 seconds to make sure it’s clear.
After the flushing liquid has been purged, you can turn the power switch off again.
Then activate the trigger guard and lower the pressure control to the lowest setting. Disconnect the power source and remove filters from your sprayer.
Clean the filter and tip
Place the filters inside your washer fluid until the paint is mostly gone and use your rag to remove any debris. Do the same with your tip and your tip guard.
You should now be ready to reassemble your paint sprayer. If you used water as the wash fluid, we recommend that you rinse it now with mineral spirits to prevent ice build-up and oxidation.
Make sure you dispose of waste from this process responsibly. And that’s all it takes to clean a paint gun.
Frequently Asked Questions (FAQs)
Can you leave the paint in the sprayer overnight?
No, you should never leave paint in your sprayer overnight. This can be very difficult to clean as dried paint will be much more difficult to remove.
You may need to scrub vigorously with abrasive brushes and may need to use strong paint thinner masses. These can damage the sprayer and make it impossible to use.
You may never be able to get all the dried paint out, especially from hard-to-reach areas. Conversely, if you get rid of the paint from your paint sprayer before it dries, it will be much easier for you to remove it completely.
You may also find that the cleaning process will be quicker and easier if you clean it right away so the paint is still wet.
Does vinegar remove paint?
Yes, in a pinch you can use vinegar to remove the paint. However, it may not work as well as some of the other traditional paint removal methods, such as a paint cleaning solution and paint thinner.
Also, vinegar has not been tested for use in paint, so we cannot always guarantee that it will remove all types of paint.
You may also want to make sure to use it sparingly, as vinegar is acidic and could damage the surface you are using it on.
How do you clean a latex spray gun?
Latex guns are cleaned with simple soap and water solutions. You should clean the gun as soon as you finish painting to prevent the paint from drying inside the gun.
Water-based paint will become tacky when mixed with degreasers and cleaning agents like mineral spirits.
Instead of flushing more paint with these items, it will cause more paint to adhere to the cracks and crevices inside the paint gun.
Can you use hook your paint sprayer?
Some paint sprayers are designed with accessories that allow you to connect them to a common garden hose.
With this type of paint sprayer, the pressure of the water passing through the hose is generally adequate to remove all paint residue inside the paint spray gun and there is no need to use combinations of soap and water.
Please understand that if you use oil-based paints or acrylic paints, you will not be able to clean the residue from the paint gun with just water.
If you are using a spray paint gun that connects to a garden hose for cleaning purposes, be sure to read the manufacturer’s recommendations before painting with an oil-based primer or paint.
Is one paint thinner better than another for cleaning purposes?
Automotive Lacquer Thinner is the highest quality paint thinner.
Of course, it is recommended to use thinners of the highest quality.
Conclusion
So now that you know these 5 key steps to clean your paint sprayer, be sure to do this every time you use your paint sprayer.
Consistent maintenance is the best way to help your paint sprayer last much longer.
You should always make cleaning your spray paint gun a priority. The job is not finished until the cleaning is complete.
Cleaning the paint from the gun and gun accessories will extend the life and performance capabilities of the gun.
If you allow the paint to dry inside the spray paint gun, the gun will most likely not work the next time you want to use it.
Leave a Reply